Overview
Embedding UnifyApps applications in Zendesk allows seamless integration of UnifyApps features within your Zendesk support environment.
Step-by-Step Instructions
Step 1: Search for UnifyApps in the Zendesk App Store
.png&w=1080&q=75)
.png)
Navigate to the Zendesk App Store and search for "
UnifyApps," or follow this link: UnifyApps on Zendesk Marketplace.
Step 2: Install the UnifyApps Application
Click the
Installbutton to add the UnifyApps application to your Zendesk support environment.
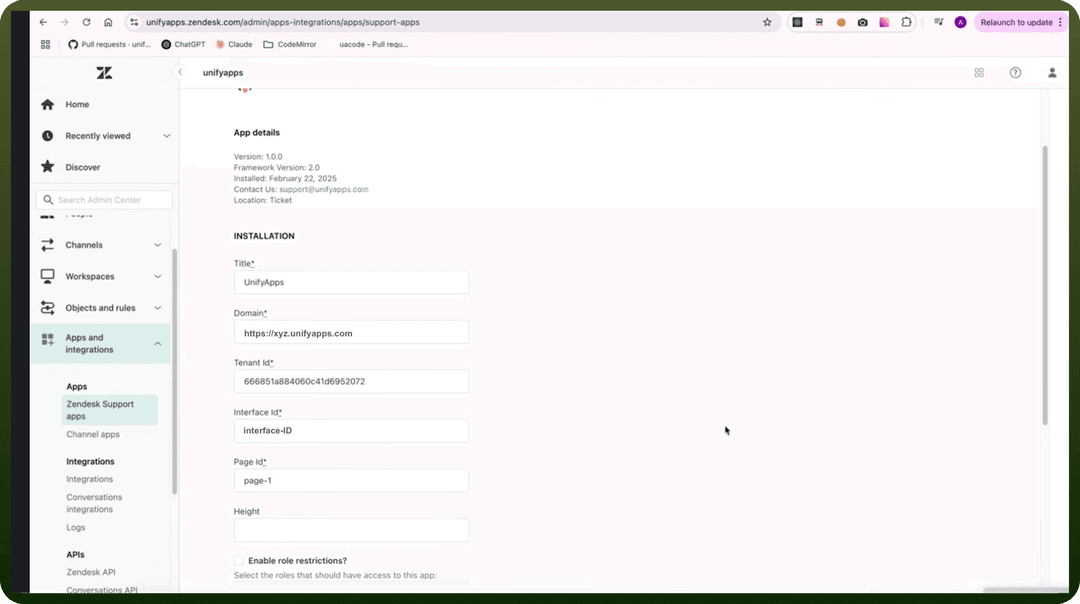
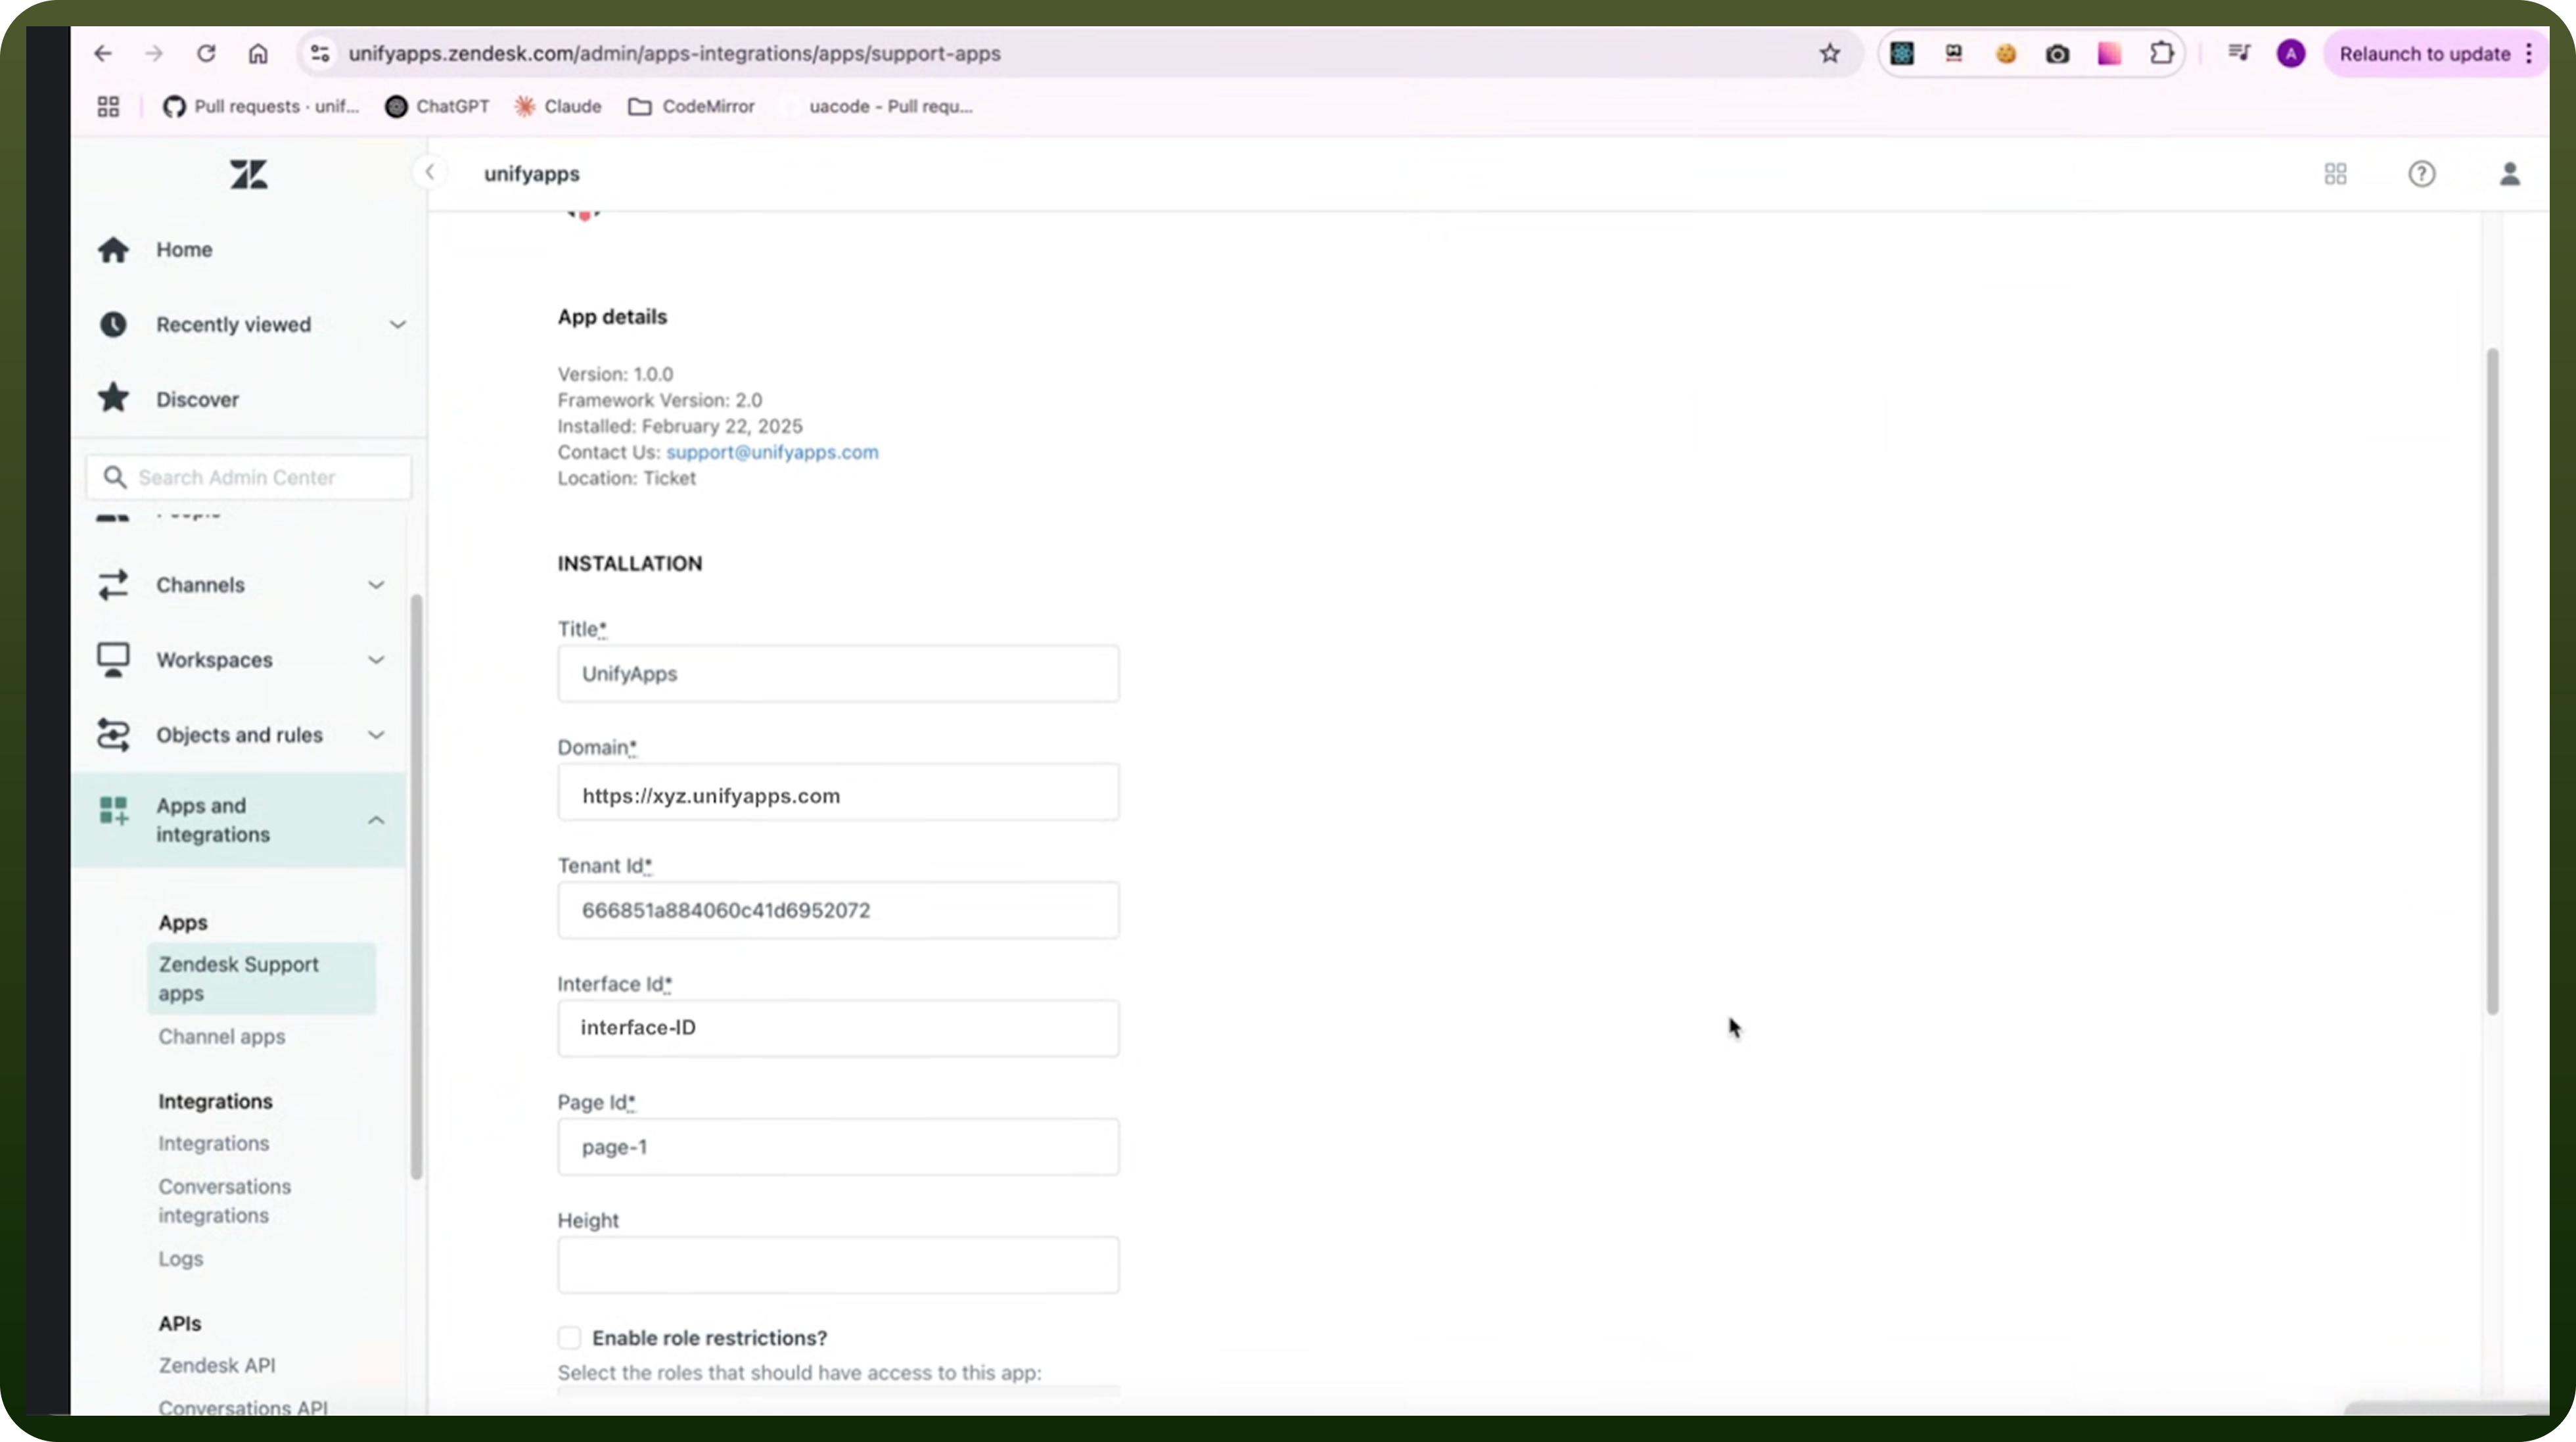
Step 3: Configure UnifyApps in Zendesk Support Apps
.png&w=1080&q=75)
.png)
Go to
Apps and Integrationsunder Zendesk Support Apps.Fill in the required configuration details:
Title– Provide a relevant title for the integration.Domain– Enter your UnifyApps domain (e.g., xyz.prod.unifyapps.com).Tenant ID– Specify the tenant ID associated with your environment.Interface ID– Enter the interface ID corresponding to your application.Page ID– Provide the specific page ID to be used.Height– Adjust the height settings for the embedded app.Role-Based Access– Enable role restrictions and select which roles should have access to this app.Group-Based Access– Enable group restrictions and choose the groups allowed to use the app.Authentication– Enter your subdomain and reauthorise with UnifyApps.
Ensure that the
Interface ID,Page ID, andSubdomainalign with your application’s URL structure:Click on Install.
Step 4: Place the Embedded Apps
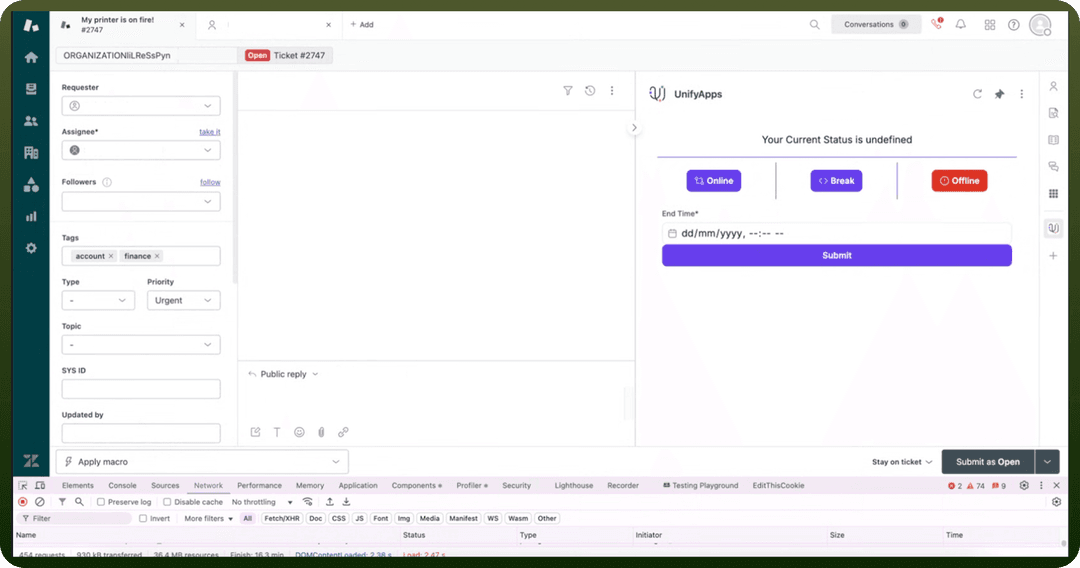
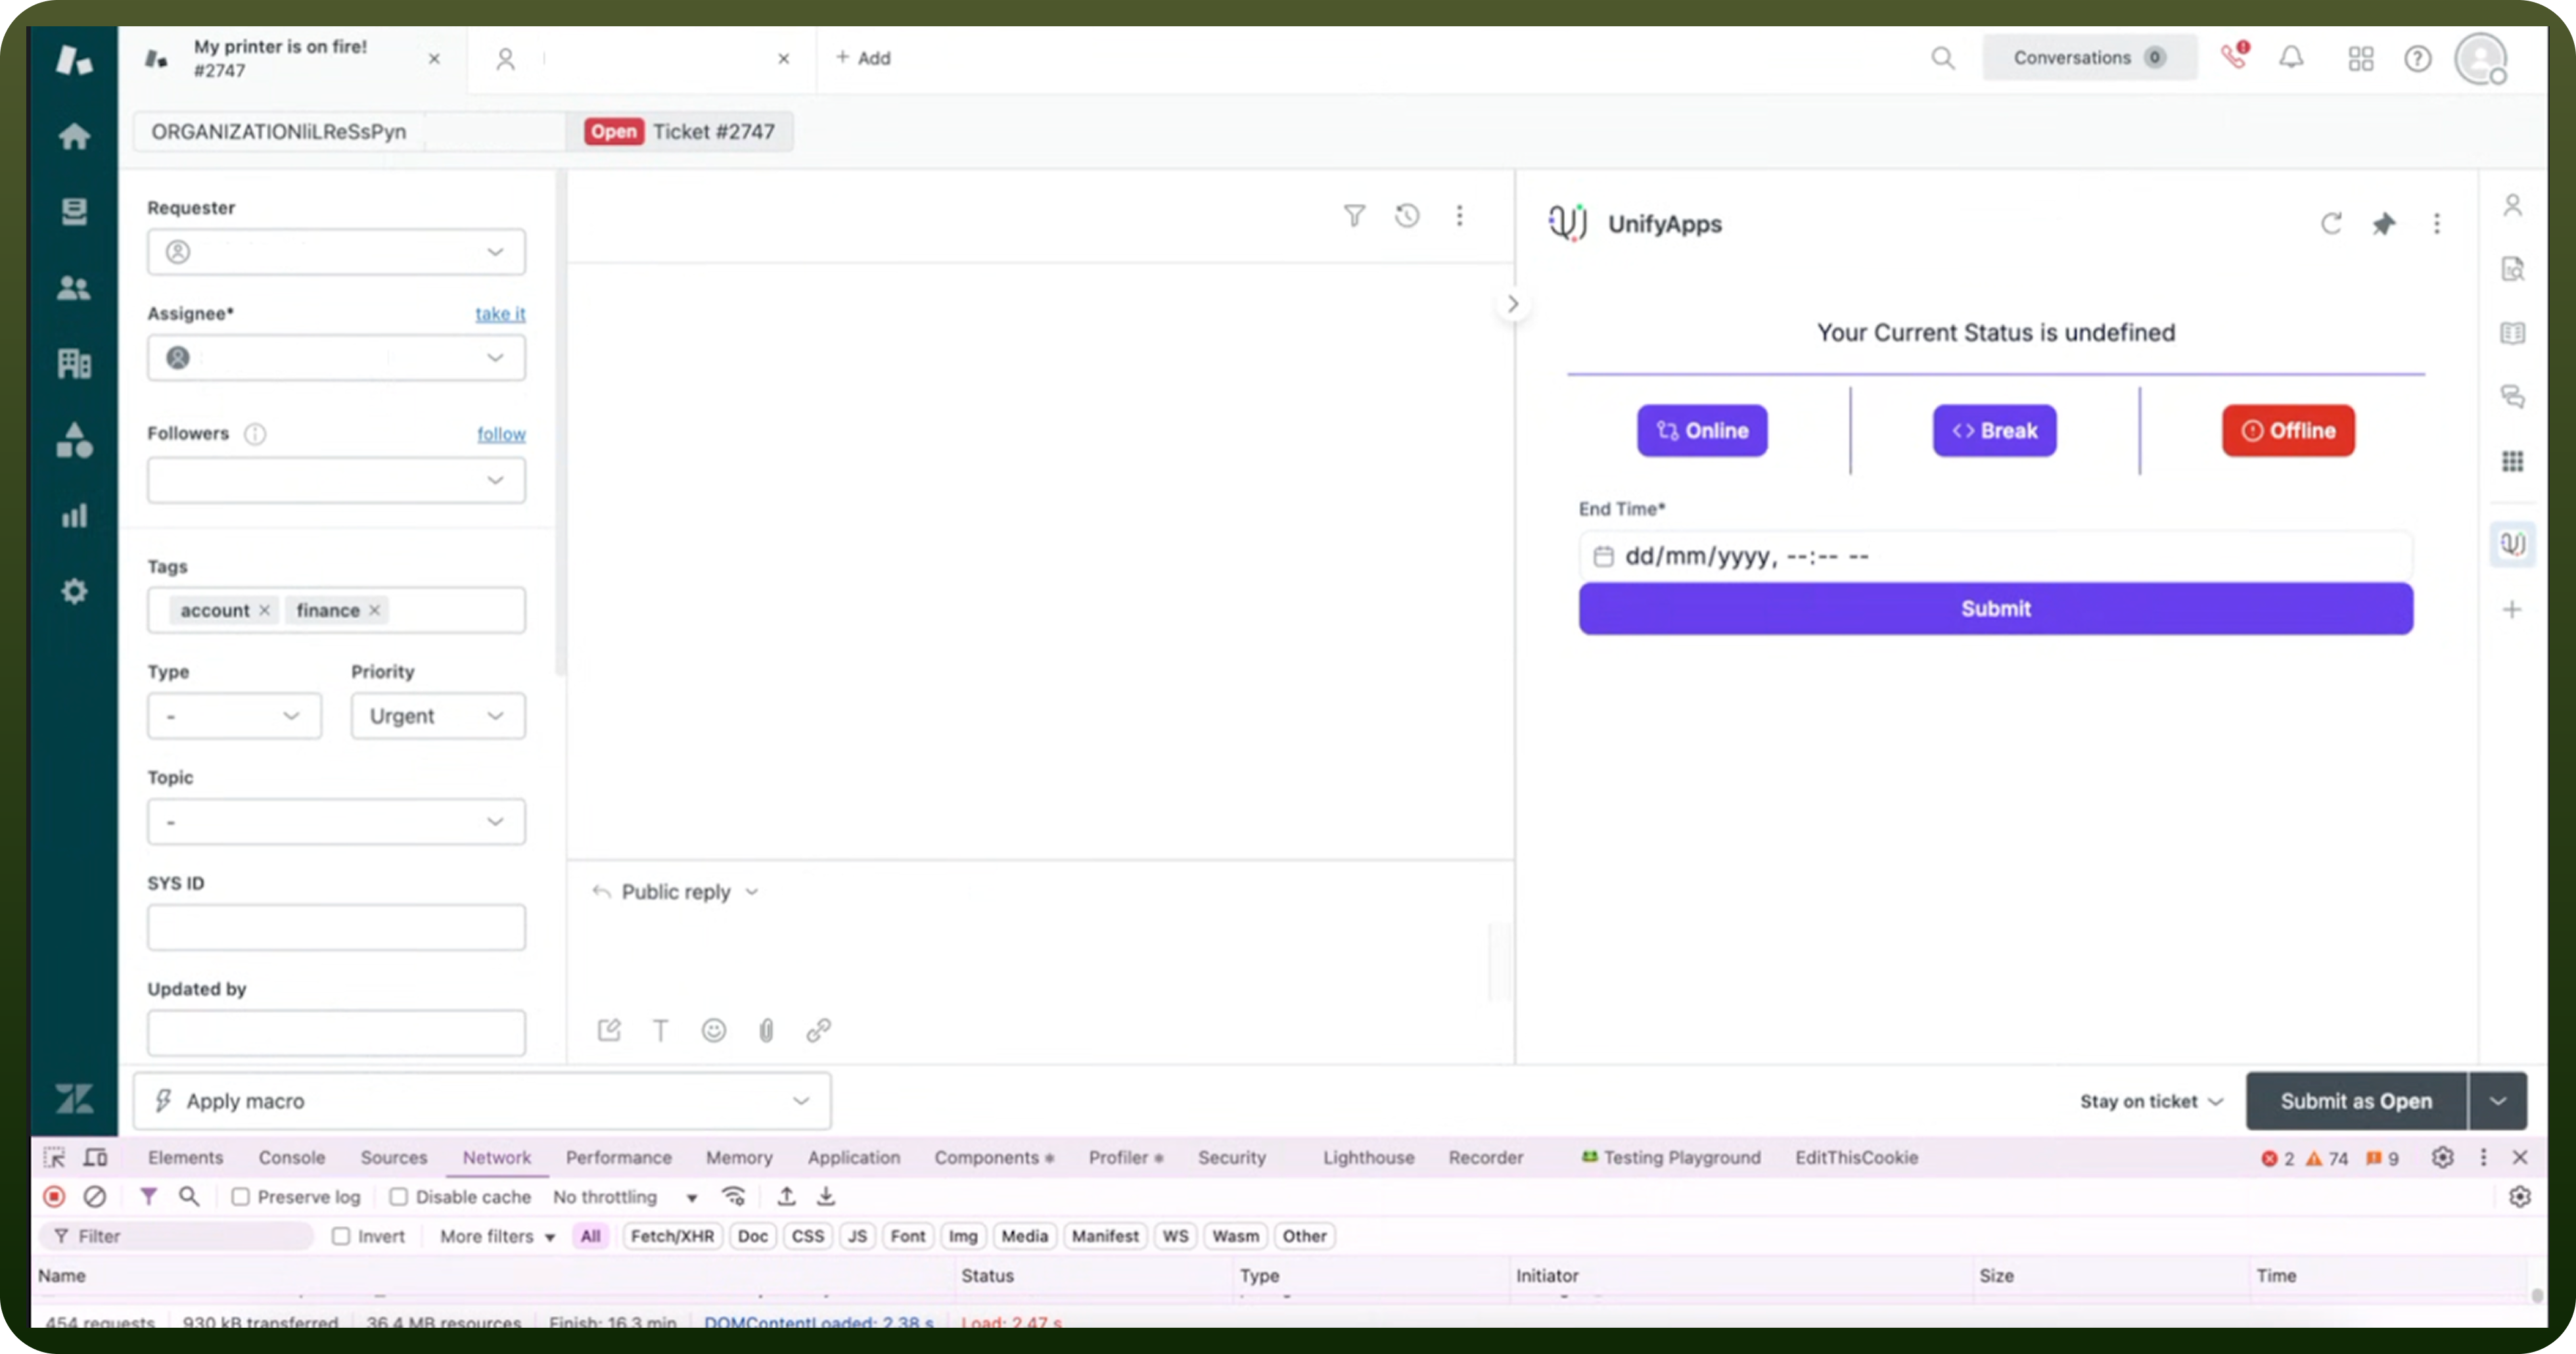
Position the UnifyApps embedded applications in your Zendesk environment based on your business needs.