
UnifyApps provides a comprehensive evaluation framework that enables you to create custom metrics to assess your AI Agent's performance and response quality. Whether you need to measure answer correctness, relevance, or specific tool usage, the platform offers flexible options using either LLM-as-a-judge or automation-based evaluators. Let's explore how to create and configure metrics that ensure your AI Agents meet your quality standards.
Understanding Evaluation Metrics
Evaluation metrics are quantitative measures that assess various aspects of your AI Agent's performance by comparing actual outputs against expected results. These metrics help you:
Validate Response Quality: Ensure your agent provides accurate and relevant answers
Track Performance: Monitor how well your agent performs across different test cases
Identify Improvement Areas: Pinpoint specific capabilities that need enhancement
Maintain Standards: Set passing criteria to ensure consistent quality
AI (LLM as a Judge)
The LLM-as-a-Judge approach uses advanced language models like GPT-4 to evaluate your AI Agent's responses with human-like judgment and understanding. This method excels at assessing nuanced aspects of language quality, relevance, and contextual appropriateness.
Creating an LLM-Based Metric
Step 1: Initialize Metric Creation: Navigate to the Metrics section and click New Metric to begin. Select AI (LLM as a Judge) as your evaluation type.
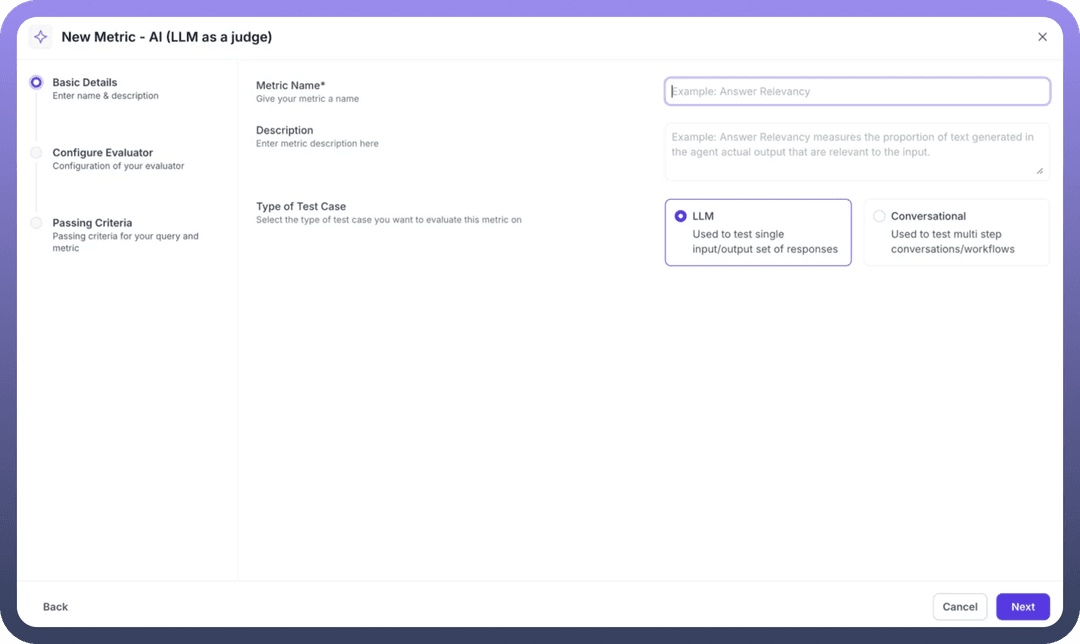
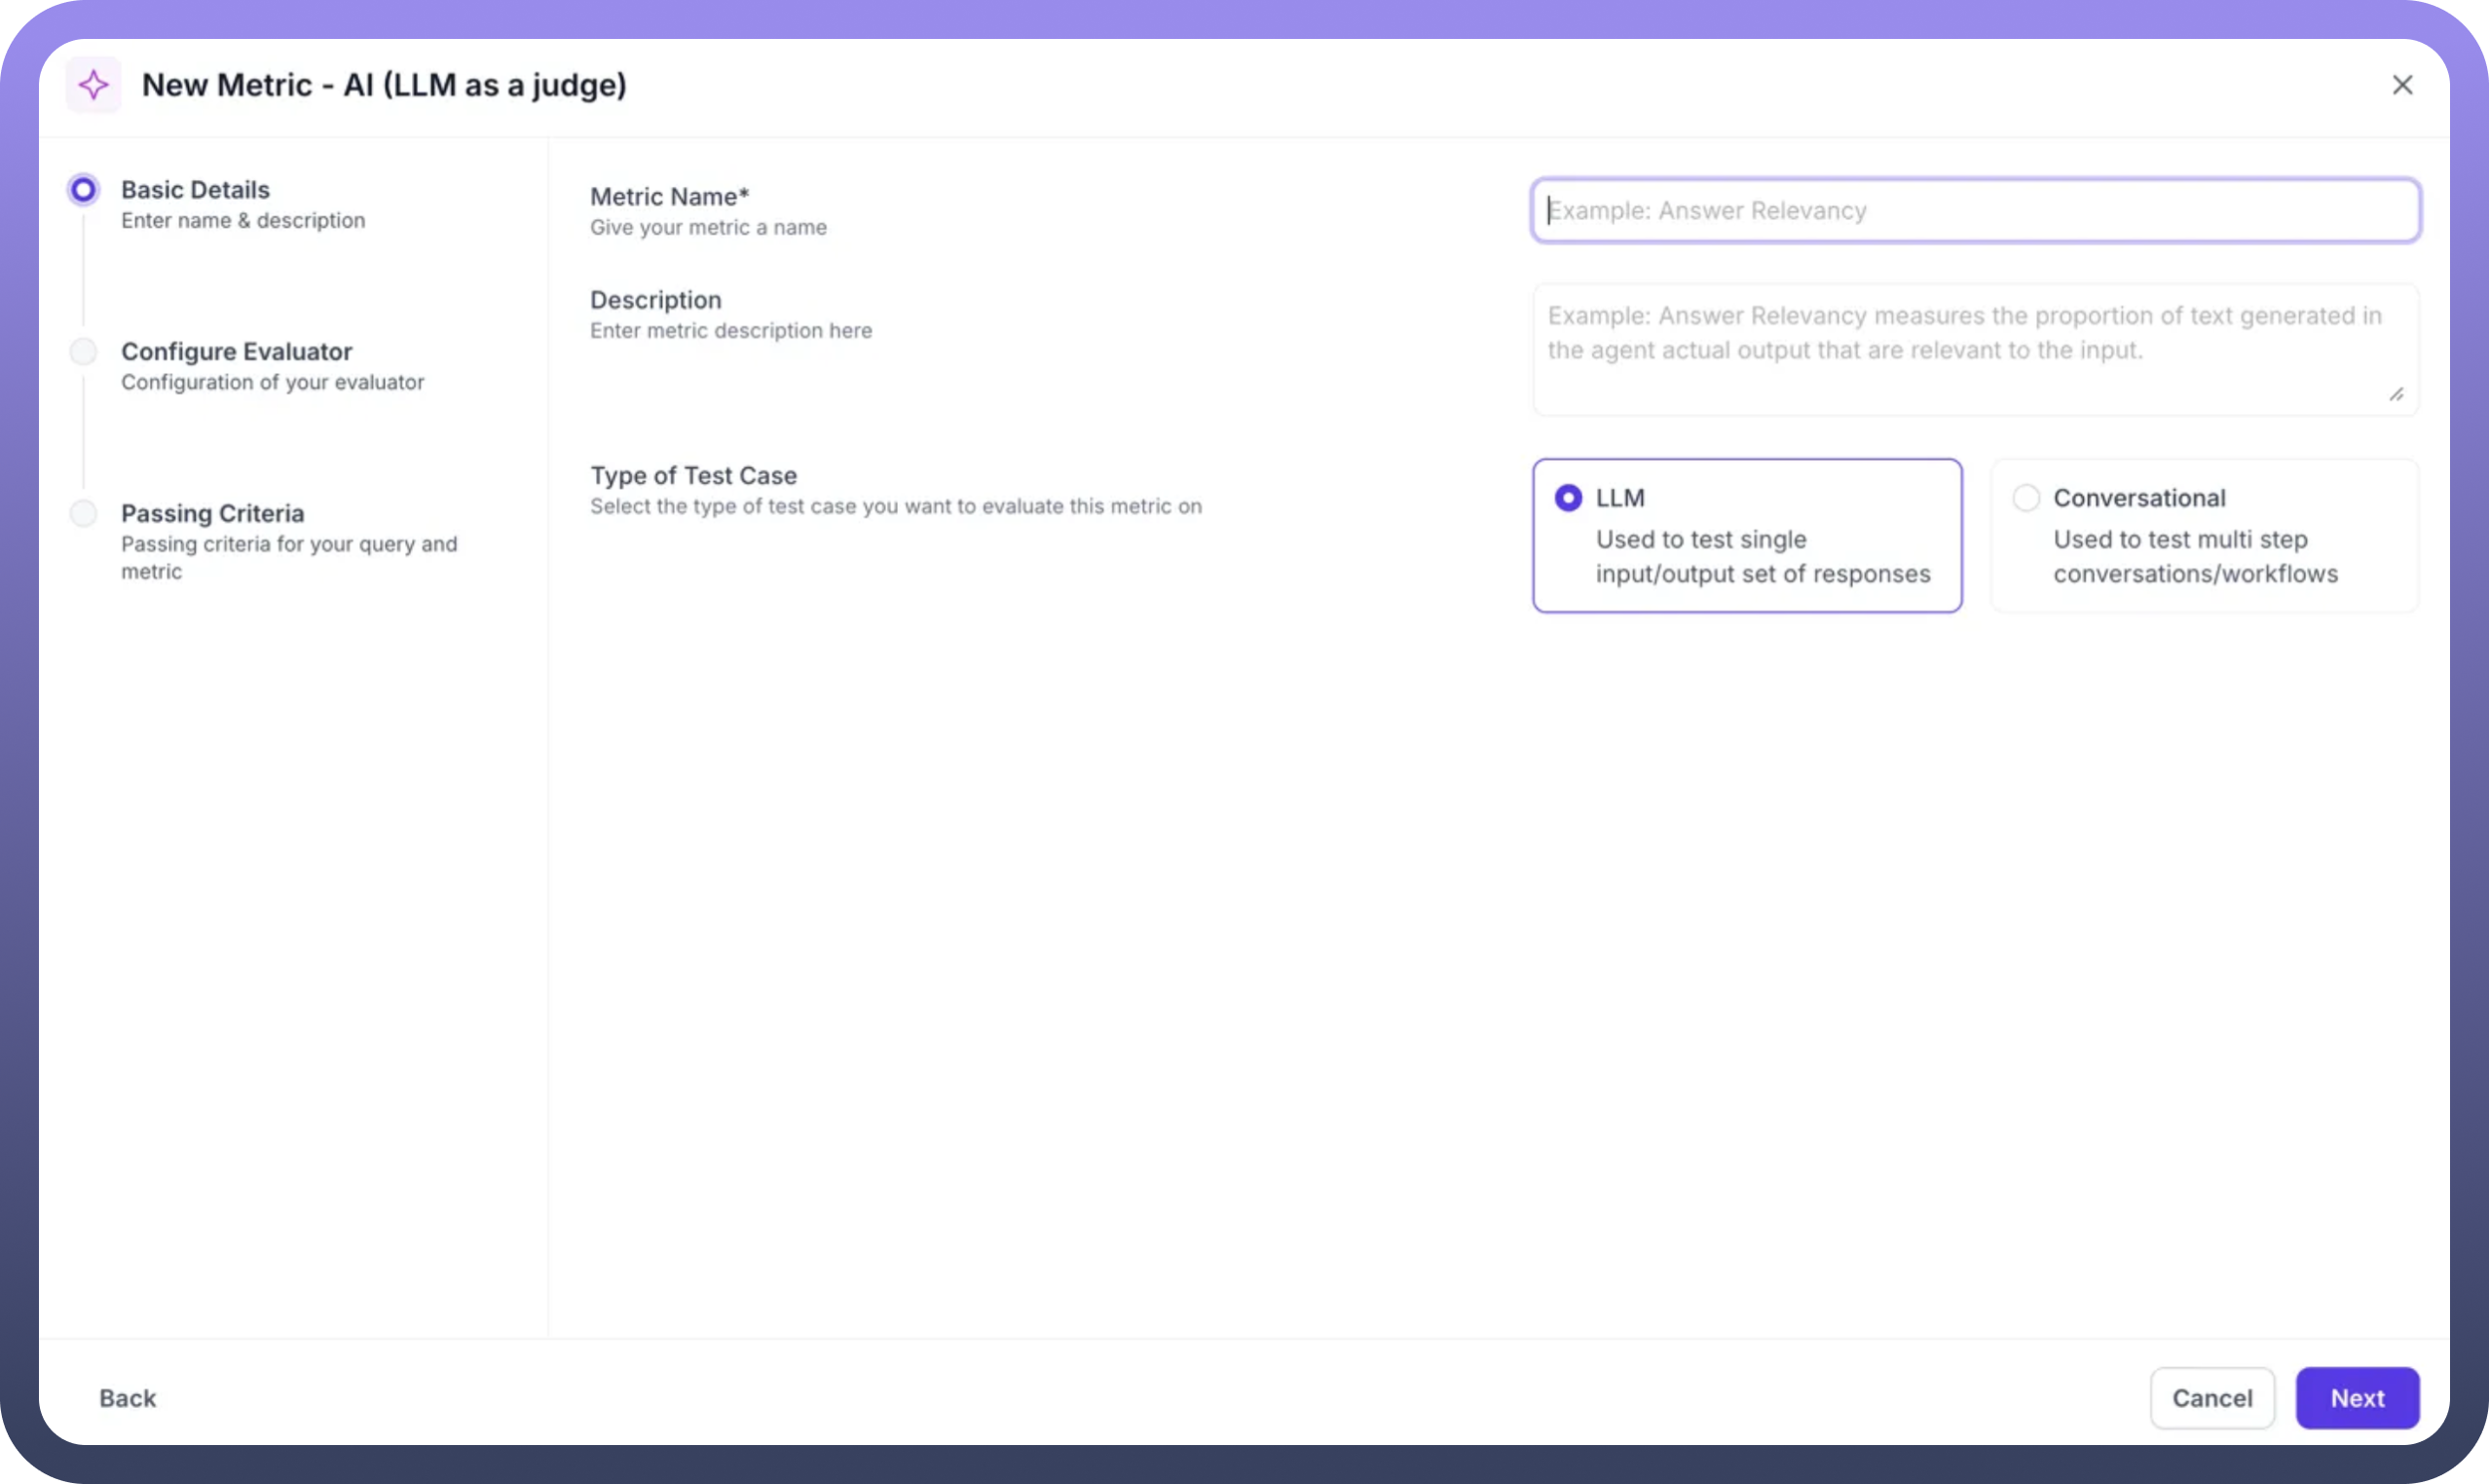
Step 2: Basic Configuration
Metric Name: Provide a descriptive name (e.g., "Answer Relevancy")
Description: Explain what the metric measures in detail
Test Case Type: Select
LLMfor single input/output evaluation orConversationalfor multi-step workflows
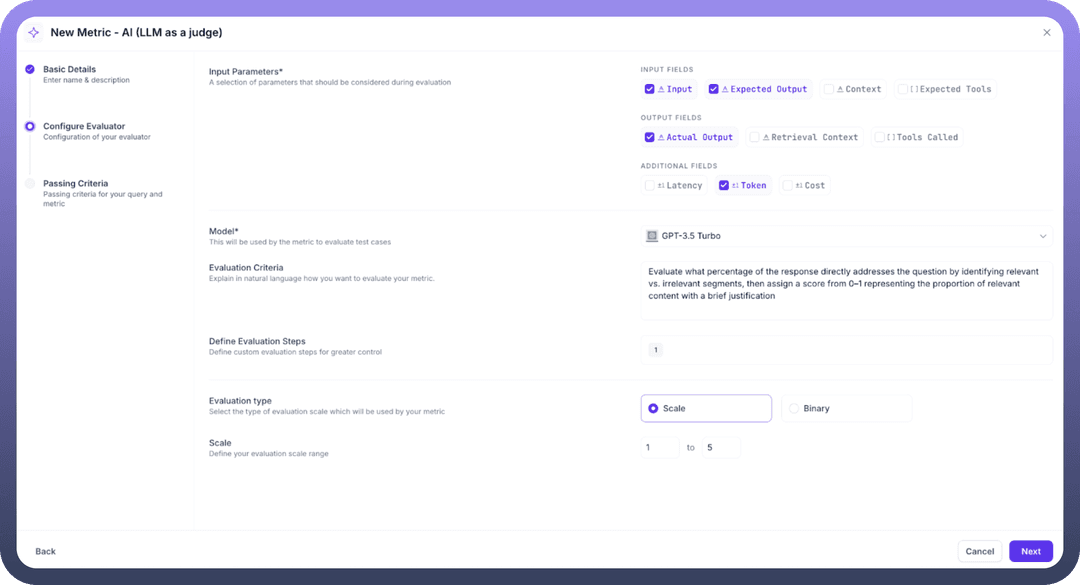
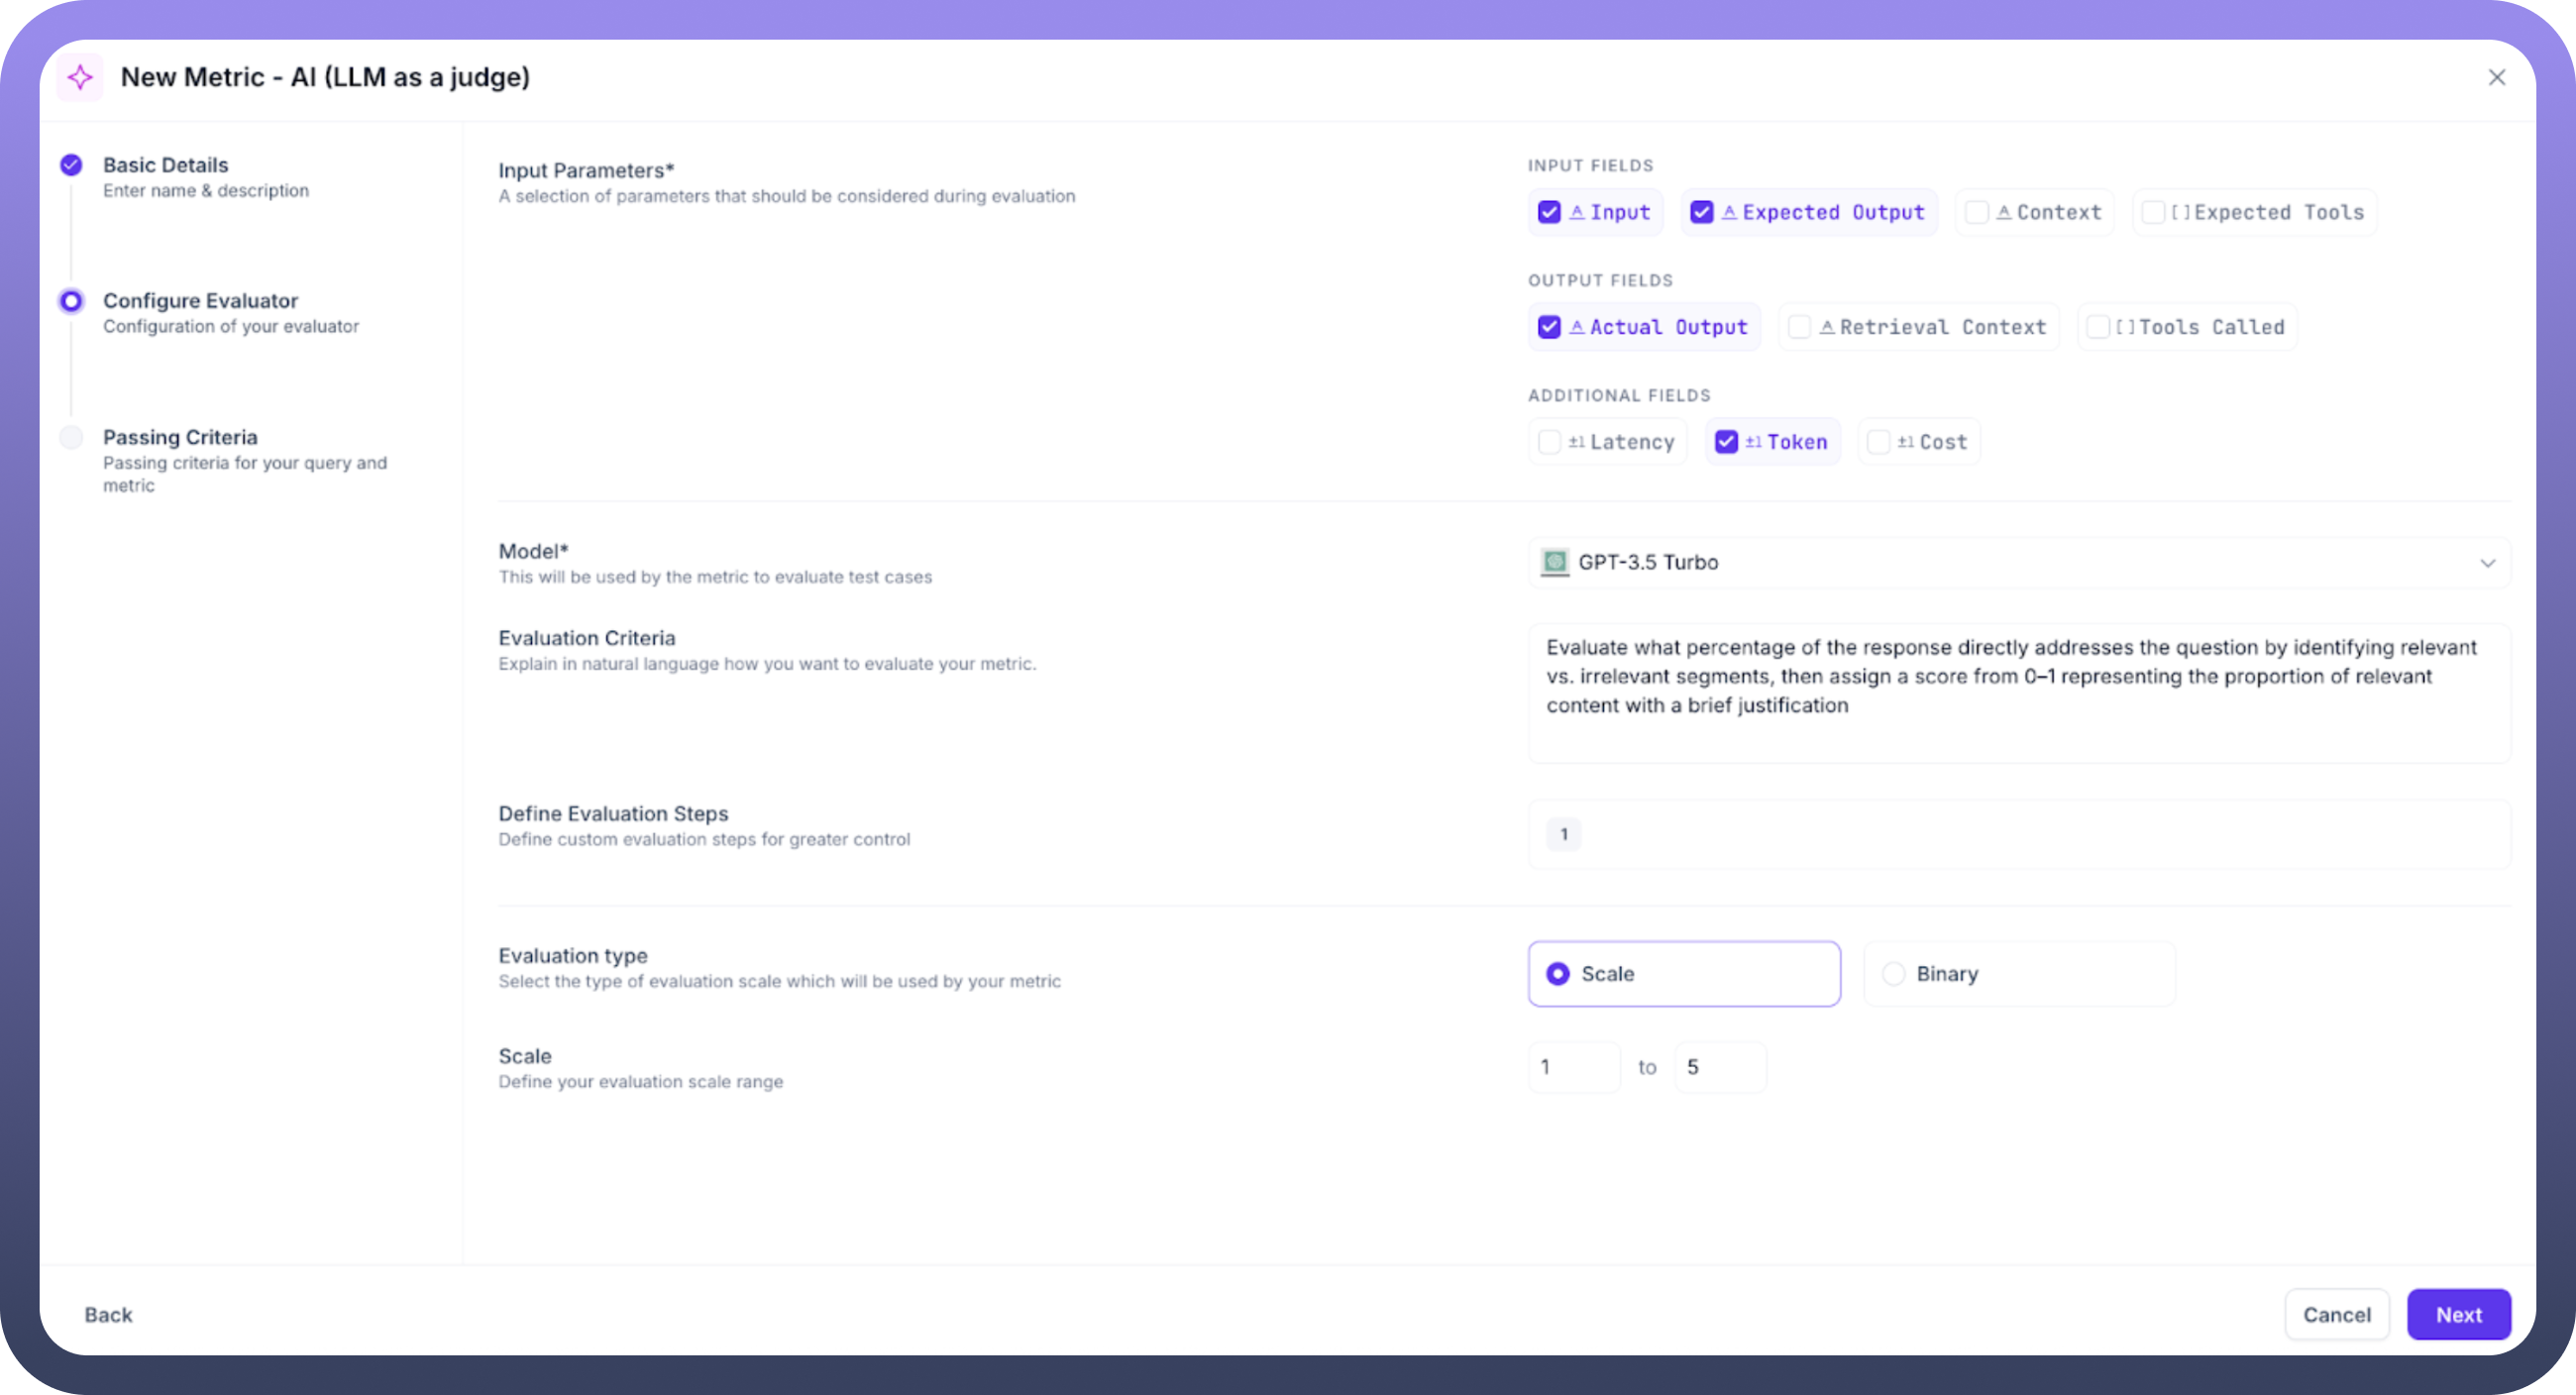
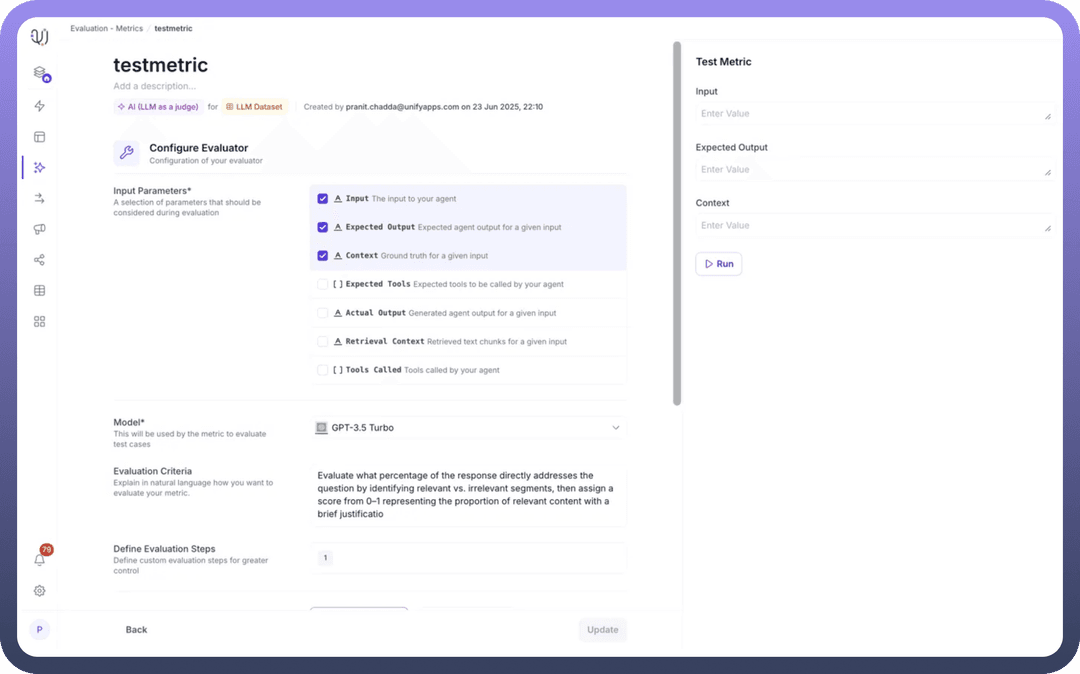
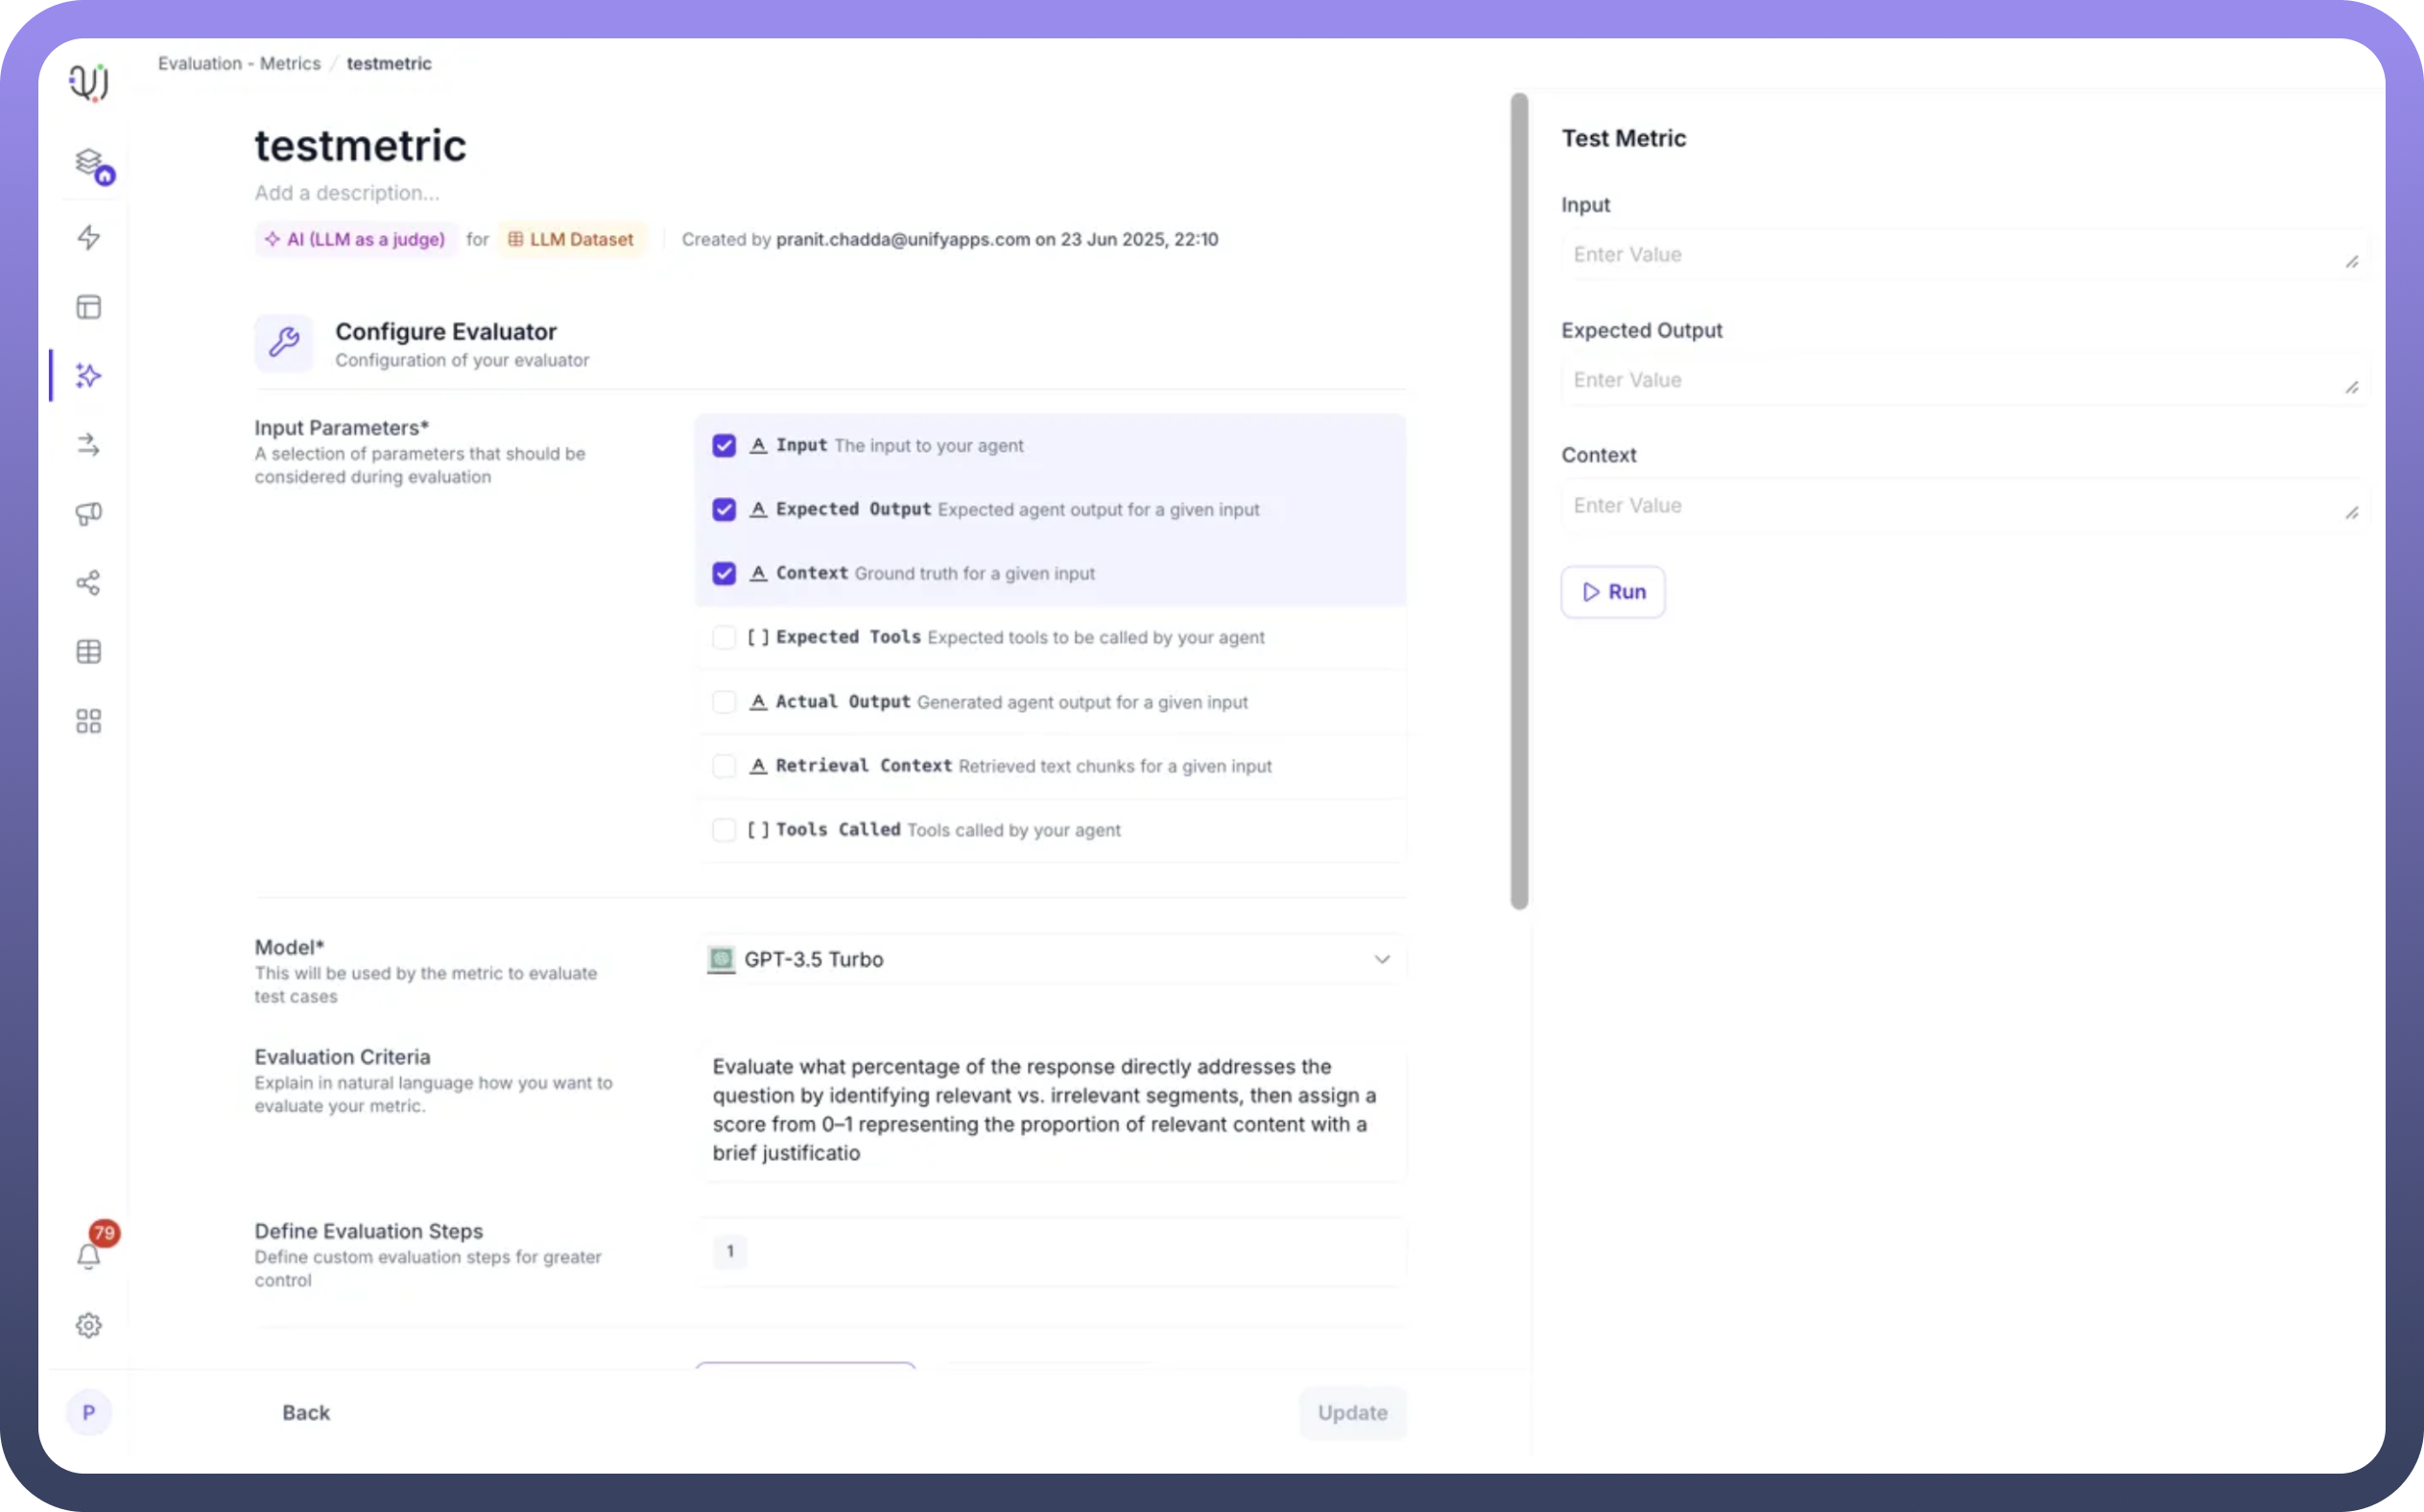
Step 3: Select Input Parameters: Choose the parameters necessary for evaluation:
Input: The user's query to your agentExpected Output: The ideal response for comparisonContext: Ground truth or retrieval context for accuracy assessmentActual Output: The agent's generated responseExpected Tools: Tools the agent should have calledTools Called: Tools actually invoked by the agentRetrieval Context: Retrieved text chunks for relevance evaluation
Step 4: Configure the LLM Evaluator
Model Selection: Choose your evaluation model (GPT-3.5 Turbo, GPT-4, etc.)Evaluation Criteria: Define how the model should assess responses using natural language instructionsEvaluation Steps: Provide detailed step-by-step instructions for the evaluation process
Step 5: Define Evaluation Scale
Evaluation Type: Choose between Scale (numerical) or Binary (pass/fail)Scale Range: Set the range (e.g., 1-5 or 0-1)Passing Criteria: Define thresholds for individual test cases and overall experiments
Example: Answer Correctness Implementation
When implementing an answer correctness metric:
Instruction Design: Create clear instructions like "Compare the actual output with the expected output, considering semantic similarity and factual accuracy"
Scoring Guidelines: Define what each score represents (e.g., 5 = perfect match, 1 = completely incorrect)
Context Integration: Include retrieval context to verify factual accuracy
Pass Criteria: Set thresholds (e.g., score > 0.7 for pass, 70% test cases for experiment success)
Best Practices for LLM Evaluation
Clear Instructions: Write specific, unambiguous evaluation criteria
Example-Driven: Include examples of good and bad responses in your instructions
Consistent Scales: Use standardized scoring scales across similar metrics
Model Selection: Use more advanced models (GPT-4) for complex evaluations
Iterative Refinement: Test and refine instructions based on evaluation results
Automation
Automation-based evaluation provides programmatic control over the evaluation process, enabling complex logic, custom calculations, and integration with external systems. This approach is ideal for technical validations, performance metrics, and business-specific criteria.
Building Custom Evaluation Automations
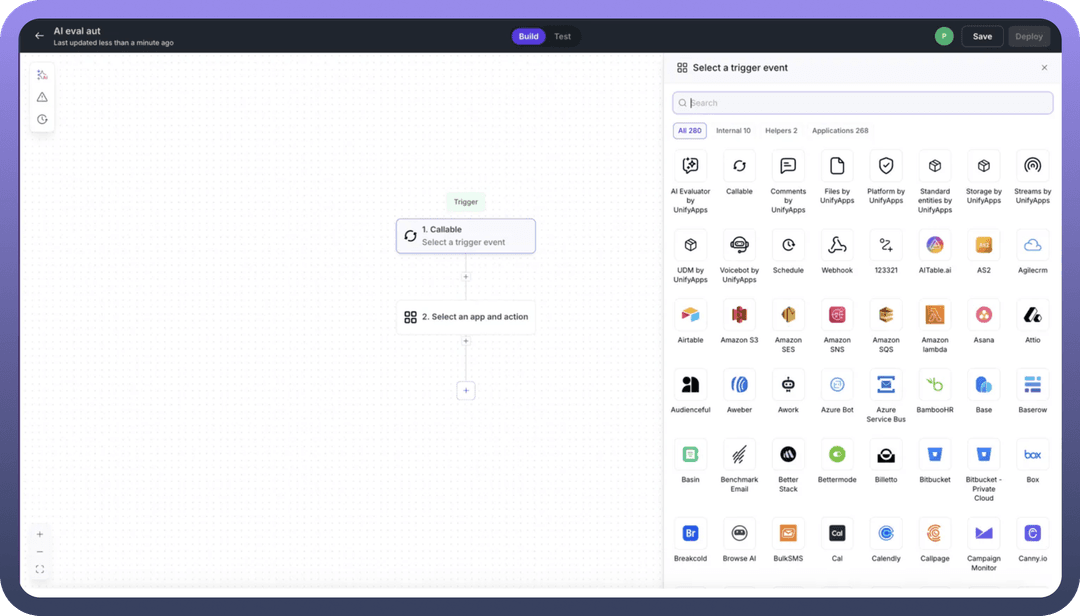
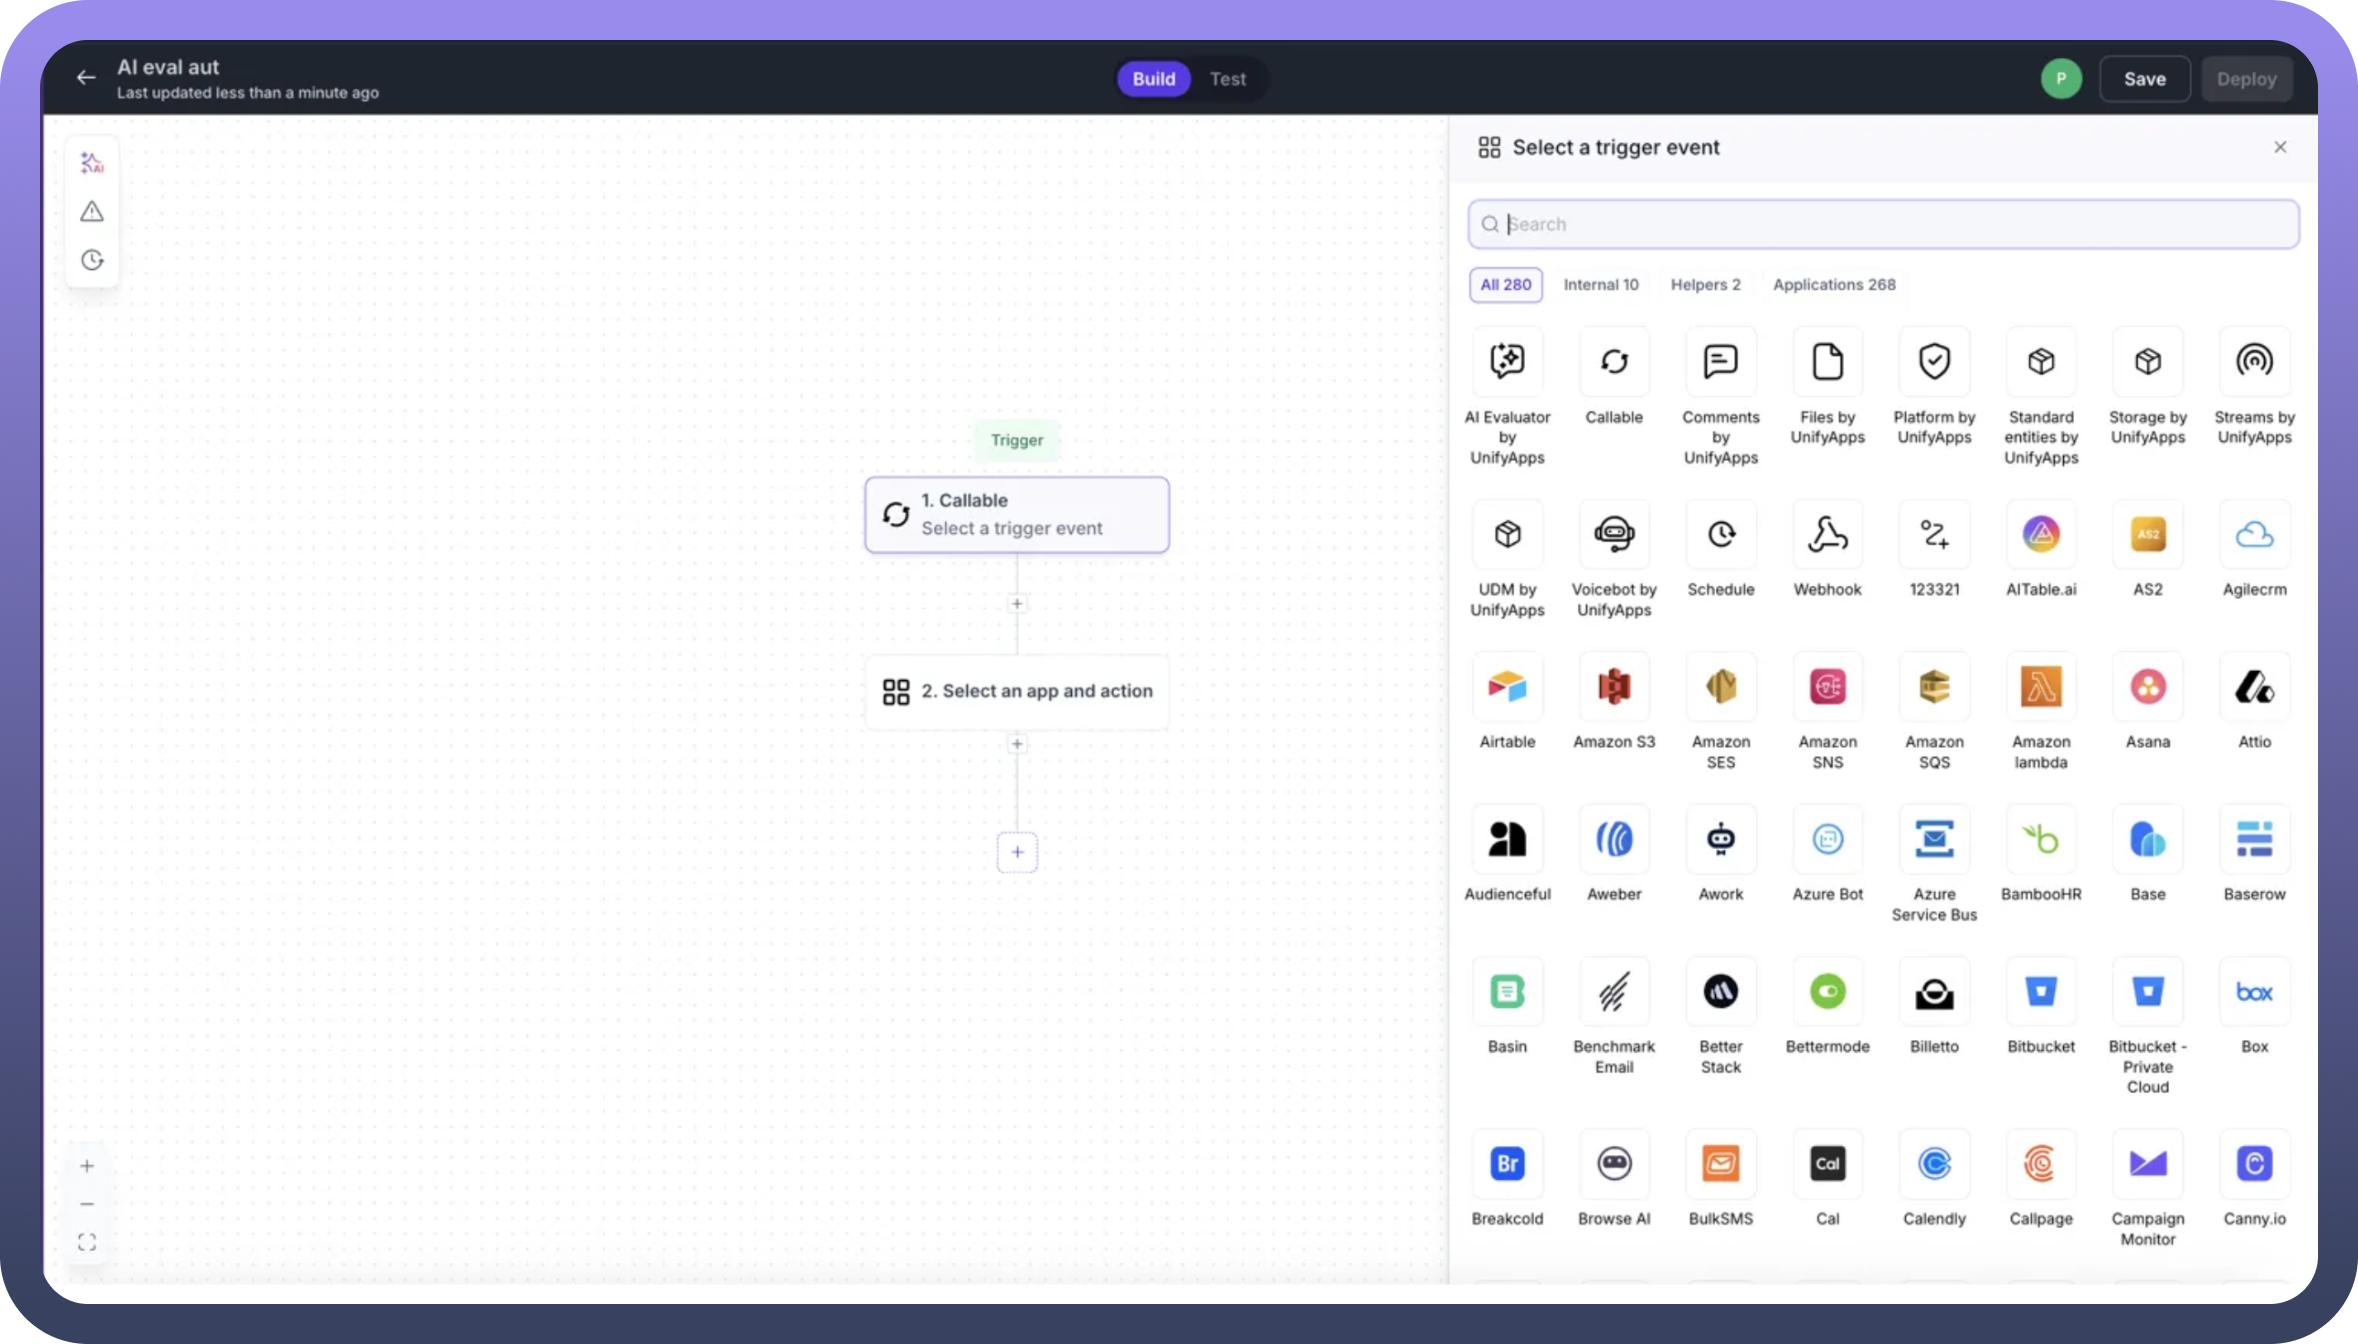
Before creating an automation-based metric, you'll need to build an evaluation automation. When creating a new automation workflow:
Select the AI Evaluator Trigger: Navigate to the automation builder and select
AI Evaluator by UnifyAppsfrom the available trigger optionsConfigure Evaluation Logic: This special trigger enables your automation to:
Receive evaluation parameters from the metrics framework
Process test case data with custom business logic
Perform complex calculations or external validations
Return scores and reasoning back to the evaluation system
Define Input/Output Mapping: Ensure your automation can handle the evaluation parameters and return scores within your defined range
Once your evaluation automation is ready, you can reference it when creating your automation-based metric.
Creating an Automation-Based Metric
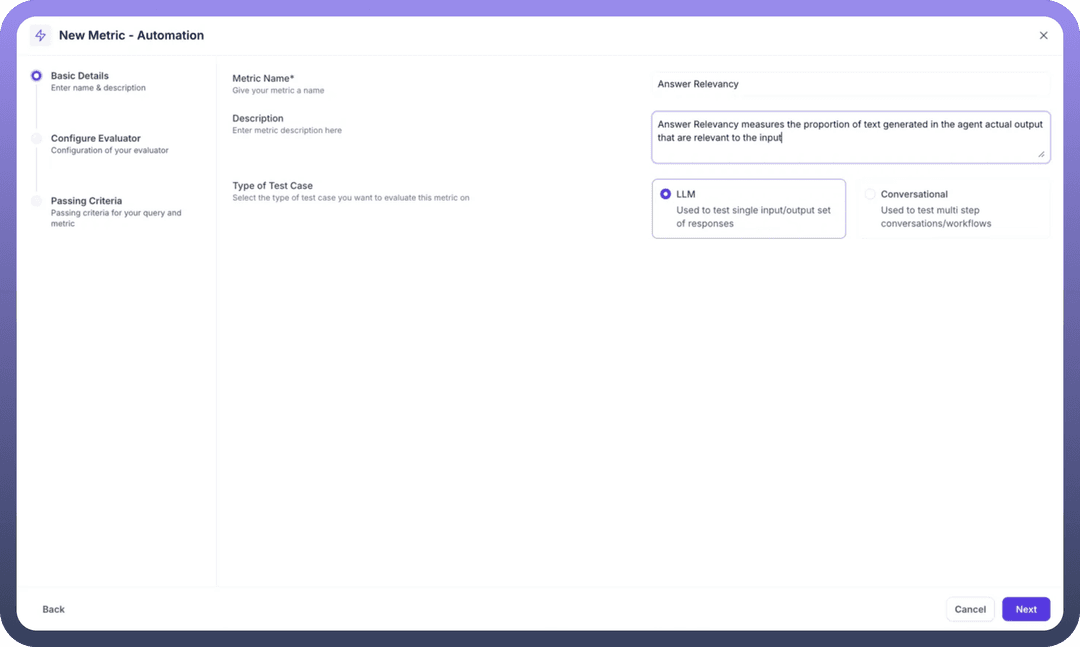
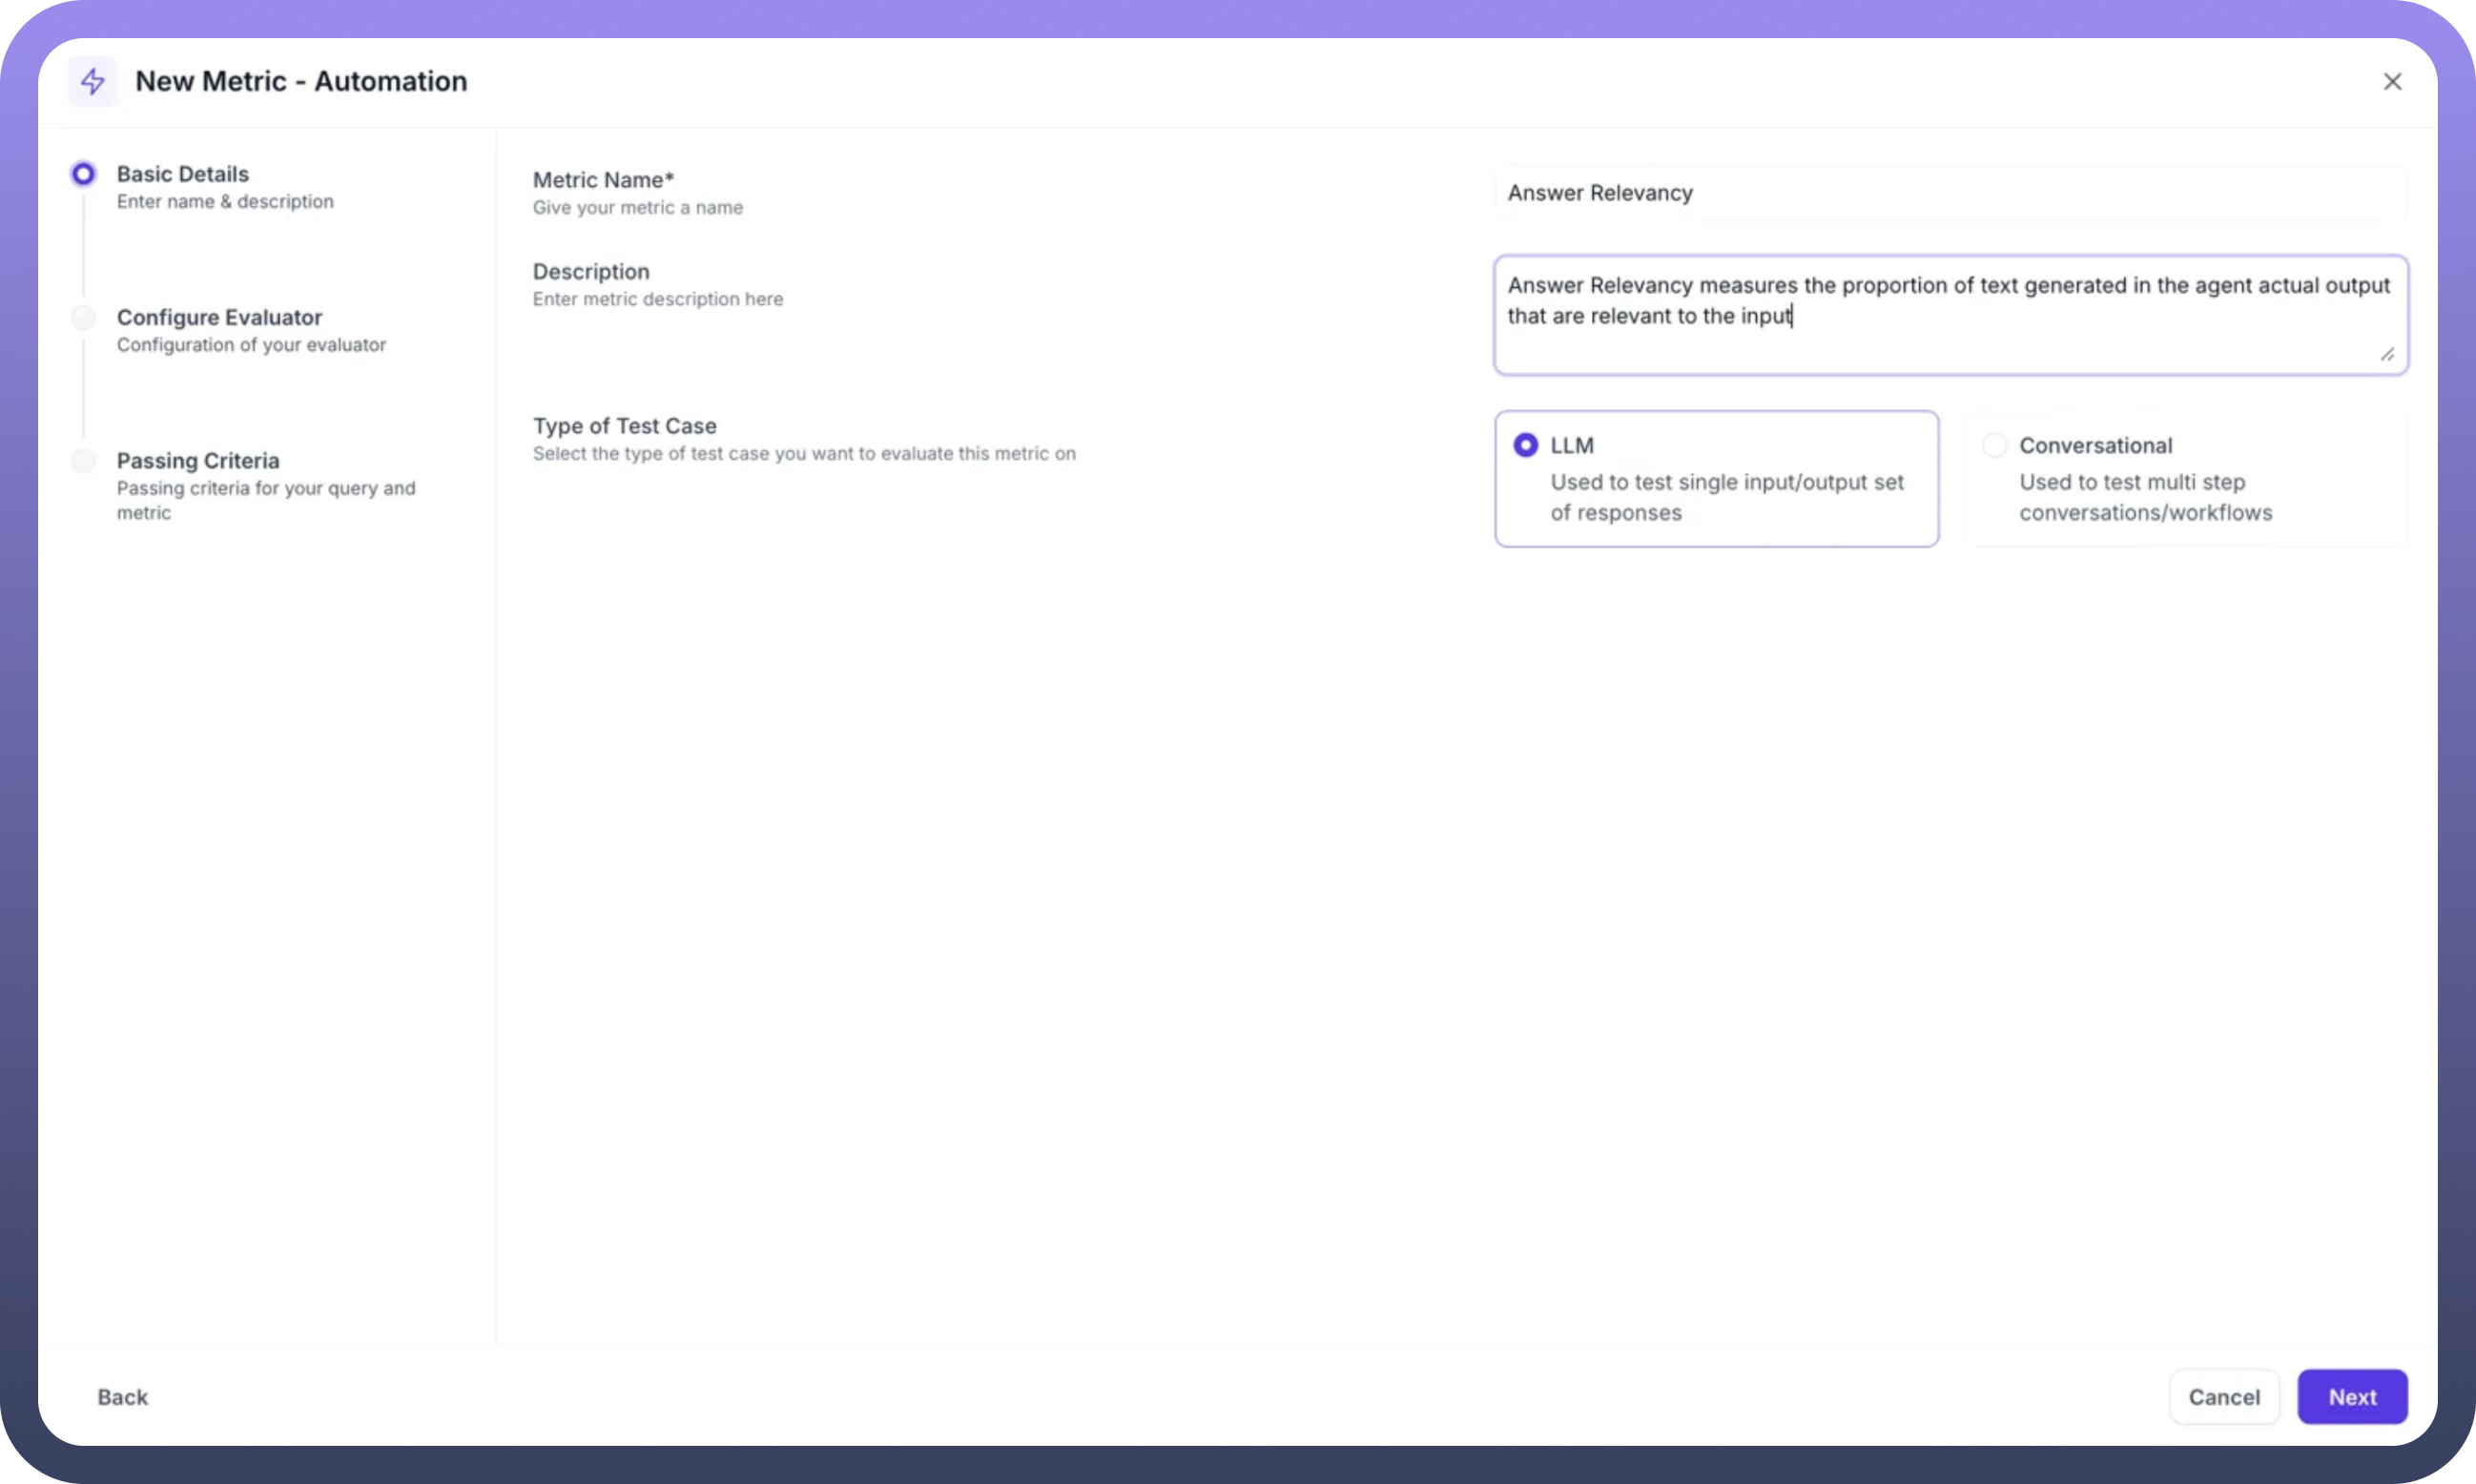
Step 1: Basic Details Configuration
Click
New Metric - Automationto startMetric Name: Enter a descriptive name (e.g., "Answer Relevancy")Description: Provide detailed explanation of what the metric evaluatesType of Test Case: SelectLLMfor single input/output evaluation
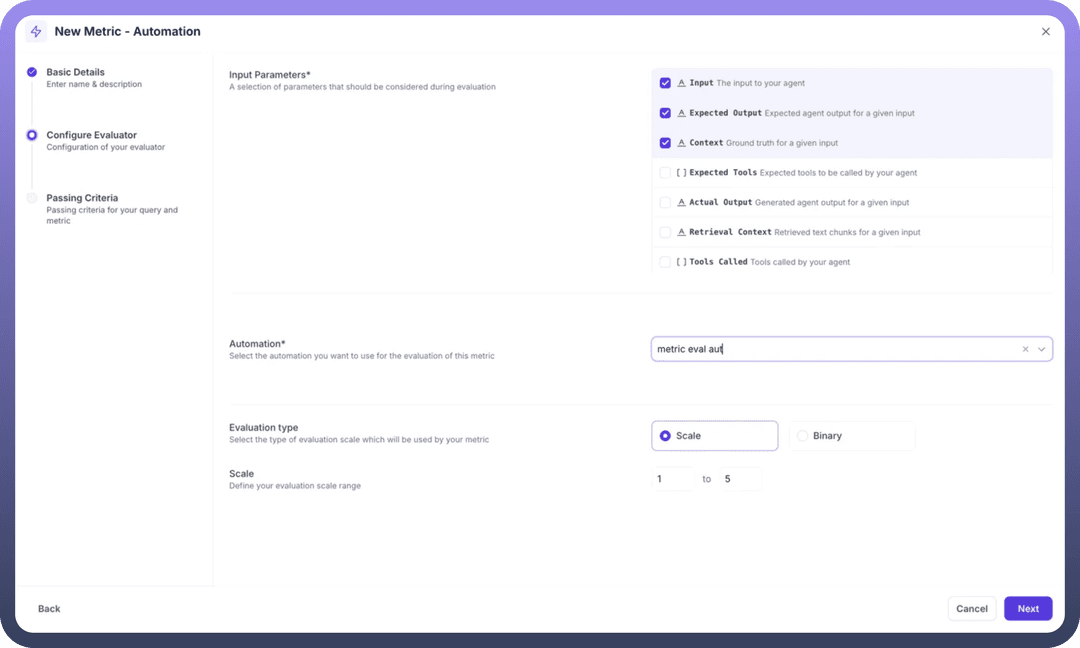
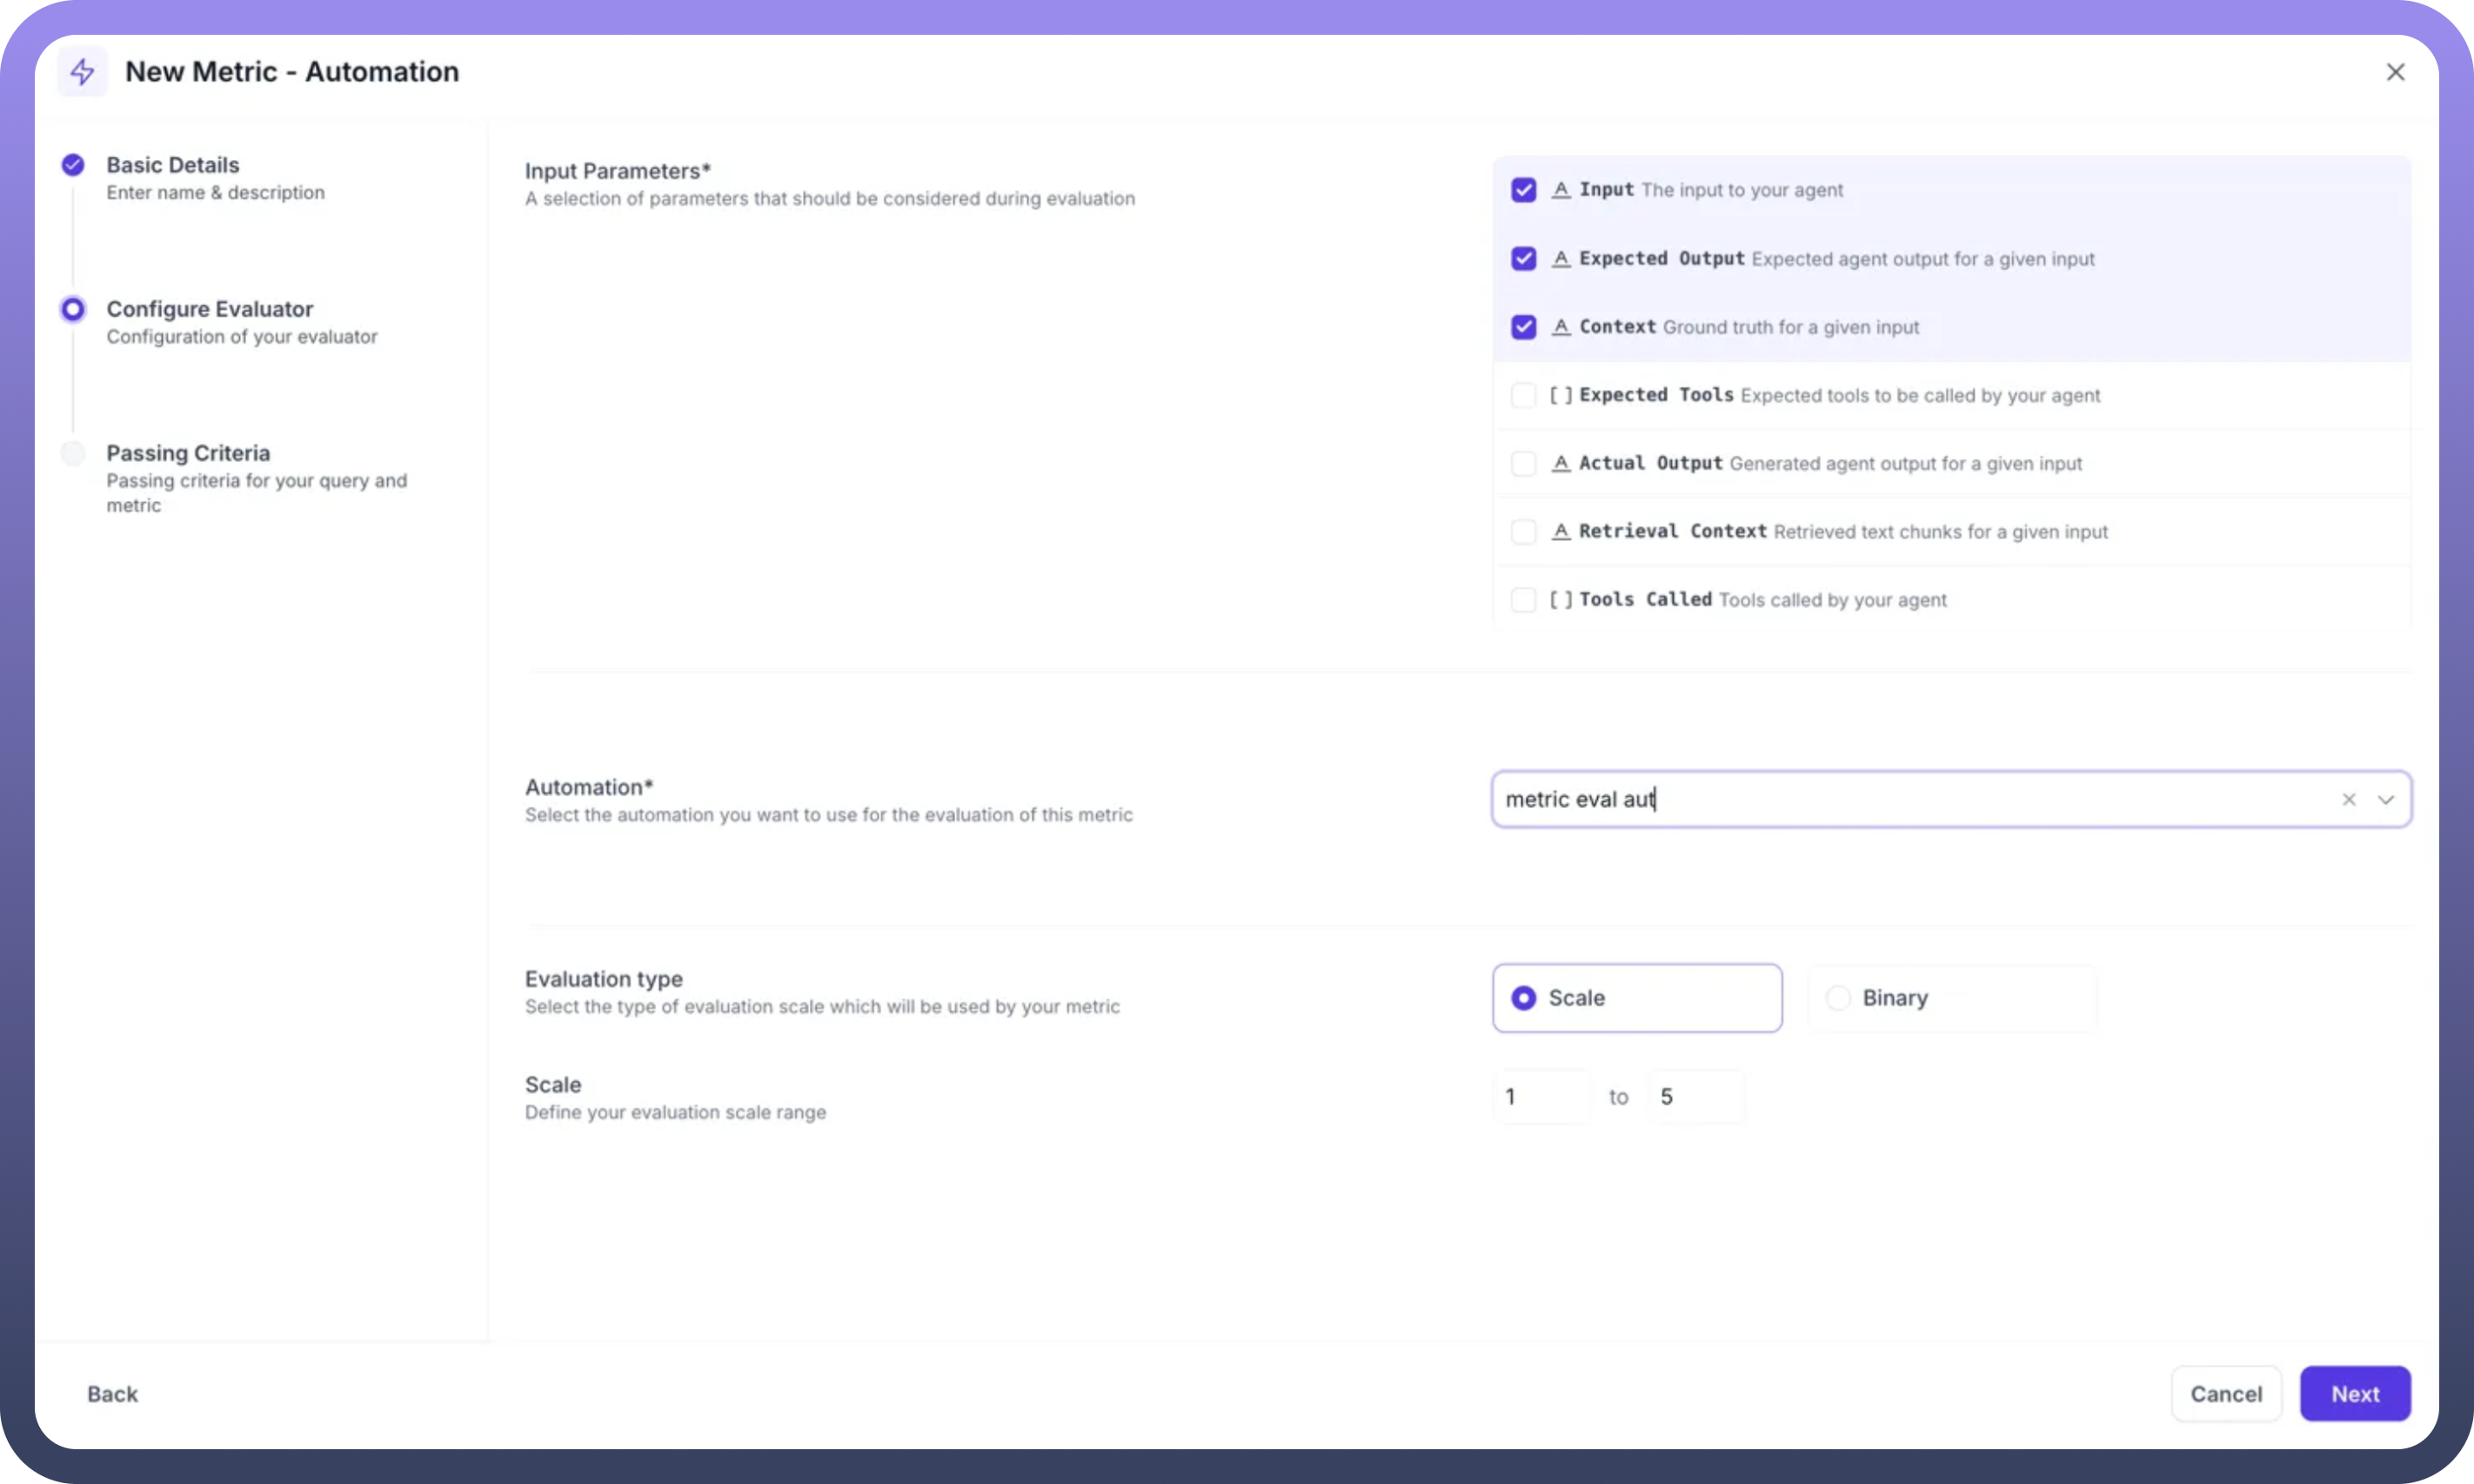
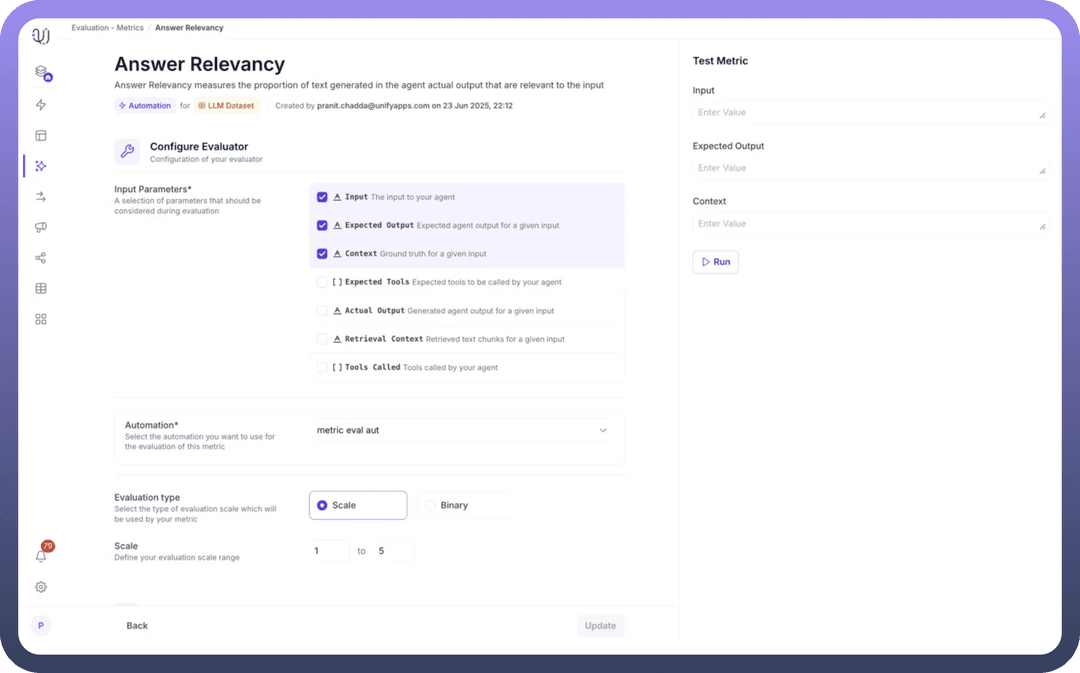
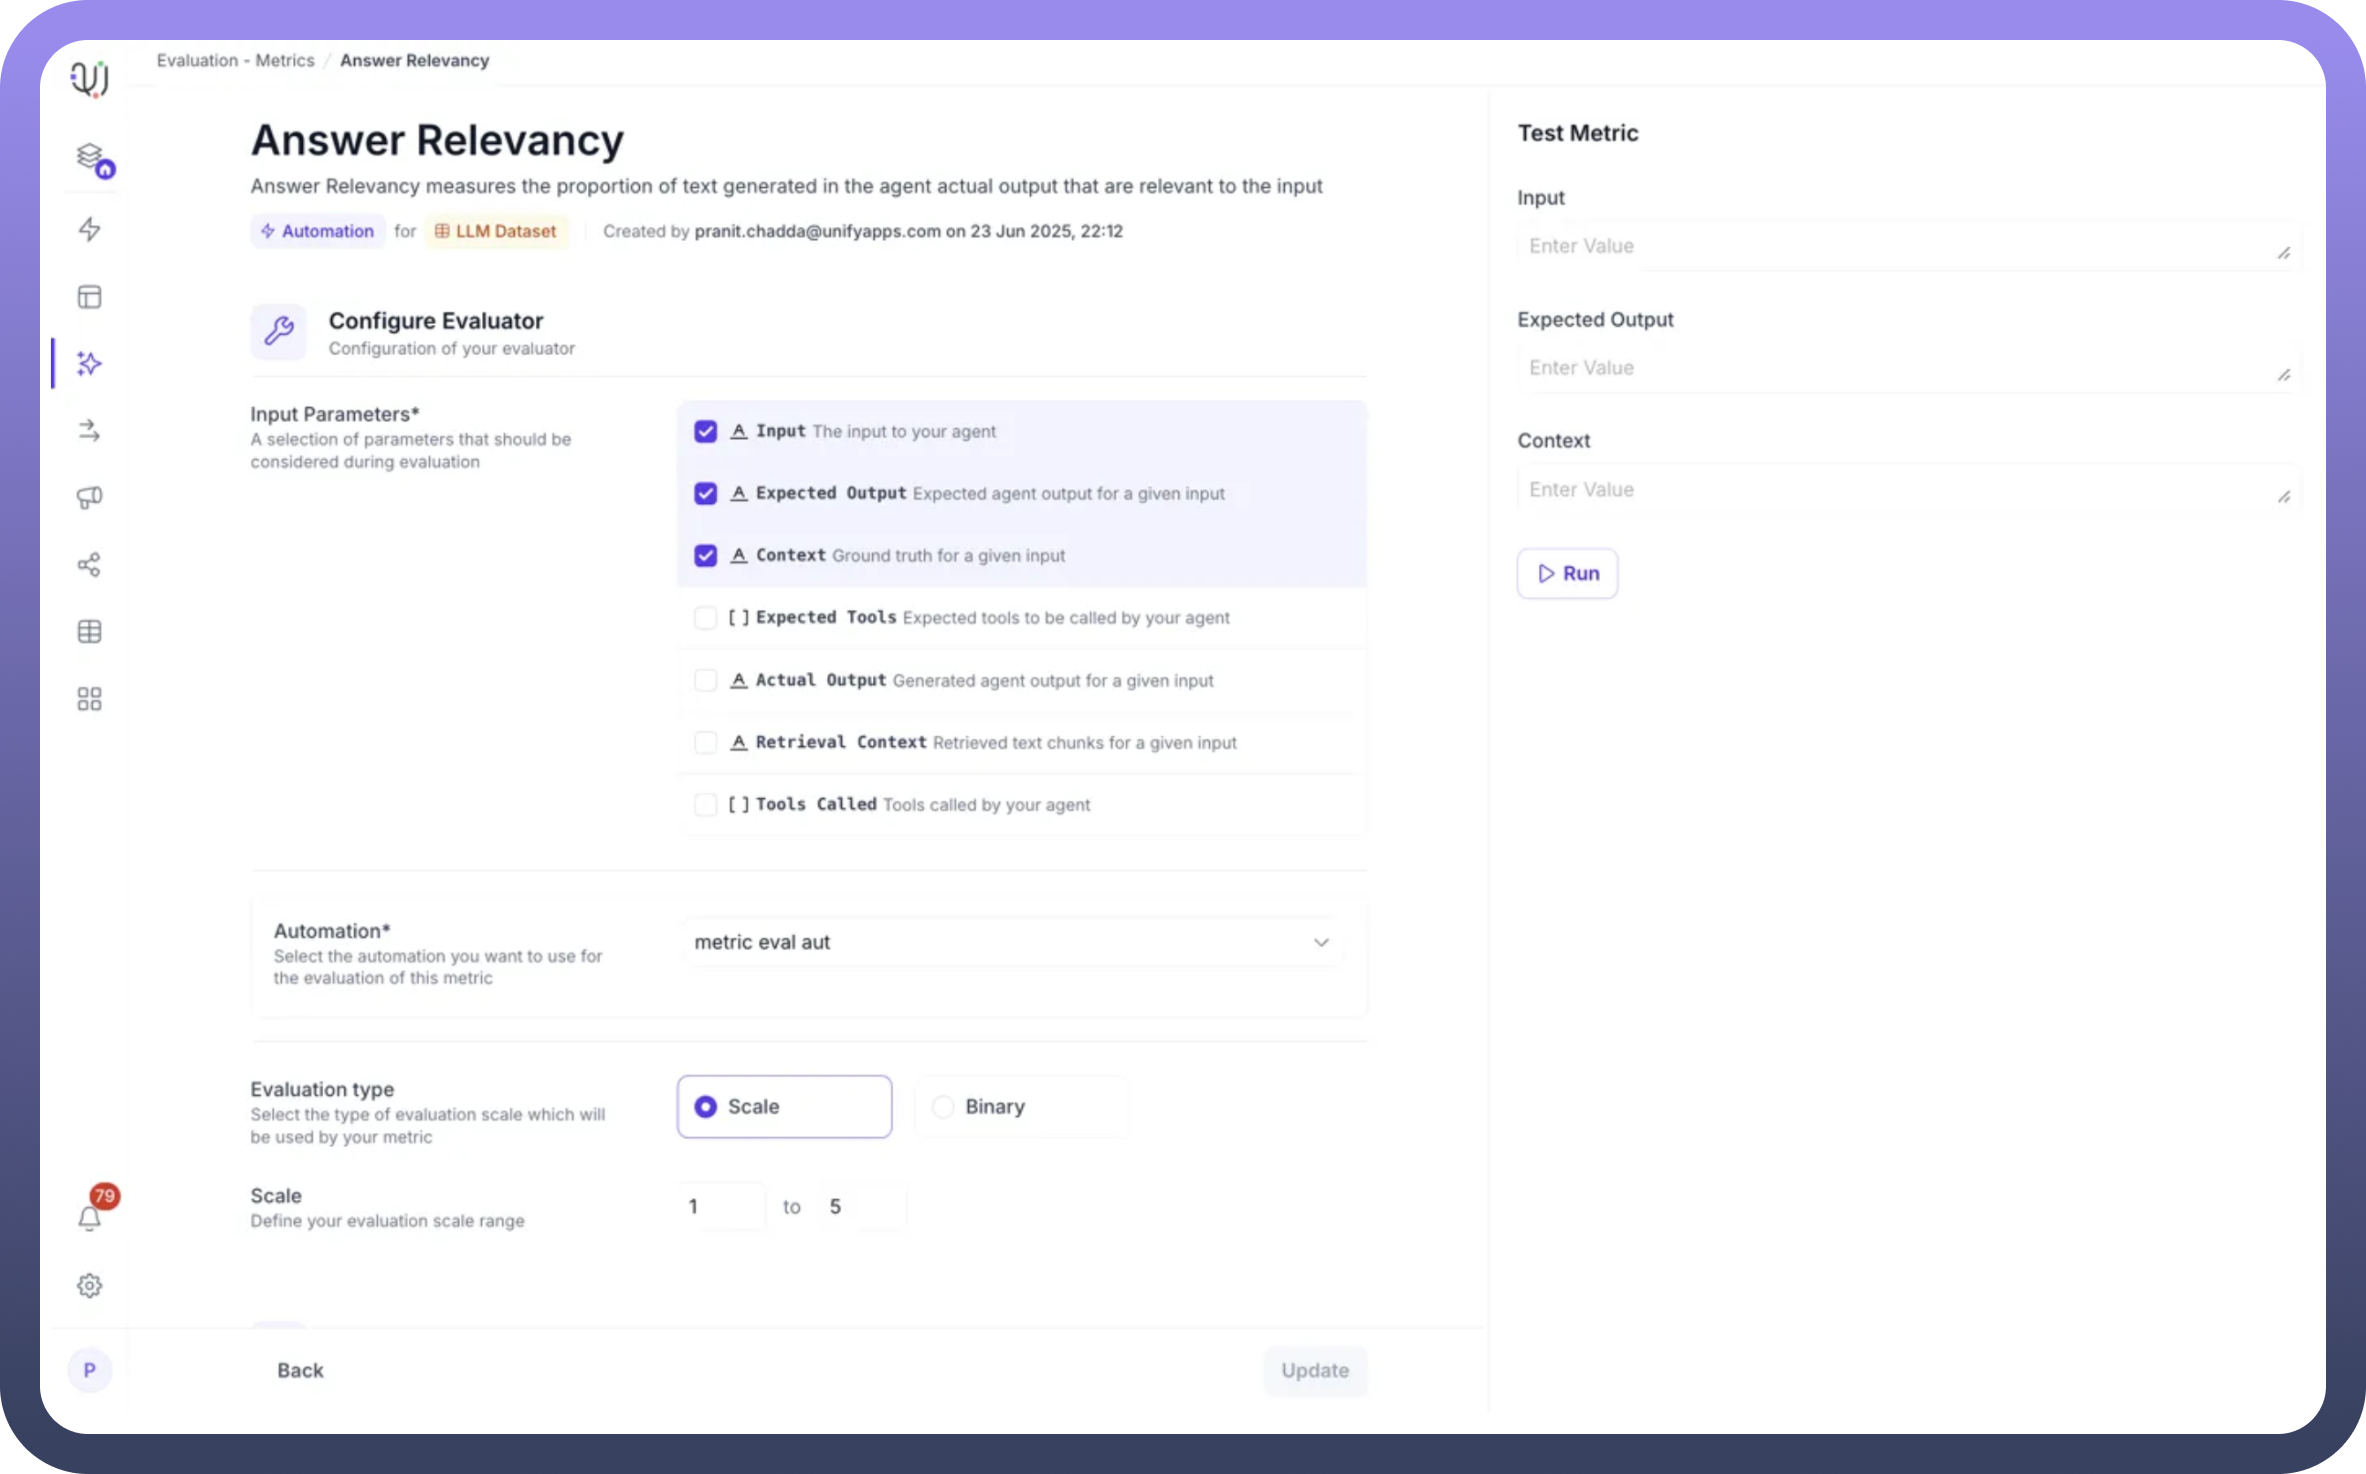
Step 2: Configure Input Parameters
Select which data points your automation will need to evaluate:
Input: The user's query sent to your agentExpected Output: The ideal response for comparisonContext: Ground truth information for validationExpected Tools: Tools the agent should invoke (optional)Actual Output: The agent's generated responseRetrieval Context: Retrieved chunks from knowledge baseTools Called: Actually invoked tools by the agent
Select only the parameters relevant to your evaluation logic. For example, an answer relevancy metric might only need Input, Expected Output, and Context.
Step 3: Select Your Automation
Automation Dropdown: Choose from your existing automation workflowsThe selected automation (e.g., "metric eval aut") will receive the chosen parameters
Ensure your automation is designed to handle these inputs and return a score
Step 4: Configure Evaluation Type and Scale
Evaluation Type: Choose between:Scale: Numerical scoring (recommended for granular assessment)
Binary: Simple pass/fail evaluation
Scale Range: Define your scoring range (e.g., 1 to 5)The automation must return scores within this defined range
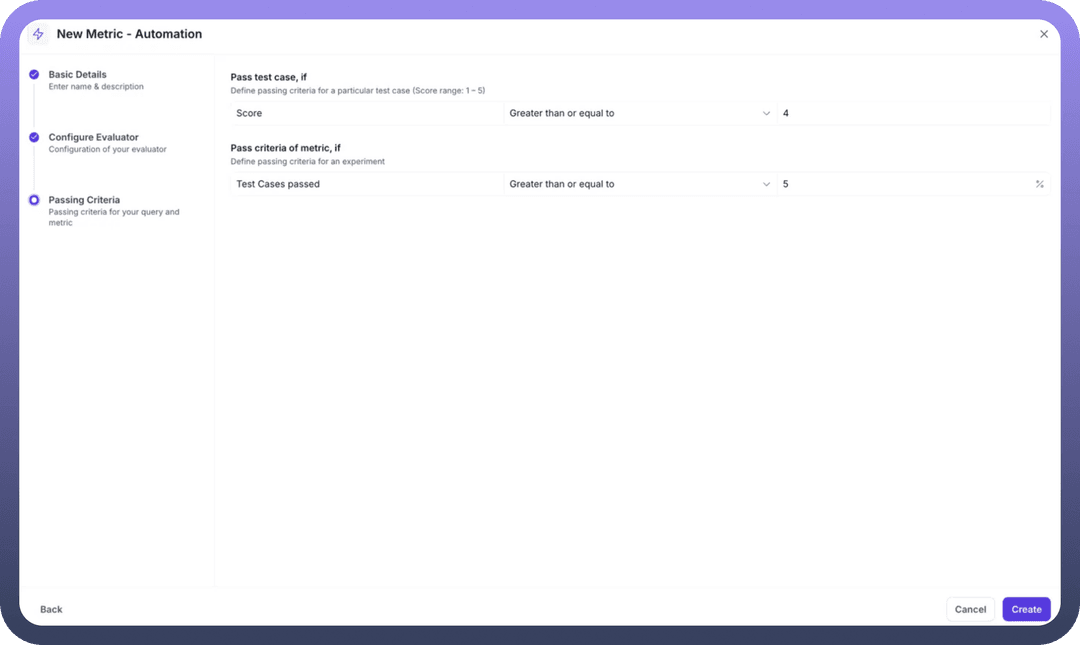
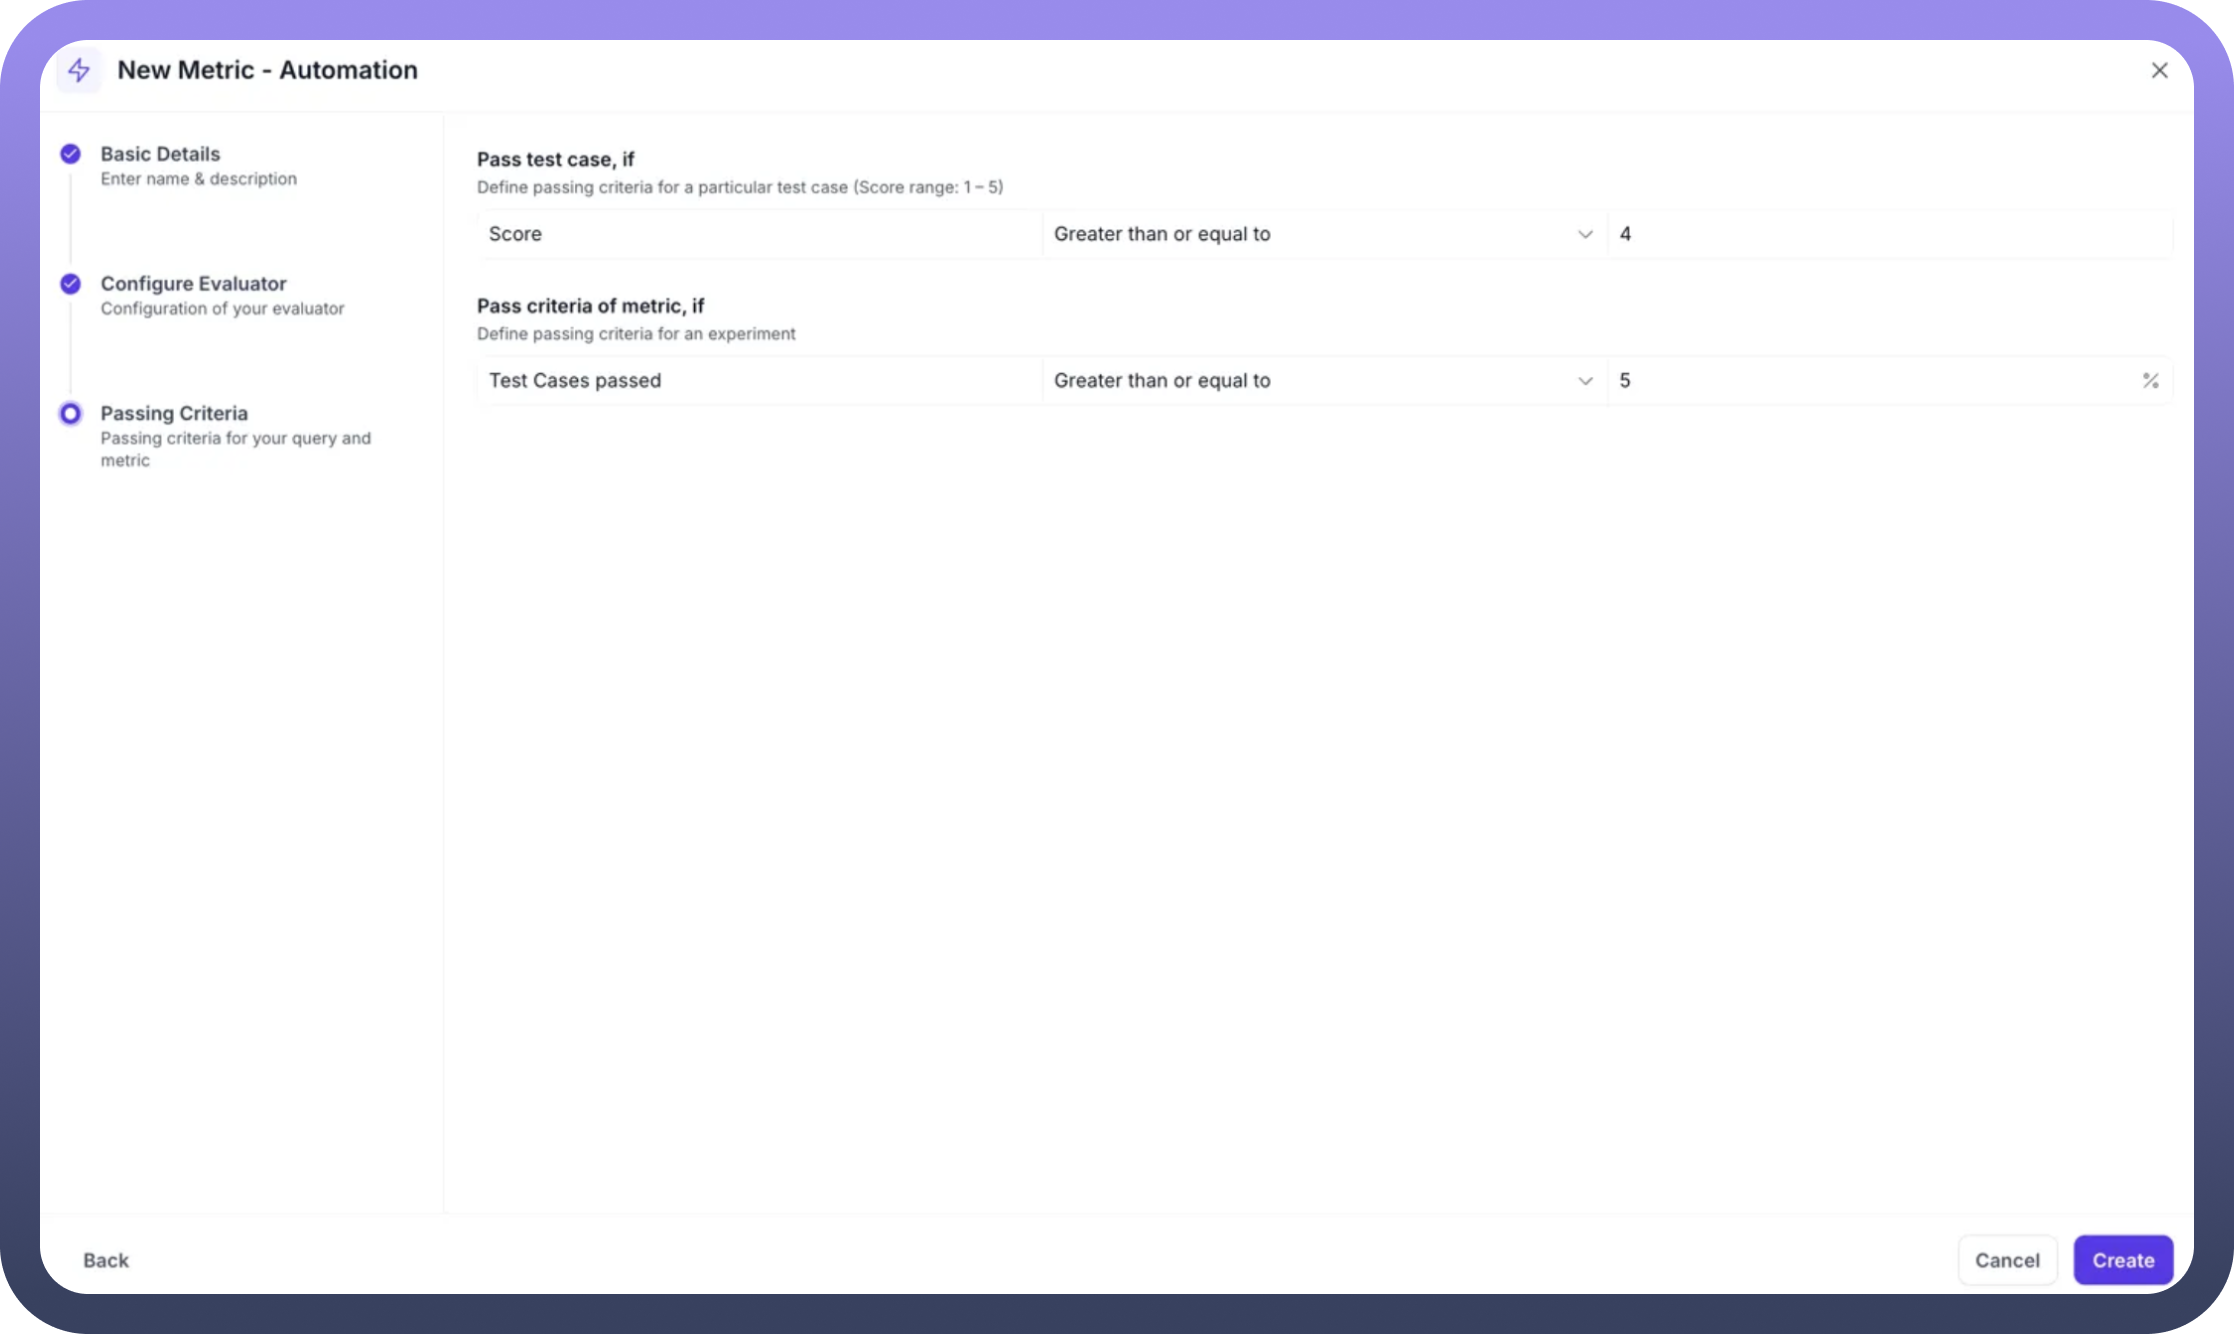
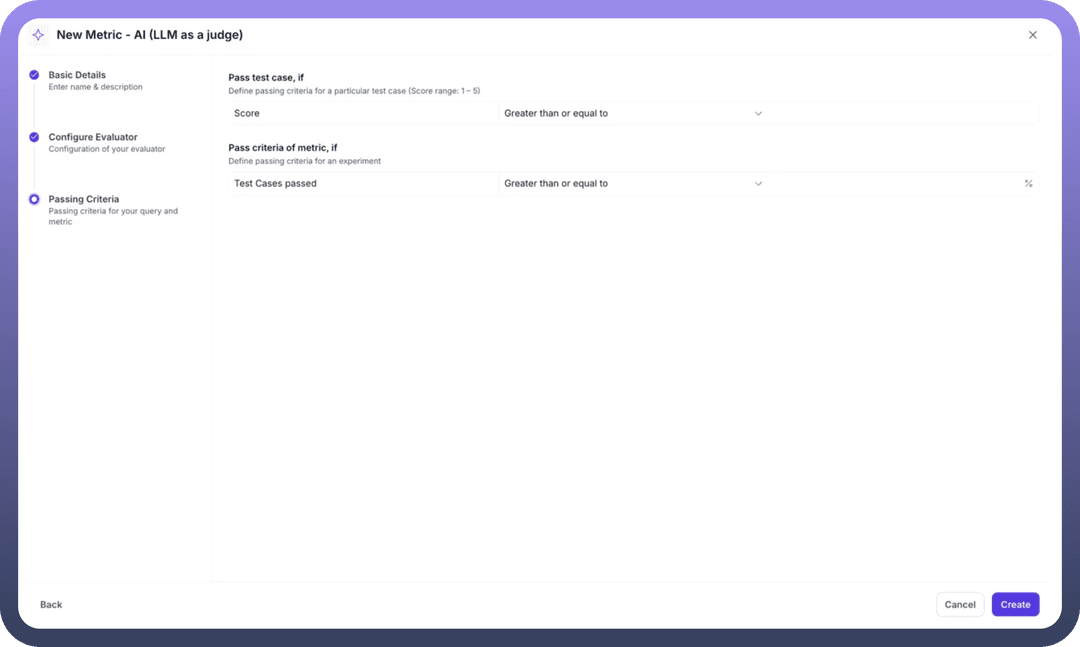
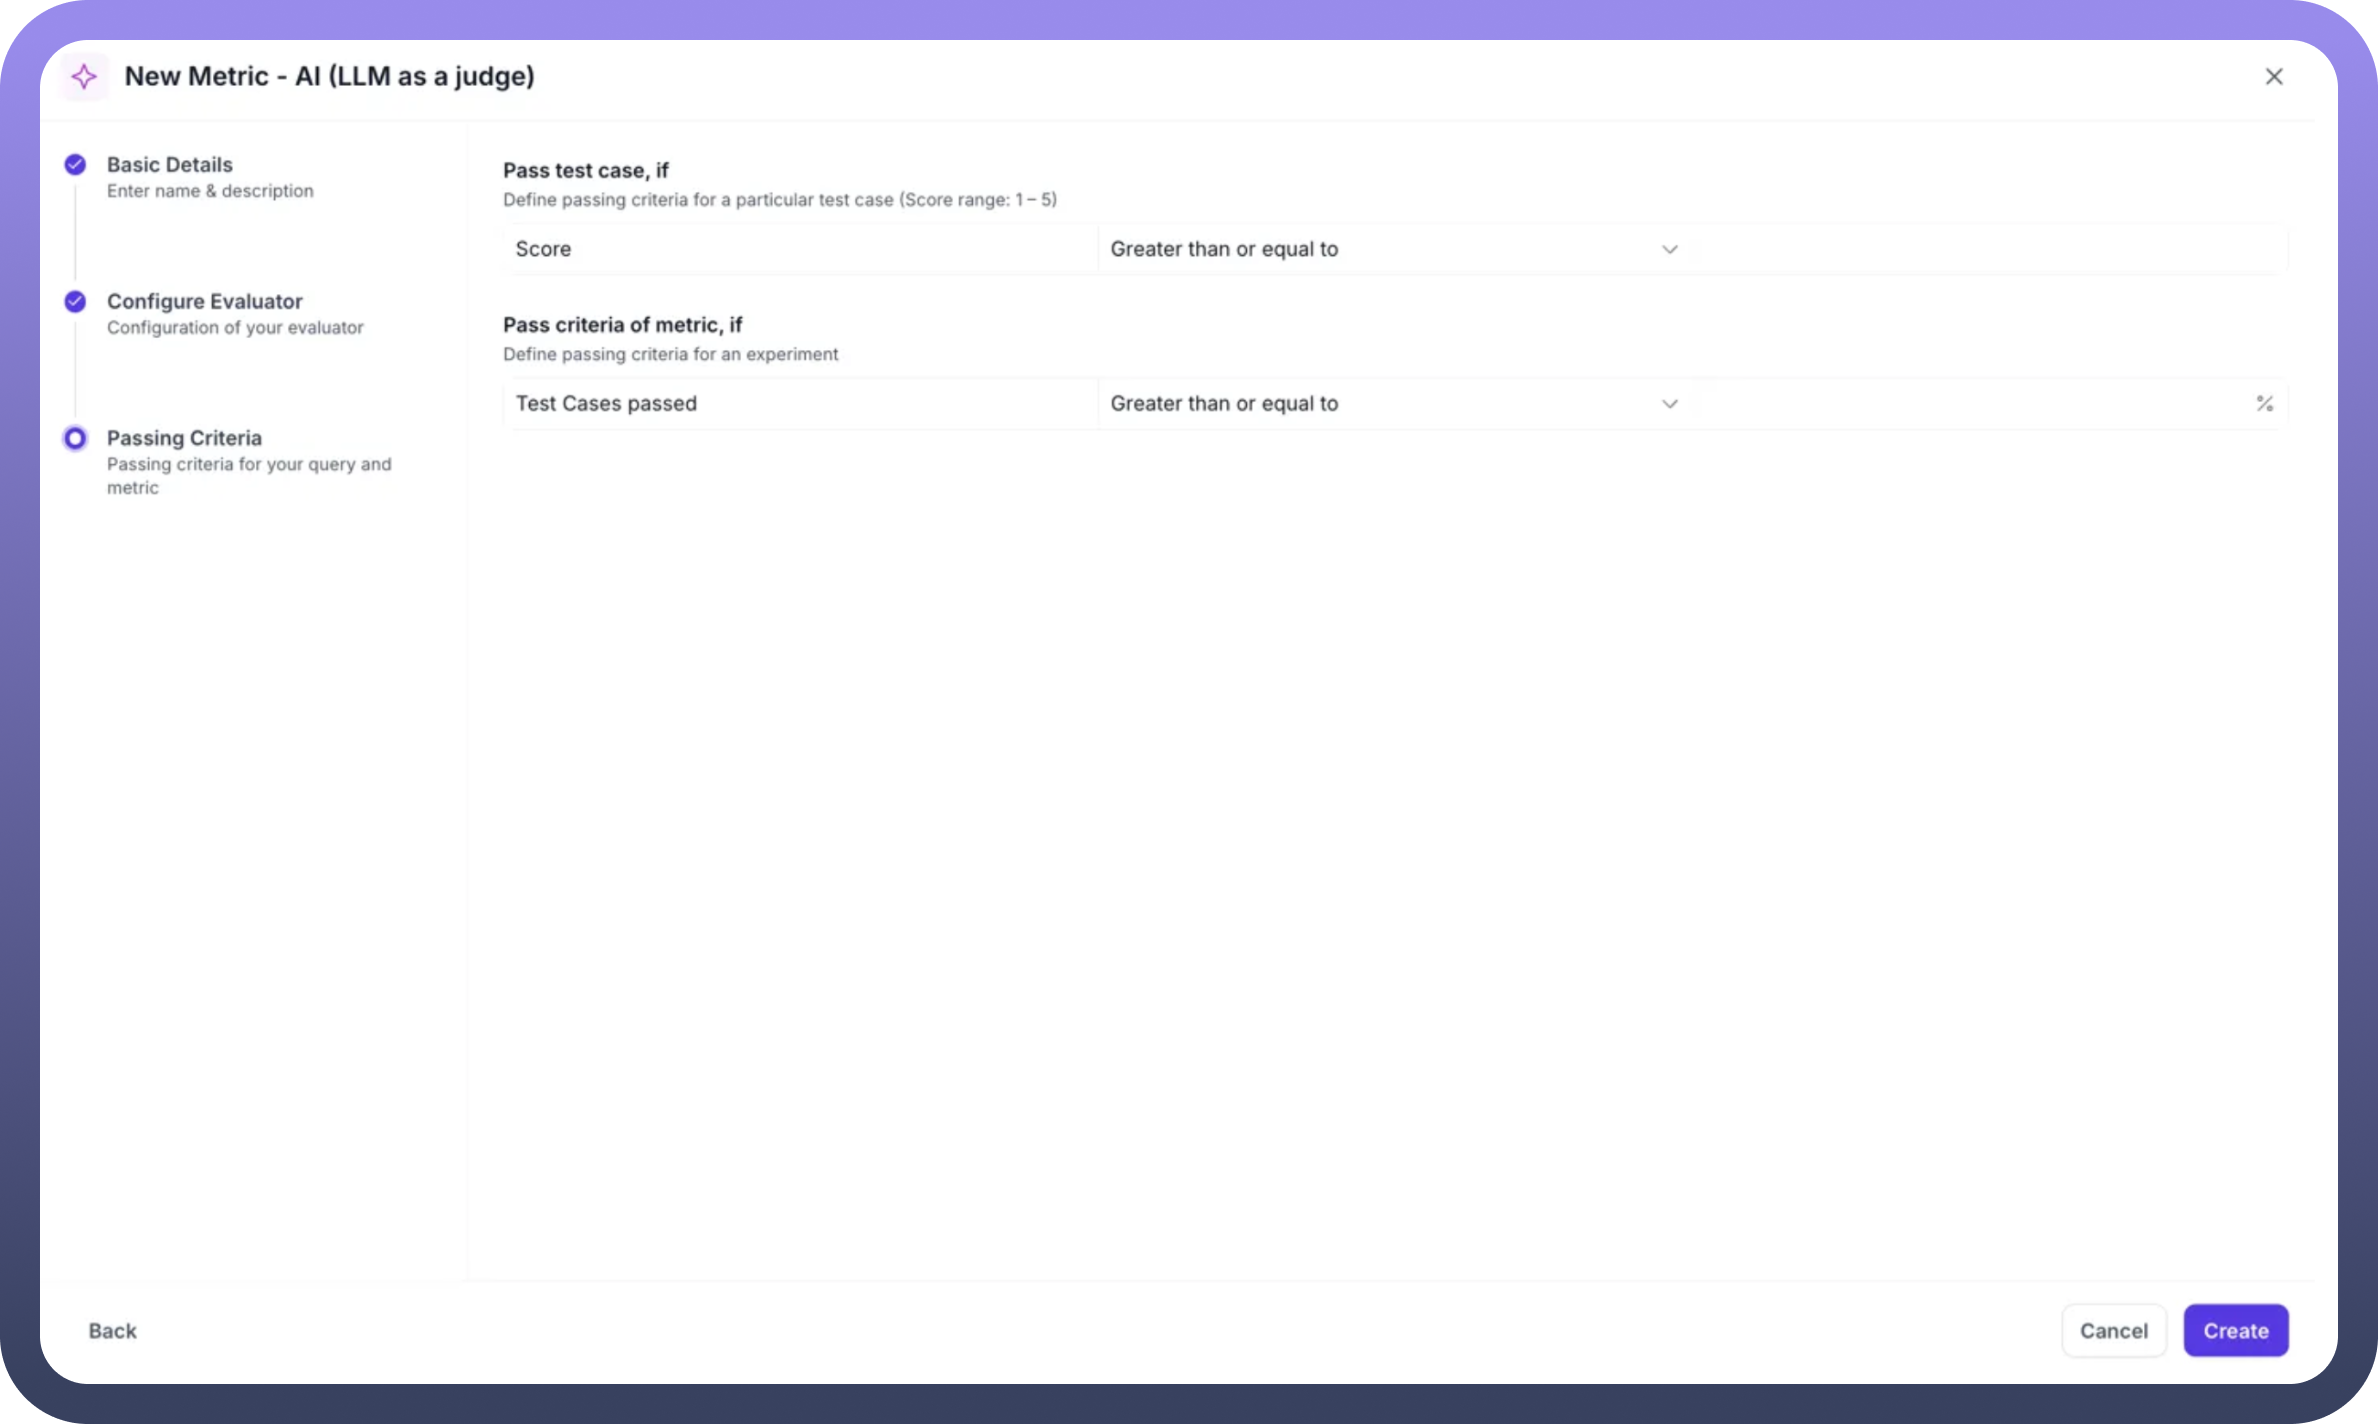
Step 5: Set Passing Criteria Define two levels of success criteria:
Individual Test Case Criteria:
Score Threshold: Set minimum score for a test case to passOperator: Choose "Greater than or equal to"Value: Set threshold (e.g., 4 for a 1-5 scale)
Experiment-Level Criteria:
Test Cases Passed: Percentage of test cases that must passOperator: Choose "Greater than or equal to"Percentage: Set threshold (e.g., 75%)
Example: Answer Relevancy Metric Setup
Name: "Answer Relevancy"Description: "Answer Relevancy measures the proportion of text generated in the agent actual output that are relevant to the input"Parameters Selected: Input, Expected Output, ContextAutomation: "metric eval aut" (pre-configured workflow)Scale: 1 to 5Test Case Pass: Score ≥ 4Experiment Pass: 75% of test cases passing
Your selected automation workflow will:
Receive the configured parameters as inputs
Execute custom evaluation logic
Return a numerical score within your defined range
Optionally provide reasoning for the score
The metric framework handles:
Parameter passing to your automation
Score validation against your scale
Pass/fail determination based on criteria
Aggregation for experiment-level results
Testing Your Automation Metric
Once created, use the Test Metric interface:
Enter sample values for your selected parameters
Click
Runto execute the evaluationReview the returned score and pass/fail status
Iterate on your automation logic if needed
Best Practices for Automation Metrics
Parameter Selection: Only choose inputs your automation actually uses
Clear Descriptions: Document what your metric measures and how
Appropriate Scales: Use ranges that provide meaningful differentiation
Realistic Thresholds: Set passing criteria based on actual performance needs
Automation Validation: Test your automation separately before creating the metric
Common Use Cases for Automation Metrics
Technical Validation:
API response format checking
Data structure validation
Performance benchmarking
Business Rule Compliance:
Policy adherence verification
Brand guideline checking
Regulatory compliance validation
Complex Calculations:
Multi-factor scoring algorithms
Weighted evaluation criteria
Statistical analysis of responses
By leveraging both AI-powered and automation-based evaluation methods, UnifyApps provides the flexibility to assess every aspect of your AI Agent's performance. Whether you need nuanced language evaluation or precise technical validation, the platform's dual approach ensures comprehensive quality assurance for your AI deployments.