
Amazon Athena is a serverless interactive query service that allows you to analyze data in Amazon S3 using standard SQL.
Integrating it with your application enhances data querying efficiency and provides powerful insights from your S3-stored data.
Authentication
Before you begin, make sure you have the following information:
Connection Name: Choose a meaningful name for your connection. This name helps you identify the connection within your application or integration settings. It could be something descriptive like "MyAppAmazonAthenaIntegration."Authentication Type: Select the type of authentication for connecting to your Amazon Athena account:IAM Role
Access Key
Access Key-Based Authentication
For Access Key-based authentication, you'll need to perform the following steps to generate access credentials:
Login to the AWS Management Console
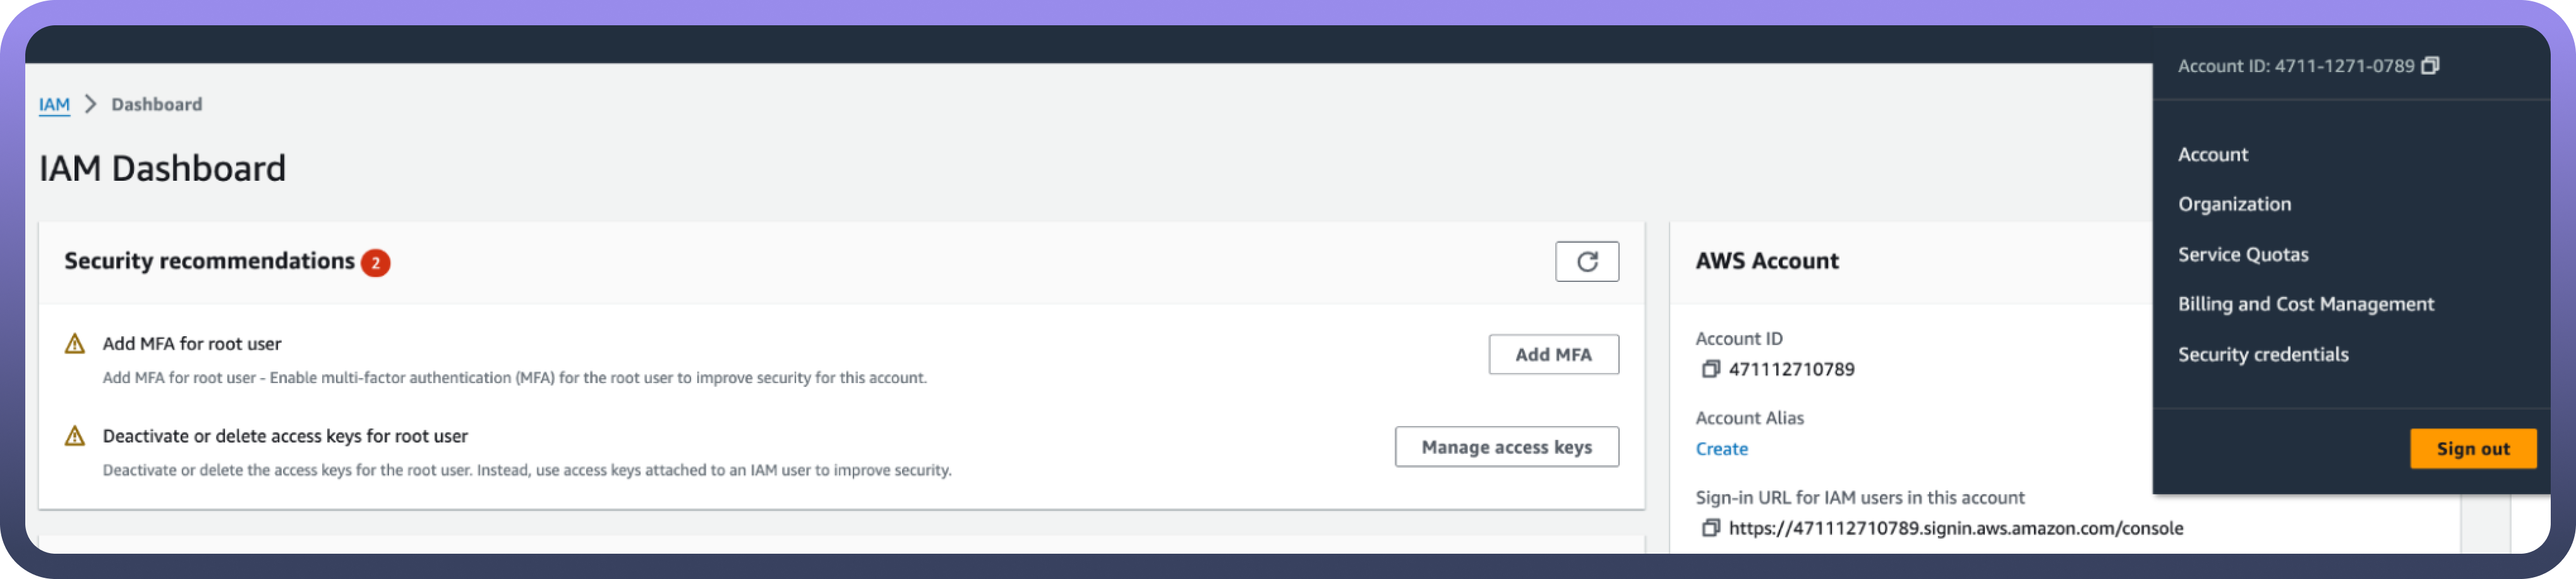
Go to AWS Console.
Create a new user
Search for
Usersin the top search bar of the AWS Console homepage.Click
Create Userat the top right corner.
Assign necessary permissions
Attach the
AmazonAthenaFullAccessandAmazonS3ReadOnlyAccesspolicies directly to the user. This ensures the user can query Athena and access the necessary S3 data.
Create Access Key
Once the user is created, click the username, navigate to the
Security credentialssection, and click theCreate access key.Use "
Command Line Interface" as the use case for the access key.Provide a description tag for the key and click
Create access key.
Store Access Credentials Securely
Store the
Access KeyandSecret Access Keysecurely, as they will allow access to your Athena account.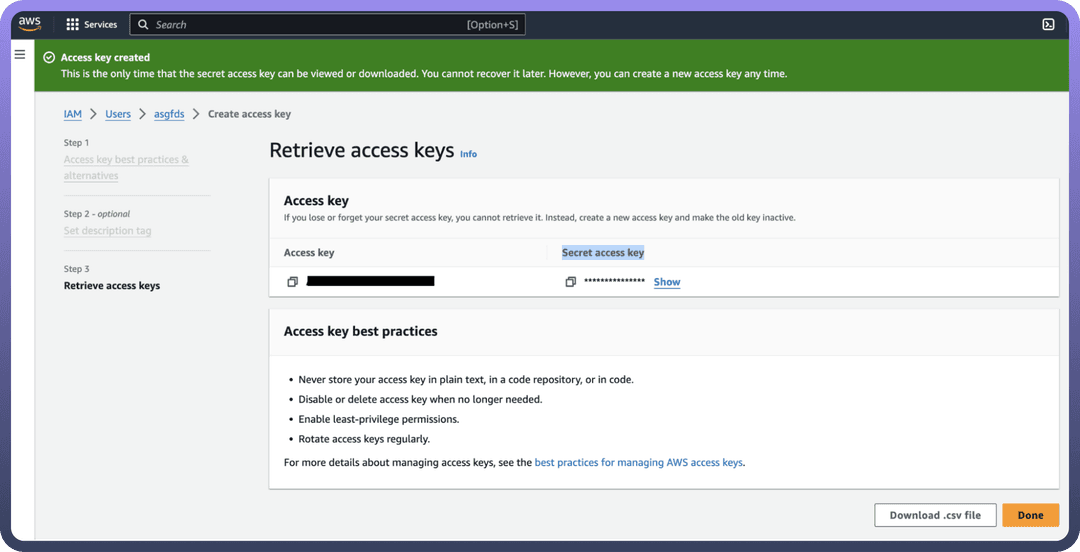
IAM Role-Based Authentication
For IAM Role-based authentication, follow these steps to set up an IAM role and grant the necessary permissions for Athena:
Login to AWS Management Console
Go to AWS Console.
Create an IAM Role
Navigate to the IAM dashboard by searching
IAMin the search bar.Select
Rolesfrom the left-hand menu, and click onCreate role.
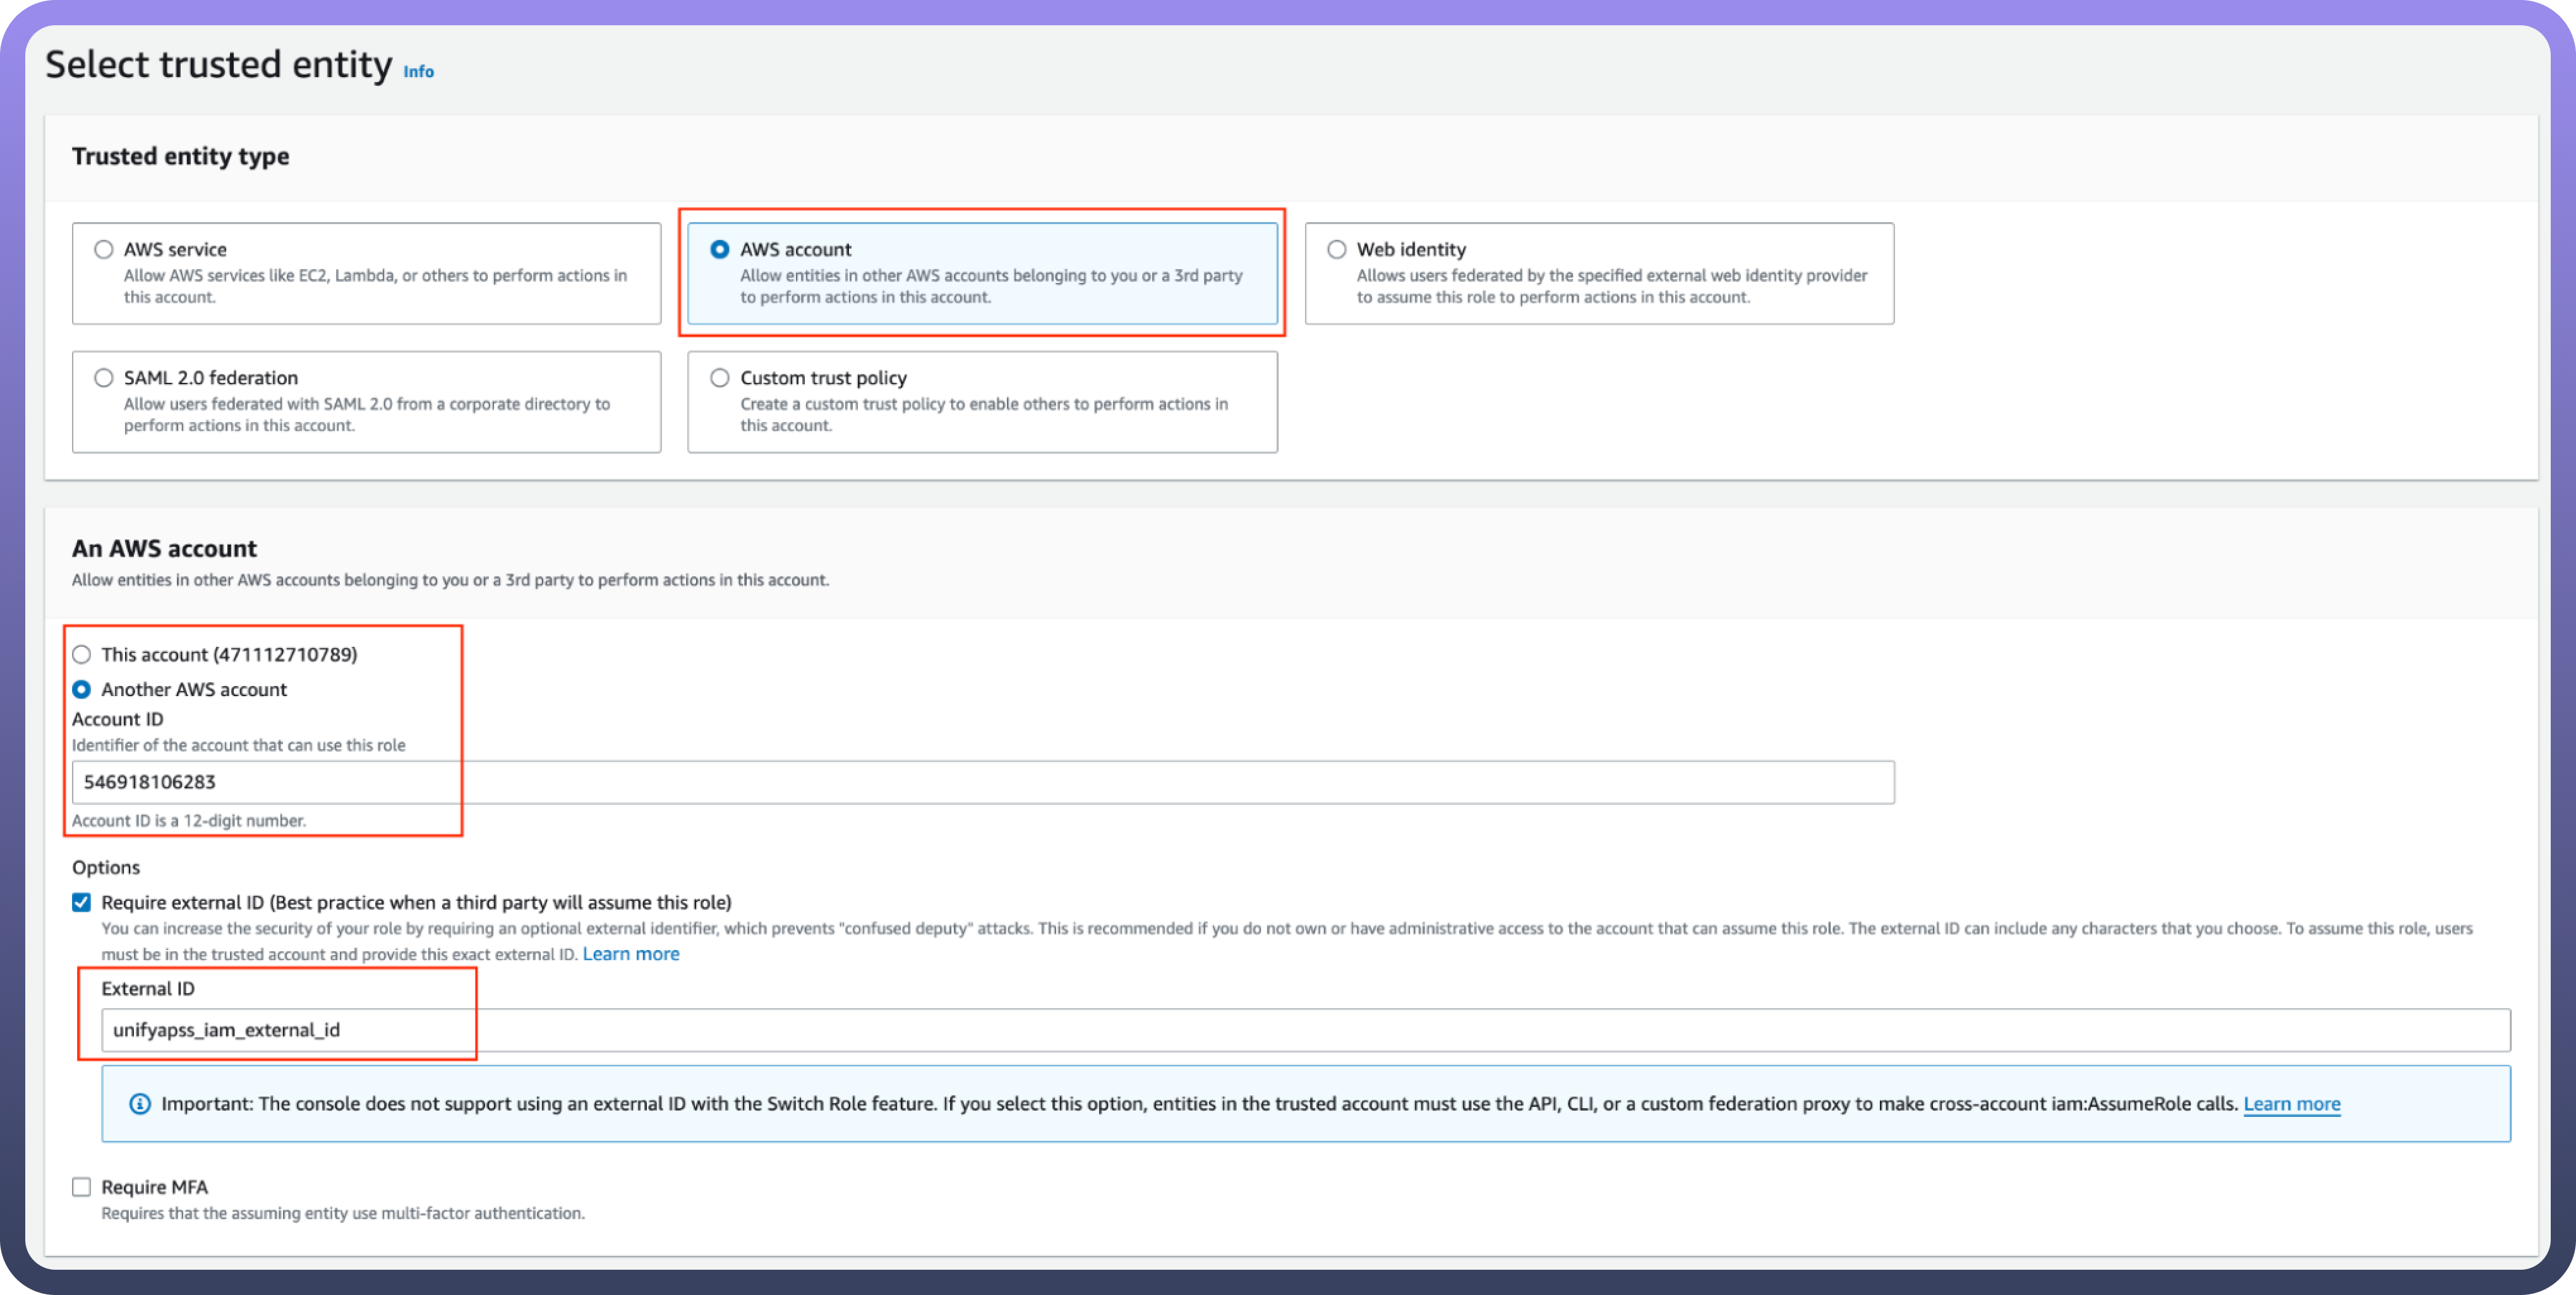
Trusted Entity
Under the
Trusted entity type, chooseAWS account.Select
Another AWS accountand input theUnifyApps AWS account ID(contact UnifyApps support to obtain this).Check the
Require external IDbox and enter theExternal IDprovided by UnifyApps.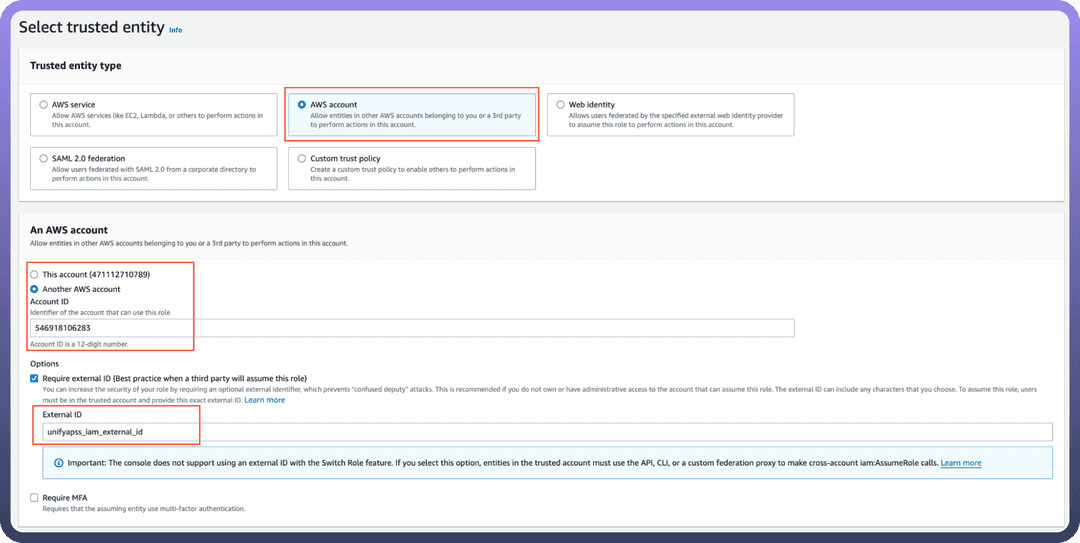
Assign Permissions to the Role
Attach the
AmazonAthenaFullAccesspolicy to the role. This will allow Athena queries.Attach
AmazonS3ReadOnlyAccessif the role needs to query data in S3.
Configure the Role
Provide a role name and description, and then click
Create role.
Create an IAM permissions policy
Go to the AWS Console and open the IAM console- https://console.aws.amazon.com/iam
Navigate to Access Management and select Policies.
Choose Create Policy.
Locate and choose the AWS service that UnifyApps will access.
Select the required permissions under the Actions field.
Define the resources that the role will have access to.
Continue clicking Next until you reach the Review policy page.
Provide a Name for the policy.
Click Create policy once done.
Retrieve IAM Role ARN
To retrieve the IAM Role ARN for connecting Athena:
Go to the AWS Console
Open the IAM console: IAM Console.
Locate Role
Navigate to
Rolesand search for the IAM role you created for Athena.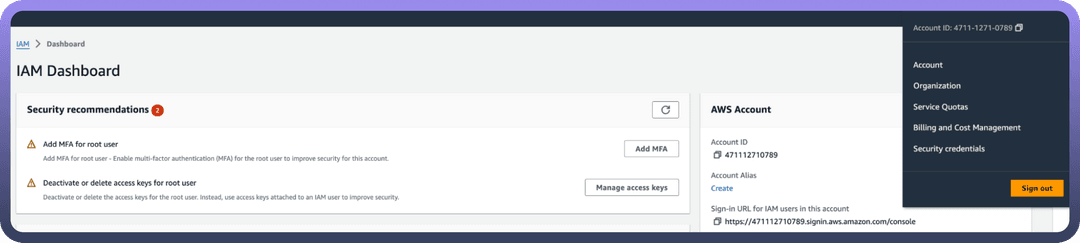
Copy the ARN
Select the role and copy the
Role ARN. This ARN will be used to configure the connection in UnifyApps.
Actions Supported
The following actions are supported in Amazon Athena:
| Action | Description |
Create Data Catalog | Creates a new data catalogue in Amazon Athena. |
Create Work Group | Creates a work group in Athena to manage queries and resources. |
Get Database | Retrieves a database object from Amazon Athena. |
Get Query Result | Fetches the results of a previously executed query. |
List Databases | Lists all available databases in Athena. |
Start Query Execution | Runs SQL queries against the data in Amazon S3. |
Stop Query Execution | Stops an ongoing query execution in Amazon Athena. |