
Okta is an identity and access management platform that provides secure authentication and user management.
Integrating it with your application improves security by offering seamless single sign-on (SSO) and robust access controls.
Authentication
Before you begin, make sure you have the following information:
Connection Name: Choose a meaningful name for your connection. This name helps you identify the connection within your application or integration settings. It could be something descriptive like "MyAppOktaIntegration".Authentication Type: Okta supports three authentication methods: token-based authentication, Authorisation code grant-based authentication and Client credentials-based Authentication.Okta Domain: Enter your Okta domain name. This can be found in your Okta URL (e.g., mycompany.okta.com).
Token-based Authentication
To generate an API token in Okta, follow these steps:
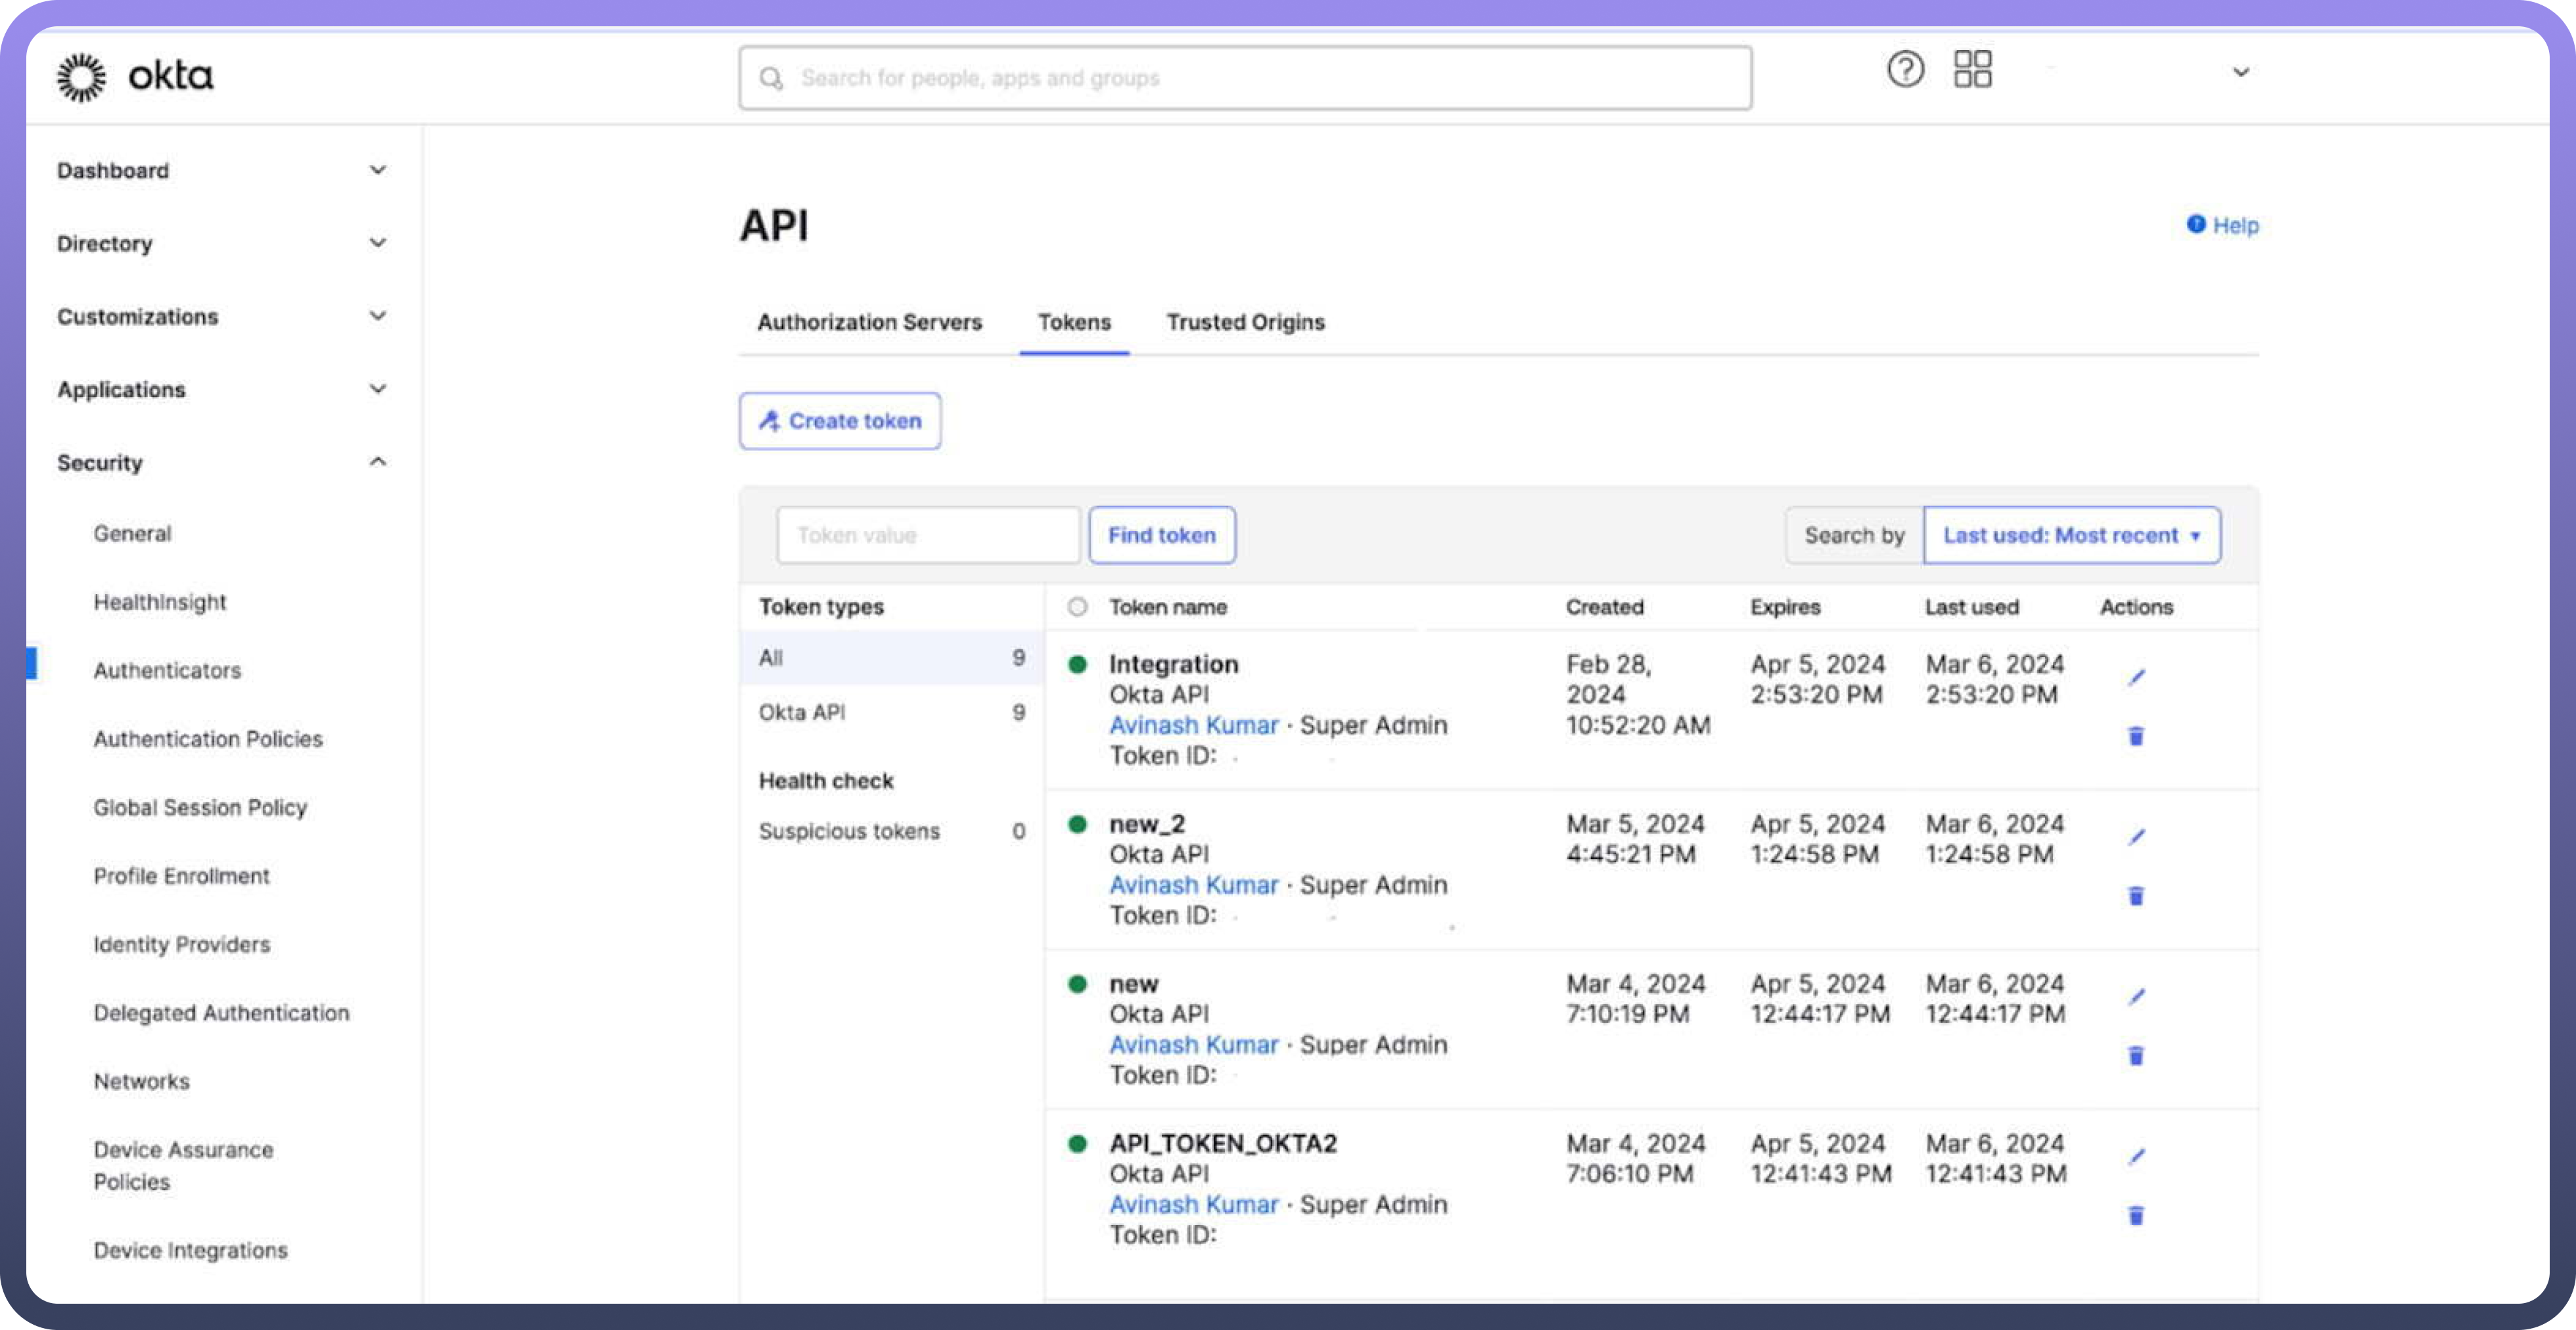
Log in to the
Okta Admin Consoleusing an administrator account with the required permissions.On the left-hand side, expand the
Securitysection.From the dropdown menu, select
APIto access the API management page.Navigate to the
Tokenstab.Click
Create Tokento initiate the creation of a new token.Enter a
namefor the token for future identification.After creating the token, ensure you copy the token value and paste it into the
API tokensection in UnifyApps to establish the connection between UnifyApps and Okta.
Authorisation code grant-based authentication
We must create a client ID and client secret to configure the Authorisation code grant with Okta. Follow these instructions to create them:
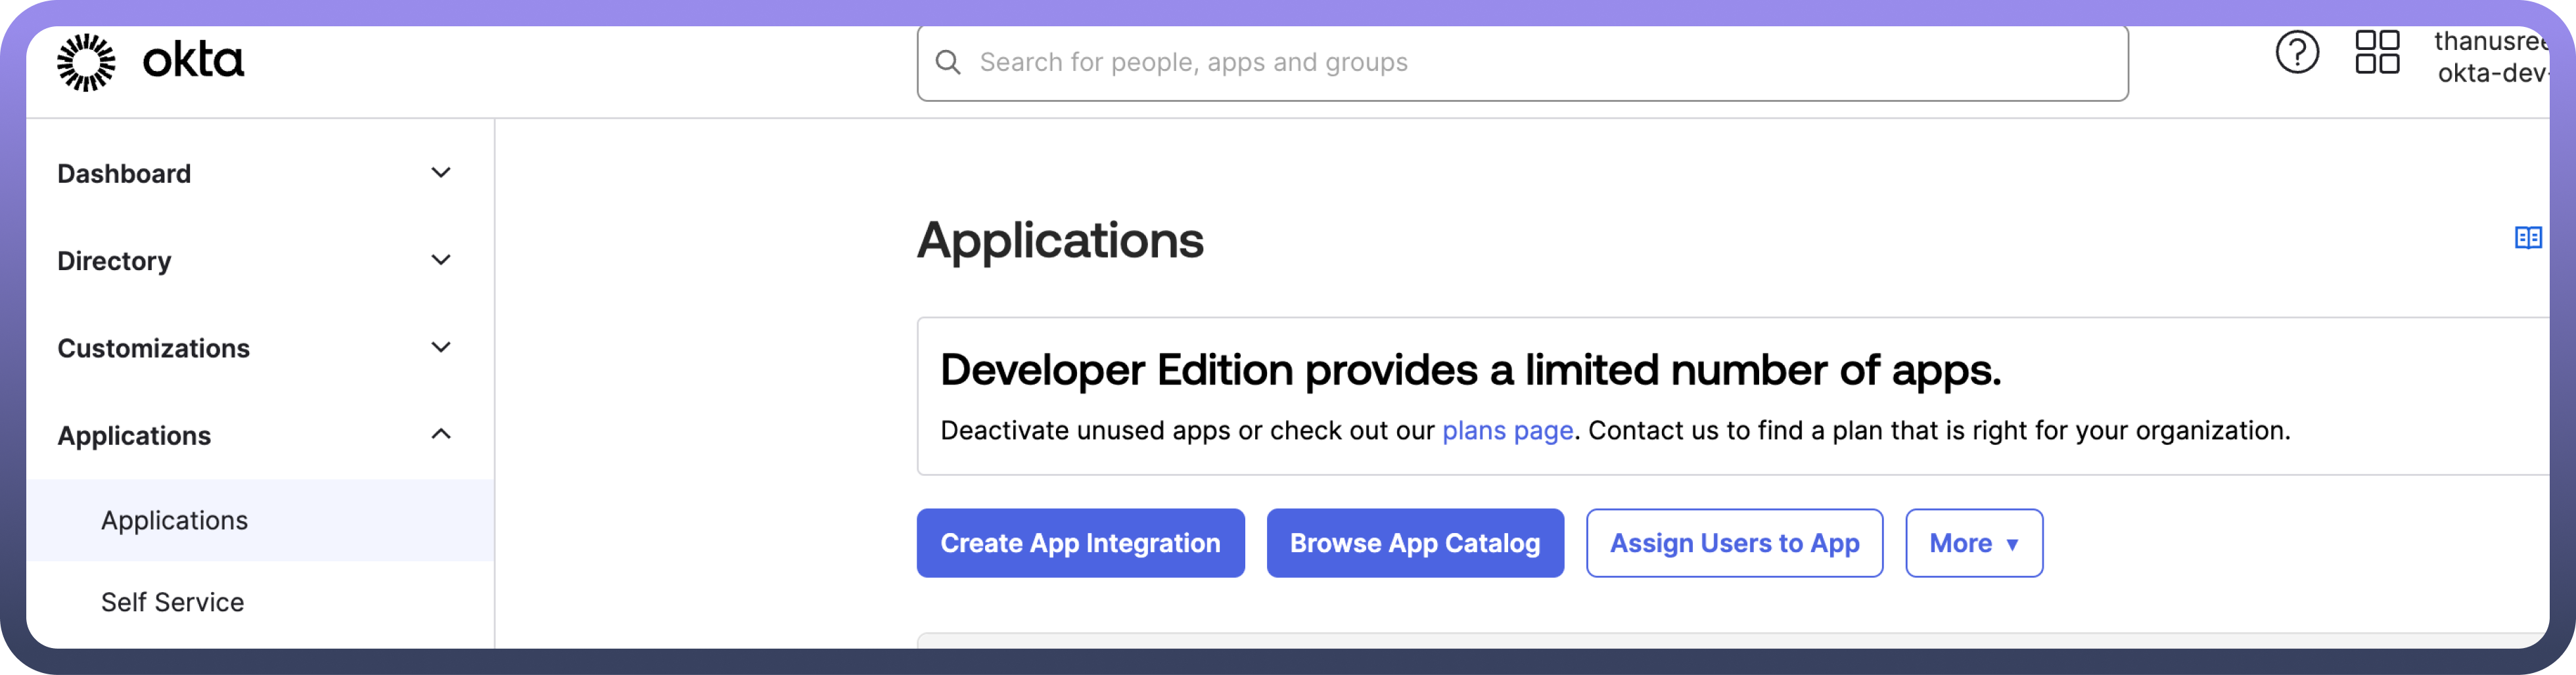
Sign into your Okta organisation using your administrator account.In the
Admin Console, navigate toApplications>Applicationsfrom the left-hand menu.Click on
Create App Integrationto begin creating a new app.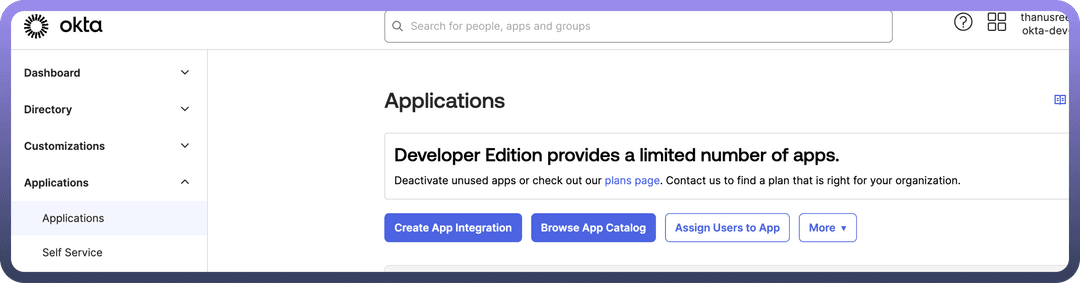
Select
OIDC- OpenID Connectas the sign-in method on the Create a New App integration page.For the application type, choose
Web Application. This is a straightforward way to test OAuth 2.0-based access to Okta APIs using bearer tokens.Provide a
namefor your app integration and ensure that theAuthorization Codegrant type is selected (it’s mandatory and pre-selected by default).In the
Sign-in redirect URIsfield, specify the callback location where Okta will return the user and token post-authentication.Optionally, in the
Assignmentssection, you can limit access by adding specific groups or skip this for now.Click
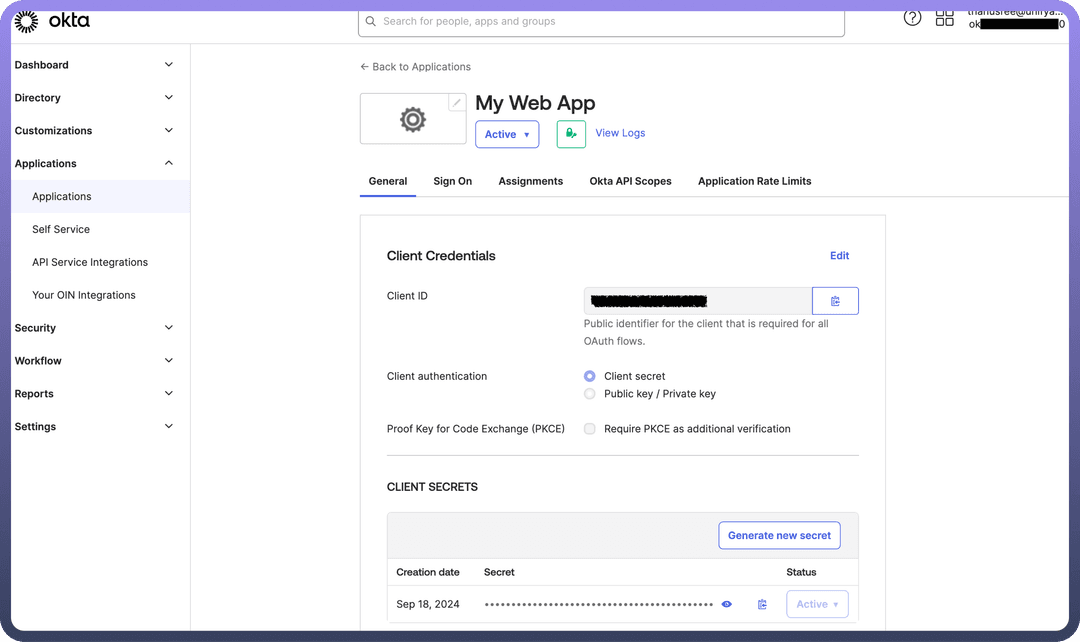
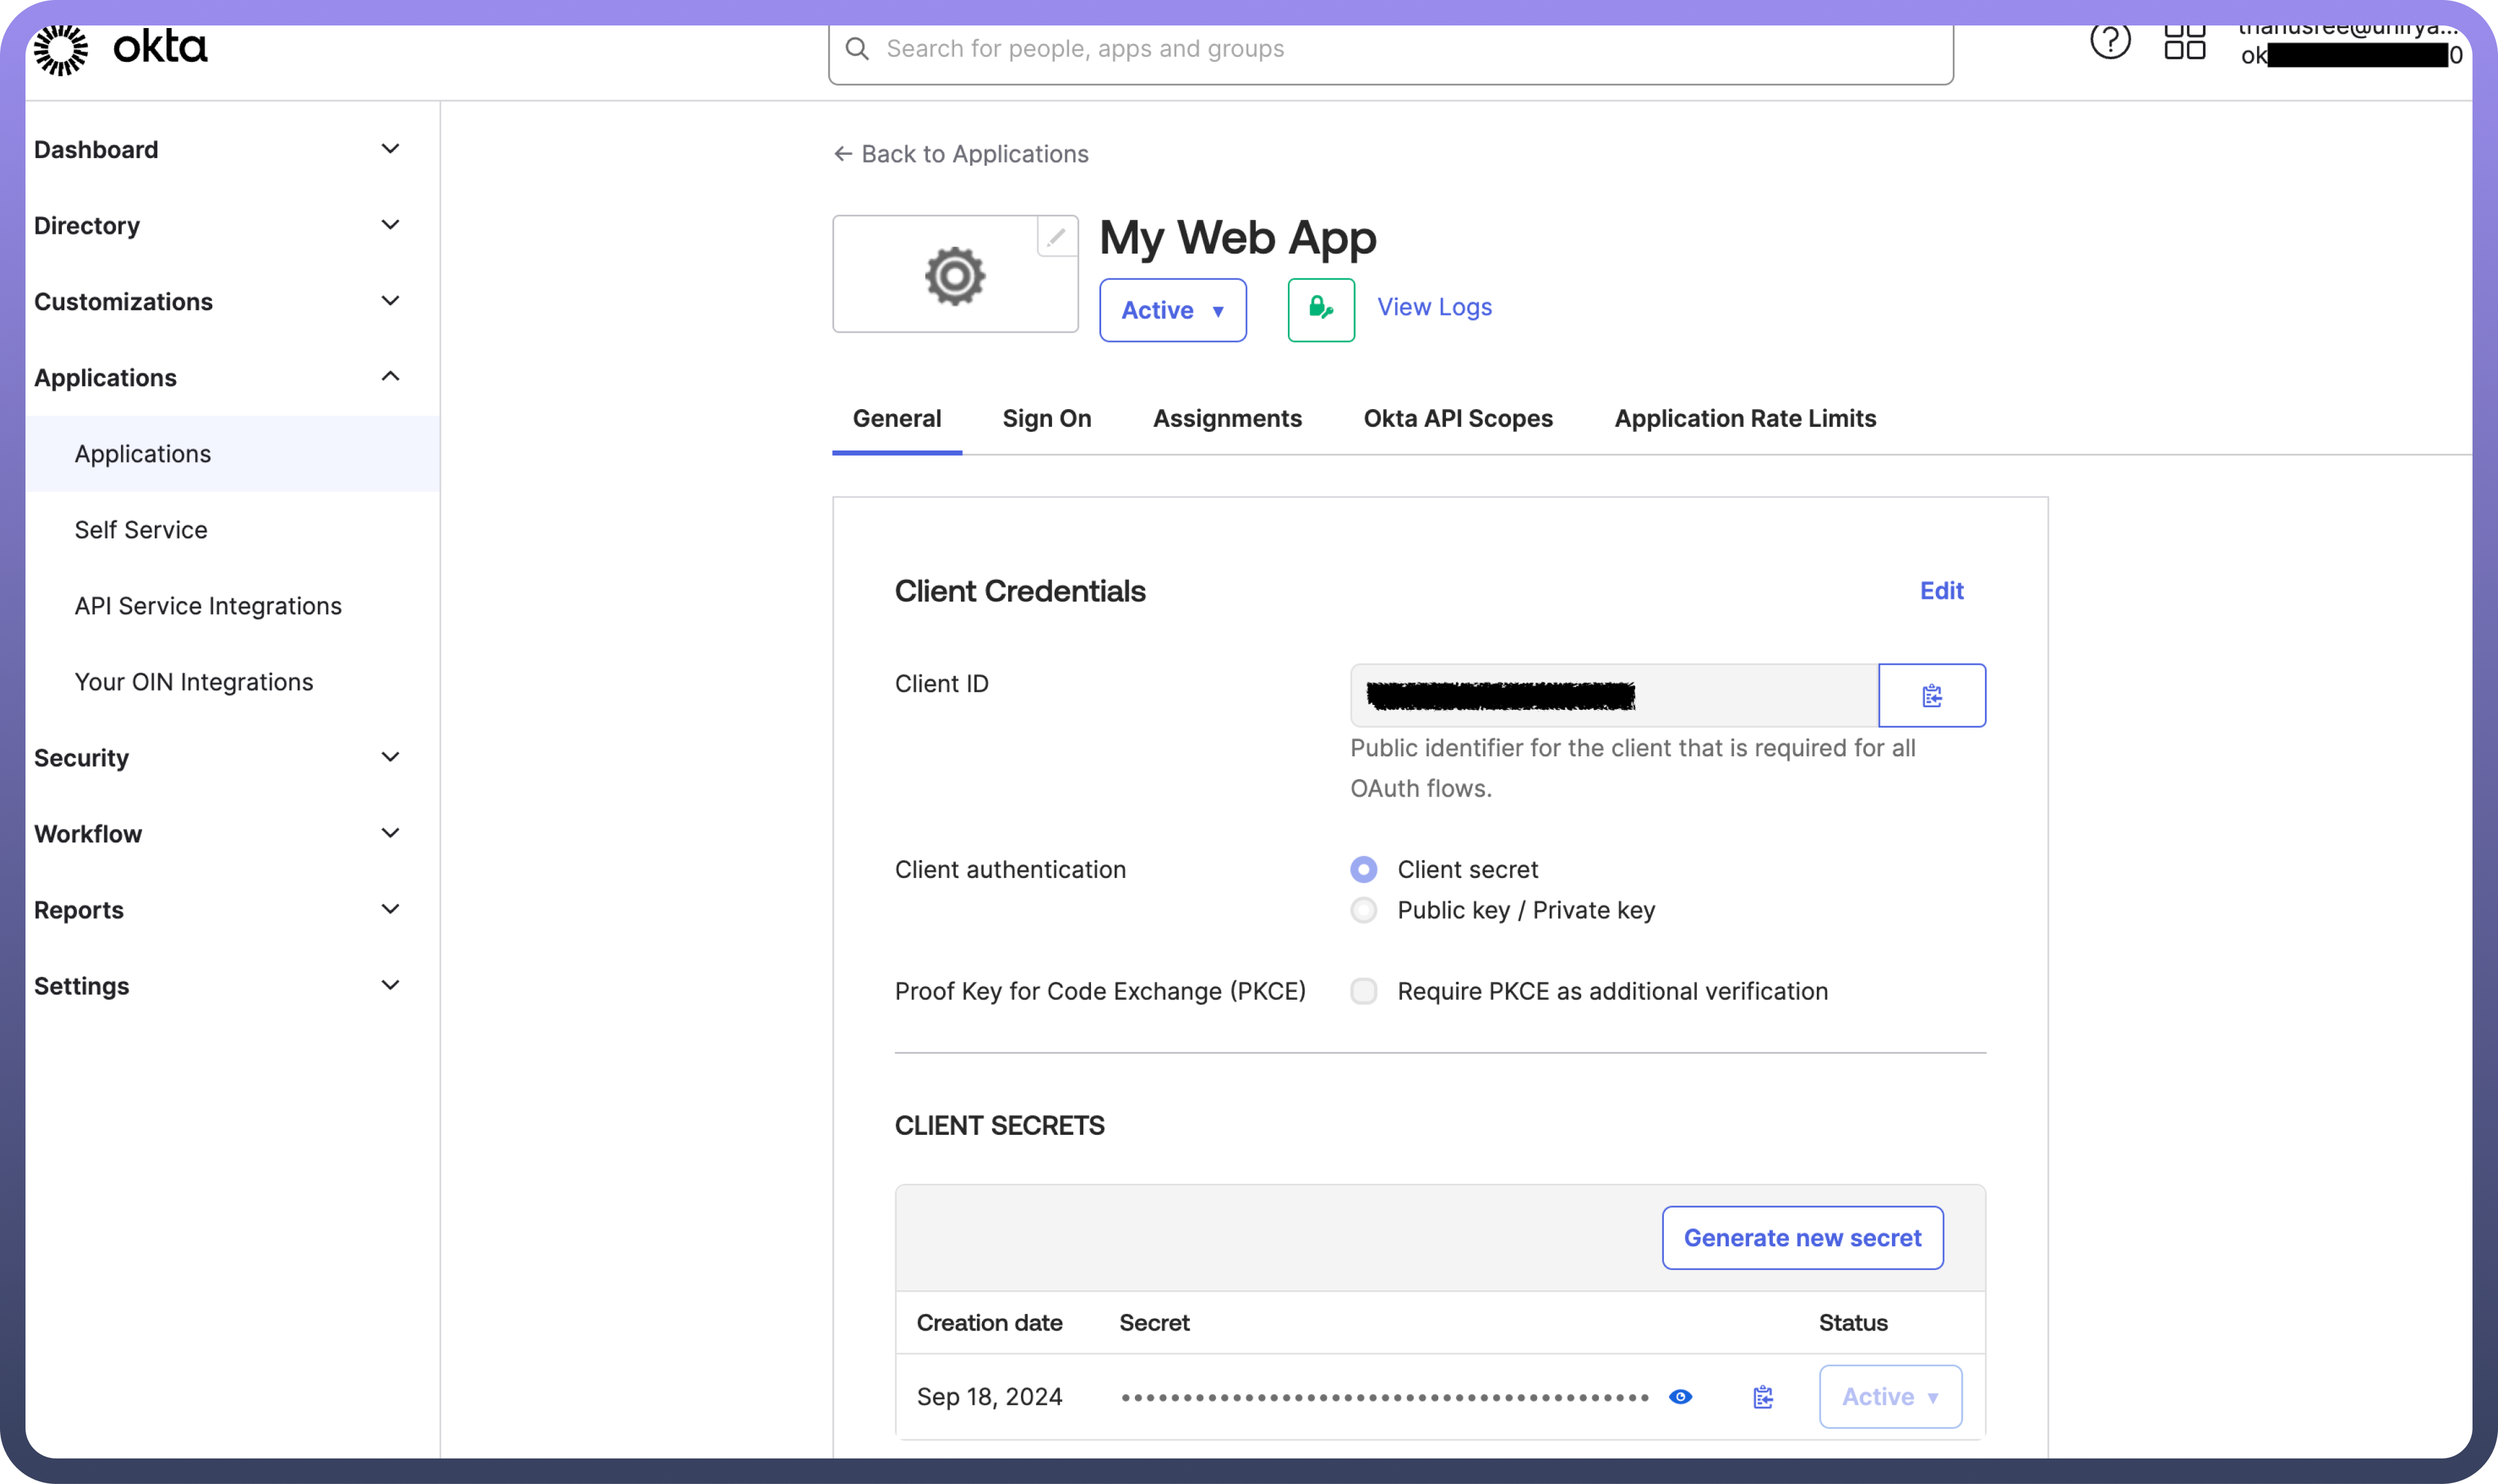
Save, and your app integration will be created. TheClient IDandClient Secretare listed under theClient Credentialssection.
This process helps configure the client app, which can be used to securely authenticate and interact with Okta’s APIs.
Client credentials-based Authentication
To configure the client credentials-based authentication method with Okta, please follow these steps:
Log In: Access your Okta organisation with an administrator account.
Navigate to Applications: In the Okta Admin Console, go to
Applicationsand selectApplicationsagain.Create App Integration: Click
Create App Integrationto start the setup process.Choose Sign-in Method: On the new app integration page, select
API Servicesas the sign-in method.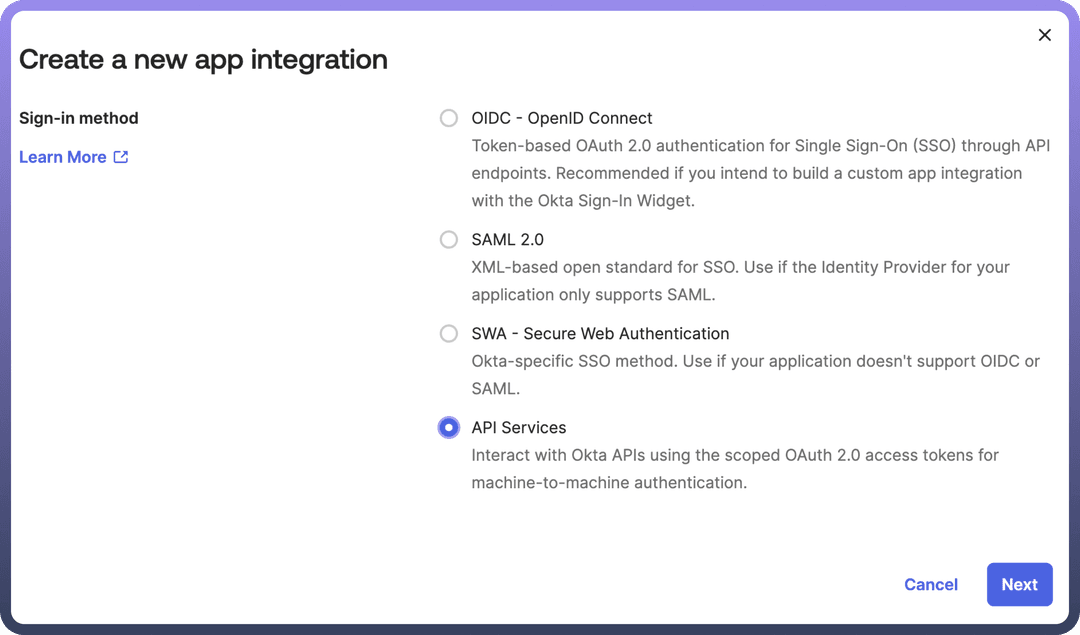

App Integration Name: Enter a meaningful name for your app integration, then click
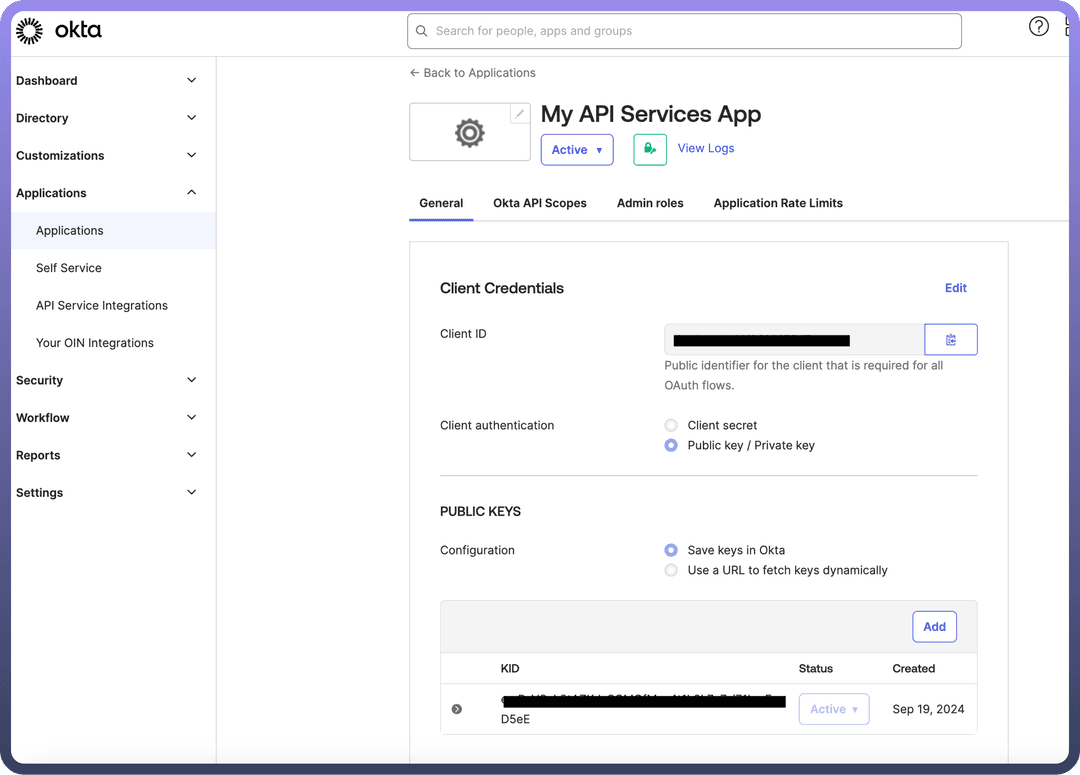
Save.Copy Client ID: In the General tab of the newly created app integration, copy the
Client ID.Edit Client Authentication: Select
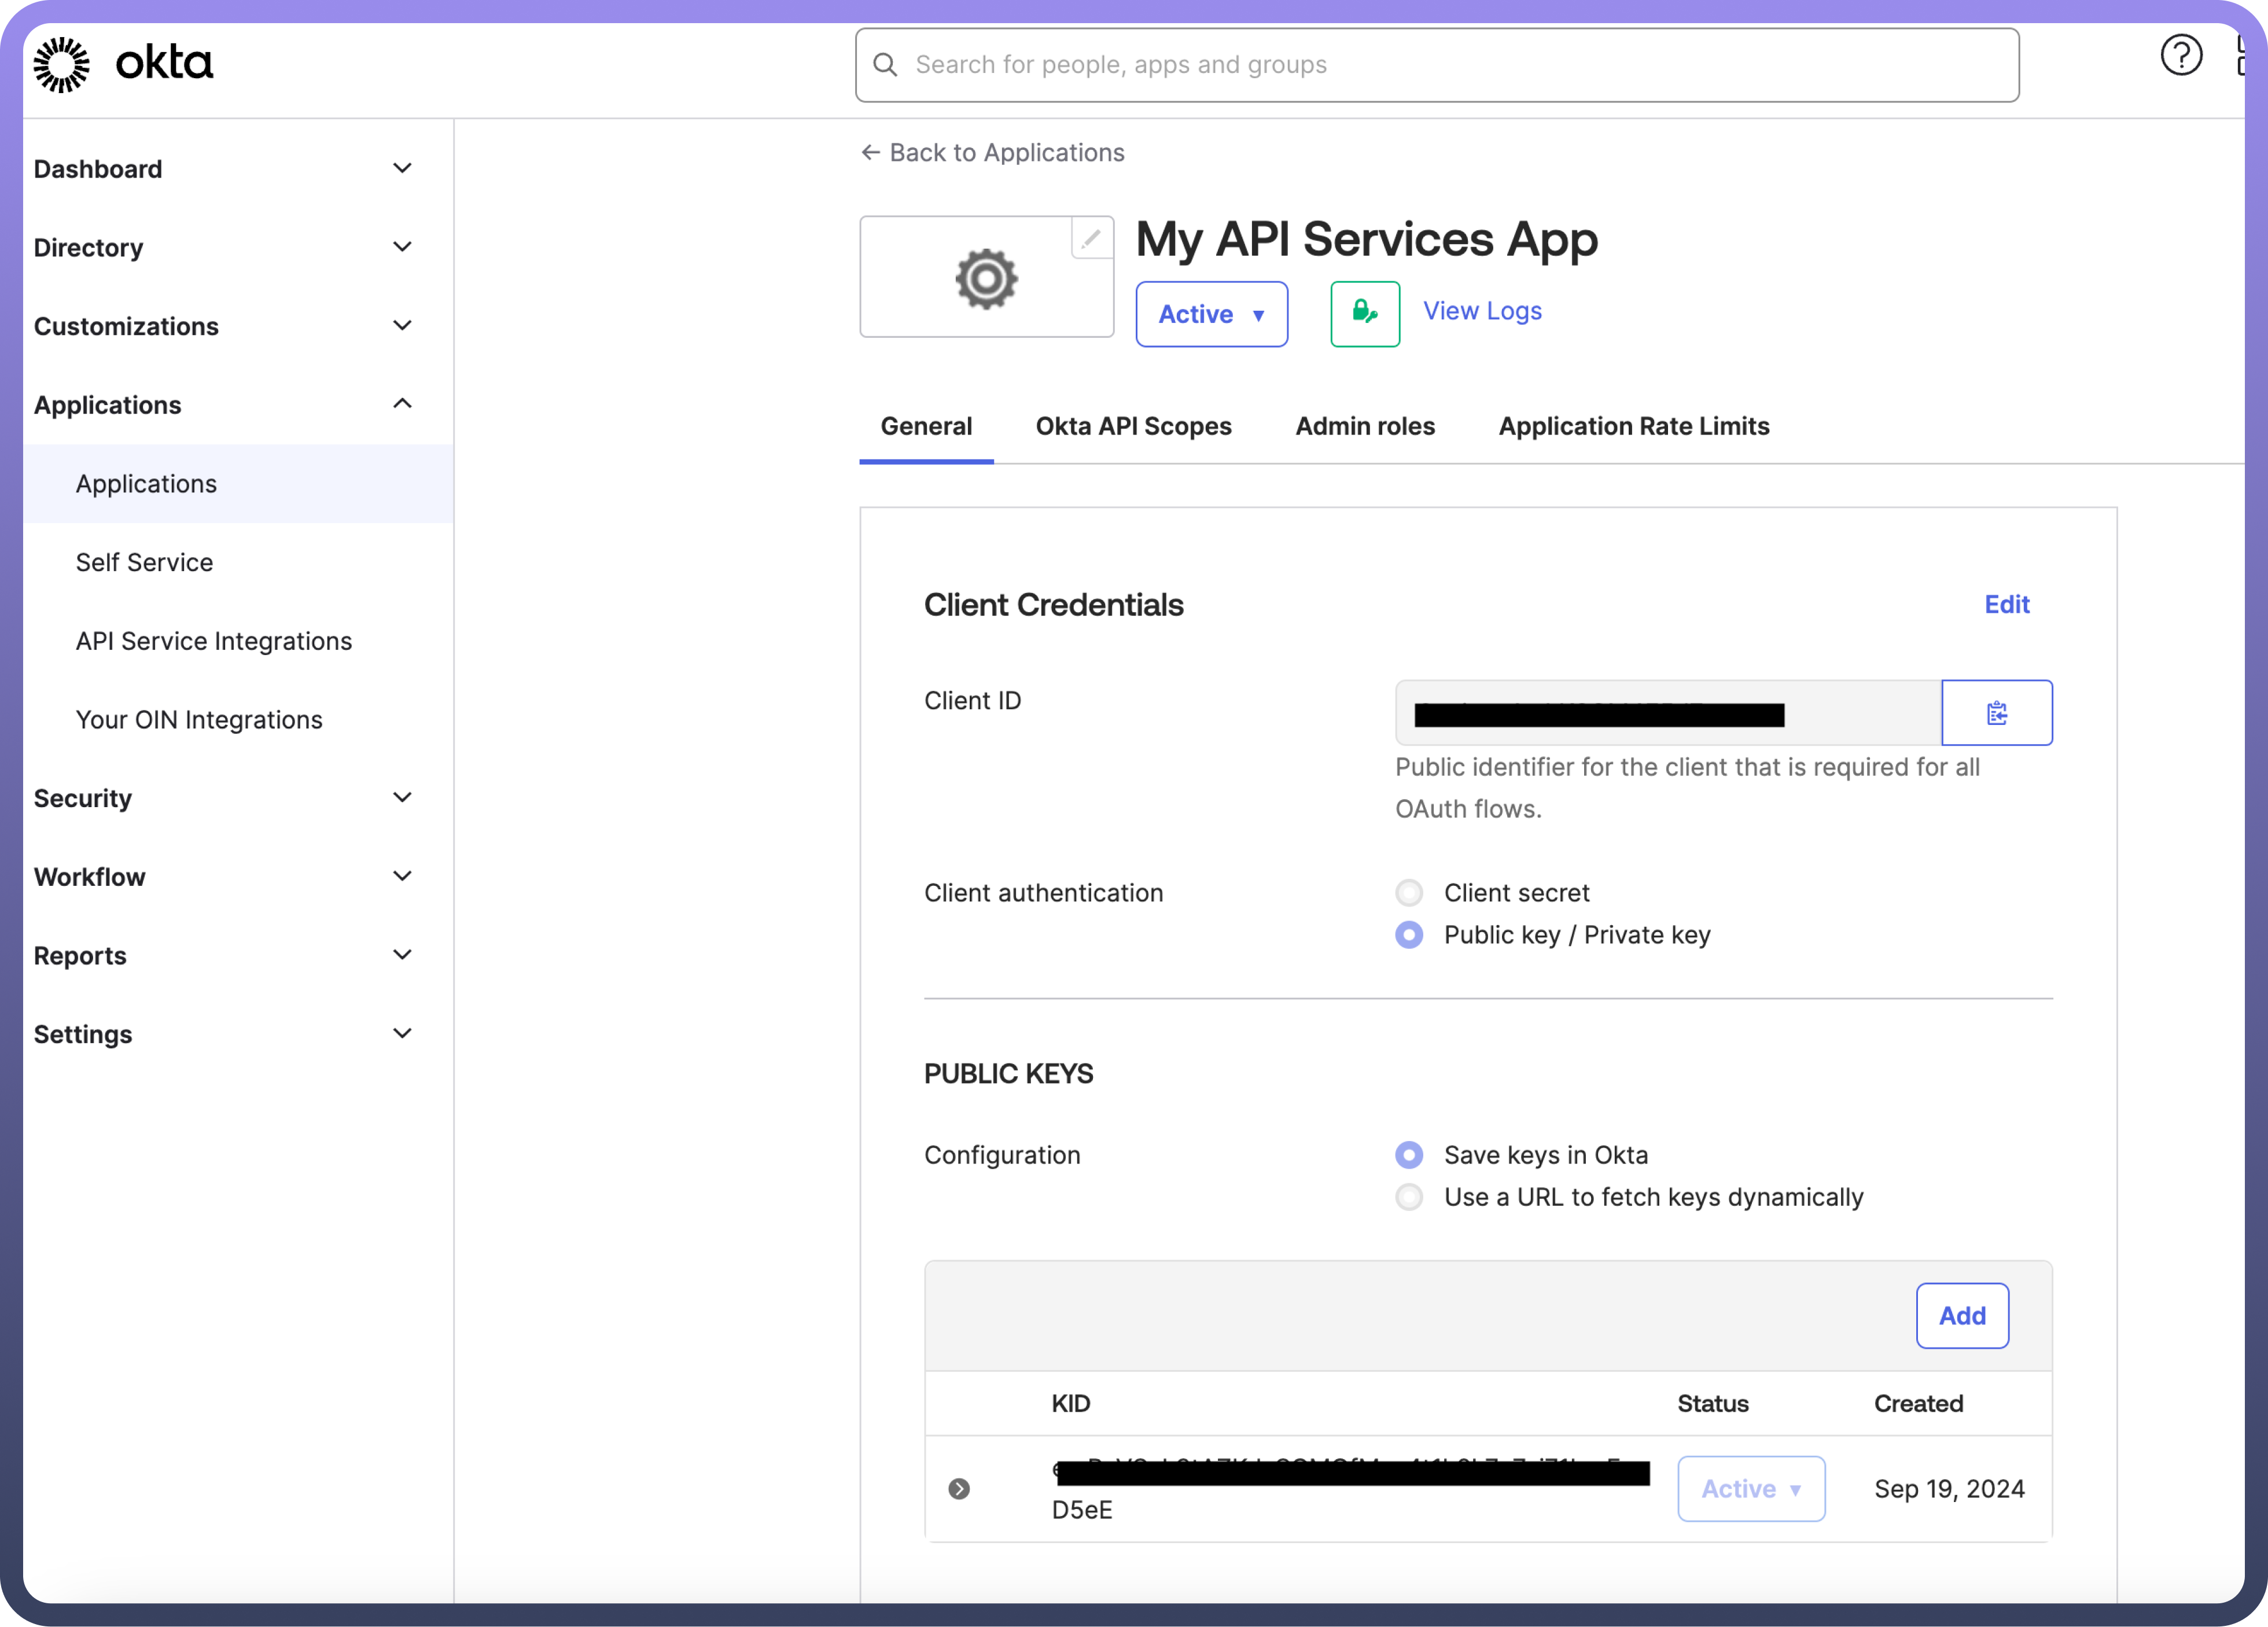
Editand choose thePublic / Private keyin the Client authentication field.Add Public Key: Click on
Add keyin thePUBLIC KEYSsection.Generate Key Pair: In the
Add a Public Keysection, selectGenerate a new keyto create a key pair.Copy Private Key: Choose
PEMin the Private key section and copy the private key for use in your connection settings, noting that it cannot be retrieved later.Finalise Key Addition: Click
Doneto finish adding the key.Save Changes: Return to the General tab and select
Saveto activate the key. Confirm by selecting Save again if prompted that existing client secrets will no longer be used.Assign API Scopes: Navigate to the
Okta API Scopestab and assign the necessary scopes. At a minimum, include okta.logs.read and okta.schemas.read for proper access.
To successfully create a connection, paste the Client ID, private key, and KID value from the public key.
Granular Permissions
OAuth 2.0 Scopes
| Scope | Description |
address | Requests access to the address claim |
device_sso | Requests a device secret used to obtain new tokens without re-prompting the user for authentication. See Native SSO |
email | Requests access to the email and email_verified claims |
groups | Requests access to the group claim |
offline_access | Requests a refresh token used to obtain new access tokens without re-prompting the user for authentication |
okta.clients.manage | Allows the app to manage clients in your Okta organisation |
okta.clients.read | Allows the app to read information about clients in your Okta organisation |
okta.clients.register | Allows the app to register new clients in your Okta organisation |
okta.universalLogout.manage | Allows an admin or a service to initiate Universal Logout and revoke all tokens and sessions for a user |
okta.workflows.invoke.manage | Allows the app to trigger an OAuth 2.0-protected flow |
openid | Identifies the request as an OpenID Connect request |
phone | Requests access to the phone_number and phone_number_verified claims |
profile | Requests access to the end user's default profile claims |
Actions
| Action Name | Description |
Activate user | Activate a user in Okta |
Add user to group | Add an existing user to a group in Okta |
Create user | Create a new user in Okta |
Update user | Update user details in Okta |
Deactivate user | Deactivate a user in Okta |
Delete user | Delete a user in Okta |
Expire an existing user password | Expire an existing user's password in Okta |
Get group members | Retrieve the list of members in a group in Okta |
Get groups by name | Retrieve groups by name in Okta |
Get recent logon events by IP address | Retrieve recent logon events by IP address in Okta |
Get user groups | Retrieve the groups a user belongs to in Okta |
Remove user from group | Remove an existing user from a group in Okta |
Reset user password | Reset a user's password in Okta |
Search Users | Search for users in Okta |
Suspend user | Suspend a user in Okta |
Unsuspend user | Unsuspend a user in Okta |
Get user by ID | Retrieve a user by their ID in Okta |
List applications assigned to user | List applications assigned to user in Okta |
Reset forgotten user password | Retreive password reset link when user has forgotten his password in Okta |
Triggers
| Trigger Name | Description |
New events (real-time) | Triggers immediately when a new event is created in Okta |
New events | Triggers when a new event is created in Okta |
Scheduled event search using filter | Search for system log events on a specified schedule and returns as lists of events |