


A page template is a complete page saved as a reusable blueprint. It captures the full page as it was when published: every region, every block, layout settings, page variables, and connected data sources. When a new page is started from a template, it receives a deep copy of all of that content — a ready-to-edit starting point that already reflects your team's patterns and design standards.
Templates aren't limited to pages. You can also create Module templates from the template library. See Module Templates below.
Note: A page template is a blueprint used once at creation time. After a page is created from it, the two are independent — changes to the template do not flow to pages already built from it. A template component is different: it is a reusable component that pages embed and keep referencing live. Do not confuse the two.
What a Template Record Stores
Every saved template holds the following information:
| Field | Description |
| Layout content | All regions, blocks, and their configuration — the complete page hierarchy as it was when the template was published. |
| Page variables | Any variables declared on the page are captured and included in the blueprint. |
| Page settings | Slug pattern, privacy setting, query parameter declarations, and other page-level settings recorded at publish time. |
| Preview images | A small thumbnail and a full-size preview. Captured from the canvas or uploaded manually. Shown in the template picker so teammates can browse visually. |
| Platform | Web or Mobile — controls which template picker the template appears in. |
| Base device | Desktop, Tablet, or Mobile — the primary breakpoint the template was designed for. Web templates only. |
| Kind | Page or Module — determines which template list the entry appears in. |
| Linked page ID | Internal reference to the page the template was originally published from. Used to route republishing back to the same template record instead of creating a duplicate. |
The Template Library
The template library is the central place to view, manage, and create templates. Access it from the application's main menu or from within the page builder.
The library has two tabs:
Tab | Contents | Who can delete |
|---|---|---|
Custom | Templates your team has created and published. Fully editable and deletable. | Any team member with sufficient permissions. |
System templates | Starter templates from UnifyApps will appear here. The tab may be empty today ("No standard templates yet"). | Cannot be deleted — read-only. |
Each entry in the list supports the following actions:
Action | Available on | What it does |
|---|---|---|
Clone | Custom and System templates | Creates a new independent copy of the template. |
Edit | Custom only | Opens the template's metadata (name, description, tags, preview image) for editing without going through the page builder. |
Delete | Custom only | Permanently removes the template. Pages previously created from it are not affected. |
Creating a Template from Scratch
Use this approach when you want to define a template before building a specific page — for example, to establish a standard layout pattern your team will reuse across many new pages.
Open the template library: Navigate to the template library and click Create page template. A setup stepper opens.
Choose Platform: Select Web or Mobile. This determines which template picker the new template appears in when teammates are creating pages.
Choose Kind: Select Page or Module. Most teams creating page templates select Page here.
Choose Base Device (web only): Select Desktop, Tablet, or Mobile. This records which breakpoint the template was primarily designed for — it does not restrict usage, but it informs teammates browsing the library. Mobile templates skip this step.
Fill in Details: Enter a Name and an optional Description. The name appears in the template picker. A clear, descriptive name helps teammates quickly identify the right starting point.
Finish and build: The new (empty) template record is created. You can then open the associated page in the builder to design the layout that will be captured when you publish the template.
Publishing an Existing Page as a Template
This is the most common workflow. You build a page, are happy with its design, and want to save it as a reusable blueprint for future pages.
Open the page in the builder: Navigate to the page you want to save. The page must be fully built — the template captures a snapshot of the current state.
Open the page menu in the Hierarchy panel: In the Hierarchy panel (left rail), open the ⋮ menu at the top of the panel (…) for page-level actions.
Click "Publish as template": A panel opens asking you to fill in the template's metadata. Once published, this menu item changes to Manage template — indicating that this page is now linked to a template record. Publish as template is available only for pages, not modules.
Fill in metadata: Complete the following fields:Name — the name shown in the template picker.Description — what the template is for.Tags — add tags to convey other information about the template.Preview — click Capture from canvas to take a screenshot of the current page, or Upload image to use your own (under 5 MB).
Click Create template: The template is saved and appears in the Custom tab of the template library. It is now available for any teammate to use when creating new pages.
Updating a Published Template
After a page is linked to a template, you can update the template at any time to reflect improvements made to the page design.
Make changes to the linked page: Edit the page in the builder as you normally would. The linked template is not updated automatically — you must trigger an update explicitly.
Open "Manage template" from the page menu: In the hierarchy panel, open the page's overflow menu and select Manage template. This opens the template management dialog.
Click Update / Sync: The template record is updated with the current page content and settings. The preview image is refreshed if you recapture it. Metadata (name, description, tags) can be edited here as well.
Warning: Updating a template does not modify pages that were previously created from it. Each page is an independent deep copy. The update only affects future pages created from the template after the update.
Unlinking a Page from Its Template
The link between a page and its template can be broken. Once unlinked:
The page continues to exist and function normally — nothing about the page itself changes.
The template continues to exist independently in the library.
The page's hierarchy menu reverts from "Manage template" back to "Publish as template."
Future republishing from this page would create a new, separate template record rather than updating the old one.
Starting a New Page from a Template
When creating a new page, you can choose an existing template instead of starting from a blank canvas.
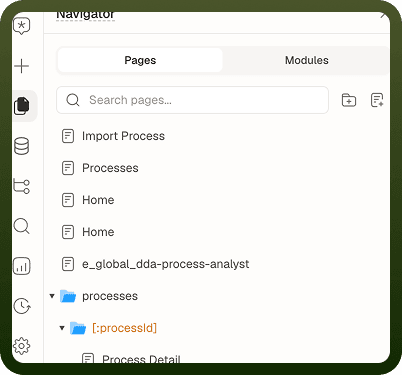
Start creating a new page: In the Navigator panel, click the Create New Page icon next to the search box, or click + in the page switcher in the top bar and choose Page. The Add a New Page dialog opens.
Choose a template instead of a blank start: Under Start with the dialog offers Blank Page, Figma Frame and Data; below it, the Templates list shows your workspace's templates. Search the list or use the Dashboards and Login quick filters. Click a template to preview it, then click Use Template.
Complete page setup: In the Page Setup dialog, fill in the standard new-page fields — page name, parent folder, slug, privacy setting, and whether to add the page to navigation — and click Confirm. See Pages Overview for each field.
Start building: The new page opens in the builder pre-populated with the template's layout, blocks, variables, and settings. From this point the page is completely independent — edit it freely. Changes to the original template or the page it came from will not affect this new page. To connect the template's blocks to your own data, see Data Binding Overview.
Tip: Creating a page from a template is a one-time deep copy operation. The new page shares no ongoing connection to the template. You are free to modify every detail of the new page without worrying about affecting the template or other pages built from it.
Module Templates
Publish as template is available only for pages. To create a module template, open the template library, click Create page template, and choose Module as the Kind.
Kind | Captures | Typical use |
|---|---|---|
Page | Full page hierarchy, blocks, variables, settings | Standard application pages — dashboards, detail views, forms, list pages |
Module | Module layout, blocks, variables, exposed outputs | Shared UI sections reused across pages — sidebars, toolbars, content cards |
Best Practices
Tip: Build your first few pages by hand, settle on patterns that work well, then publish those pages as templates. Every subsequent page benefits from a tested starting point rather than reinventing the layout.
Tip: A visual preview dramatically speeds up template discovery in the picker. Teams with five or more templates will thank you for a clear screenshot instead of a blank placeholder.
Tip: Use consistent tag conventions across your team — for example by department (sales, operations), layout type (list, detail, form), or platform (mobile, web).
Warning: If you need a reusable component that all pages stay in sync with, use a template component — not a page template. Page templates are blueprints for initial creation, not a propagation mechanism for ongoing design changes.
Quick Reference
Scenario | Action |
|---|---|
Save a finished page as a reusable blueprint | Hierarchy menu → Publish as template |
Update template after editing the linked page | Hierarchy menu → Manage template → Update / Sync |
Start a new page from an existing design | Create New Page → pick template in the picker |
Browse all team and system templates | Template library → Custom tab / System templates tab |
Copy a template to customize it | Template library → Clone |
Create a module template | Template library → Create page template → Module |
Remove a template your team no longer uses | Template library → Custom tab → Delete |