How a change set arrives in the destination and how you bring it in.
Overview
A change set reaches the destination one of three ways:
Pushed from a connected source environment (a "Move") — it appears automatically in Change Sets › Inbound as a new entry in Pending status, ready for you to review.
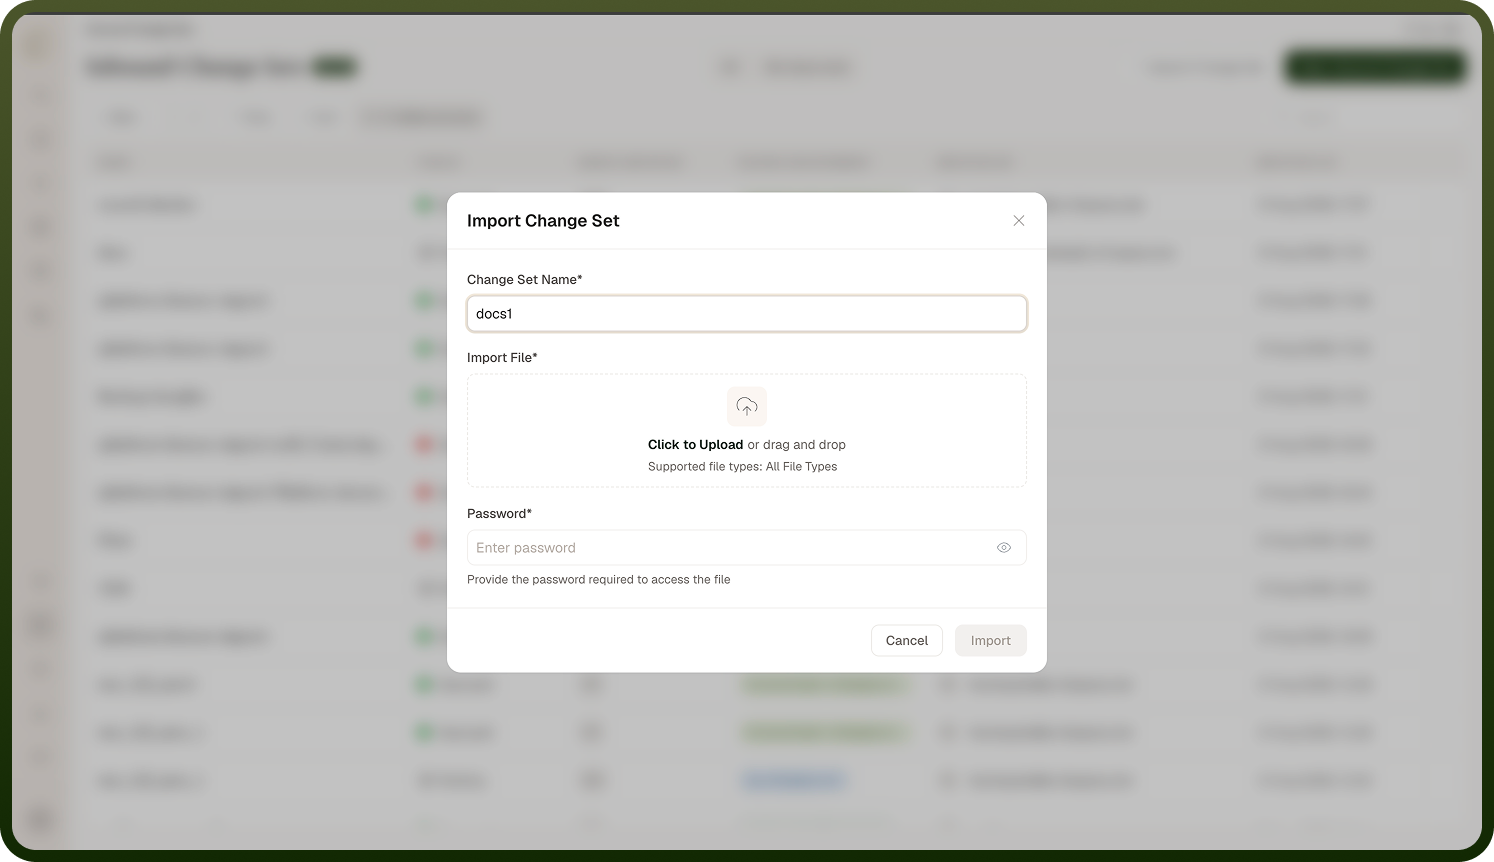
Imported from a file (an "Export") — you use Import Change Set in Inbound, upload the change set file you were given, and enter its password; the platform unpacks it and creates the inbound entry.
Pulled — you create the inbound change set yourself from this side (see below).
Either way you end up with an inbound change set in this environment that you can review, approve, and deploy. The push and pull routes need the environments connected first; the file route works even when they aren't.
Where: Change Sets › Inbound
Importing a change set from a file
In the destination, open Change Sets › Inbound and use Import Change Set. Give the change set a name, upload the file you received, and provide its password (set when it was exported). The platform decrypts and unpacks the file, reads the assets and their metadata, and creates an inbound change set in Pending status. From there it's the same as a pushed change set — review what's in it, approve if needed, and deploy. Keep the file and password secure in transit, since together they contain your packaged assets.
Where: Change Sets › Inbound › Import Change Set
FAQs
Can I pull a change set from another environment instead?
Yes — the destination can initiate the promotion. In Change Sets › Inbound, create a new inbound change set: give it a name and pick the connection to the UnifyApps environment you want to import assets from. It starts in Draft while you select the assets to import (fetched live from the source environment) and review them — note that changing the connection afterwards clears your selected assets (they belonged to the old source environment), so settle the connection first — then you Submit for Approval — after which it goes through the same approval and deploy steps as any other inbound change set. Use pull when the receiving team owns the promotion and wants to choose exactly what to take, rather than waiting for the source to push.
Where: Change Sets › Inbound › New Inbound Change Set
Can I import only some of the assets, not all?
Yes — you don't have to apply everything in a received change set. On the inbound change set's Select Assets to Import step you can choose a subset: tick the assets you want and leave the rest out. Only the selected assets are applied when you deploy; the unselected ones are left as Undeployed and aren't touched in this environment. This is useful when a change set bundles more than you're ready to take, or when some assets already exist here in a form you want to keep.
Where: Inbound change set › Select Assets to Import
Who can import and deploy change sets?
Bringing a change set in and deploying it requires change-set permissions in the destination environment (create permission to import a file; approve/deploy permission to act on an inbound change set), and any approval levels configured for the connection must be satisfied first. So with Manual Approval, receiving a change set doesn't apply it — a person with authority reviews, approves, and deploys it. With Auto-Approval (the default on a new connection), a pushed change set is imported and deployed automatically on arrival. This is what keeps promotion into sensitive environments (like production) controlled: the source can send, but the destination decides — through its connection settings — when and whether to apply.
Where: Inbound change set (permissions & approvals)