


Use the BearBanner connector to create and manage web banners.
Integrating your application with BearBanner lets you use these operations in an automation. It exposes 12 actions, listed below. Add the connector from the Connections area, authenticate, then select its operations in the automation builder. Capabilities: actions.
Authentication
Before you begin, make sure you have the following information:
Connection Name: Choose a meaningful name for your connection. This name helps you identify the connection within your application or integration settings.
Authentication Type: The authentication method for this connector is defined in the connection setup. Select the connector in the Connections area to see the fields it requires.
Obtaining Your API Key
Log in to your Bannerbear account.
Open the project you want to connect from the Projects dashboard.
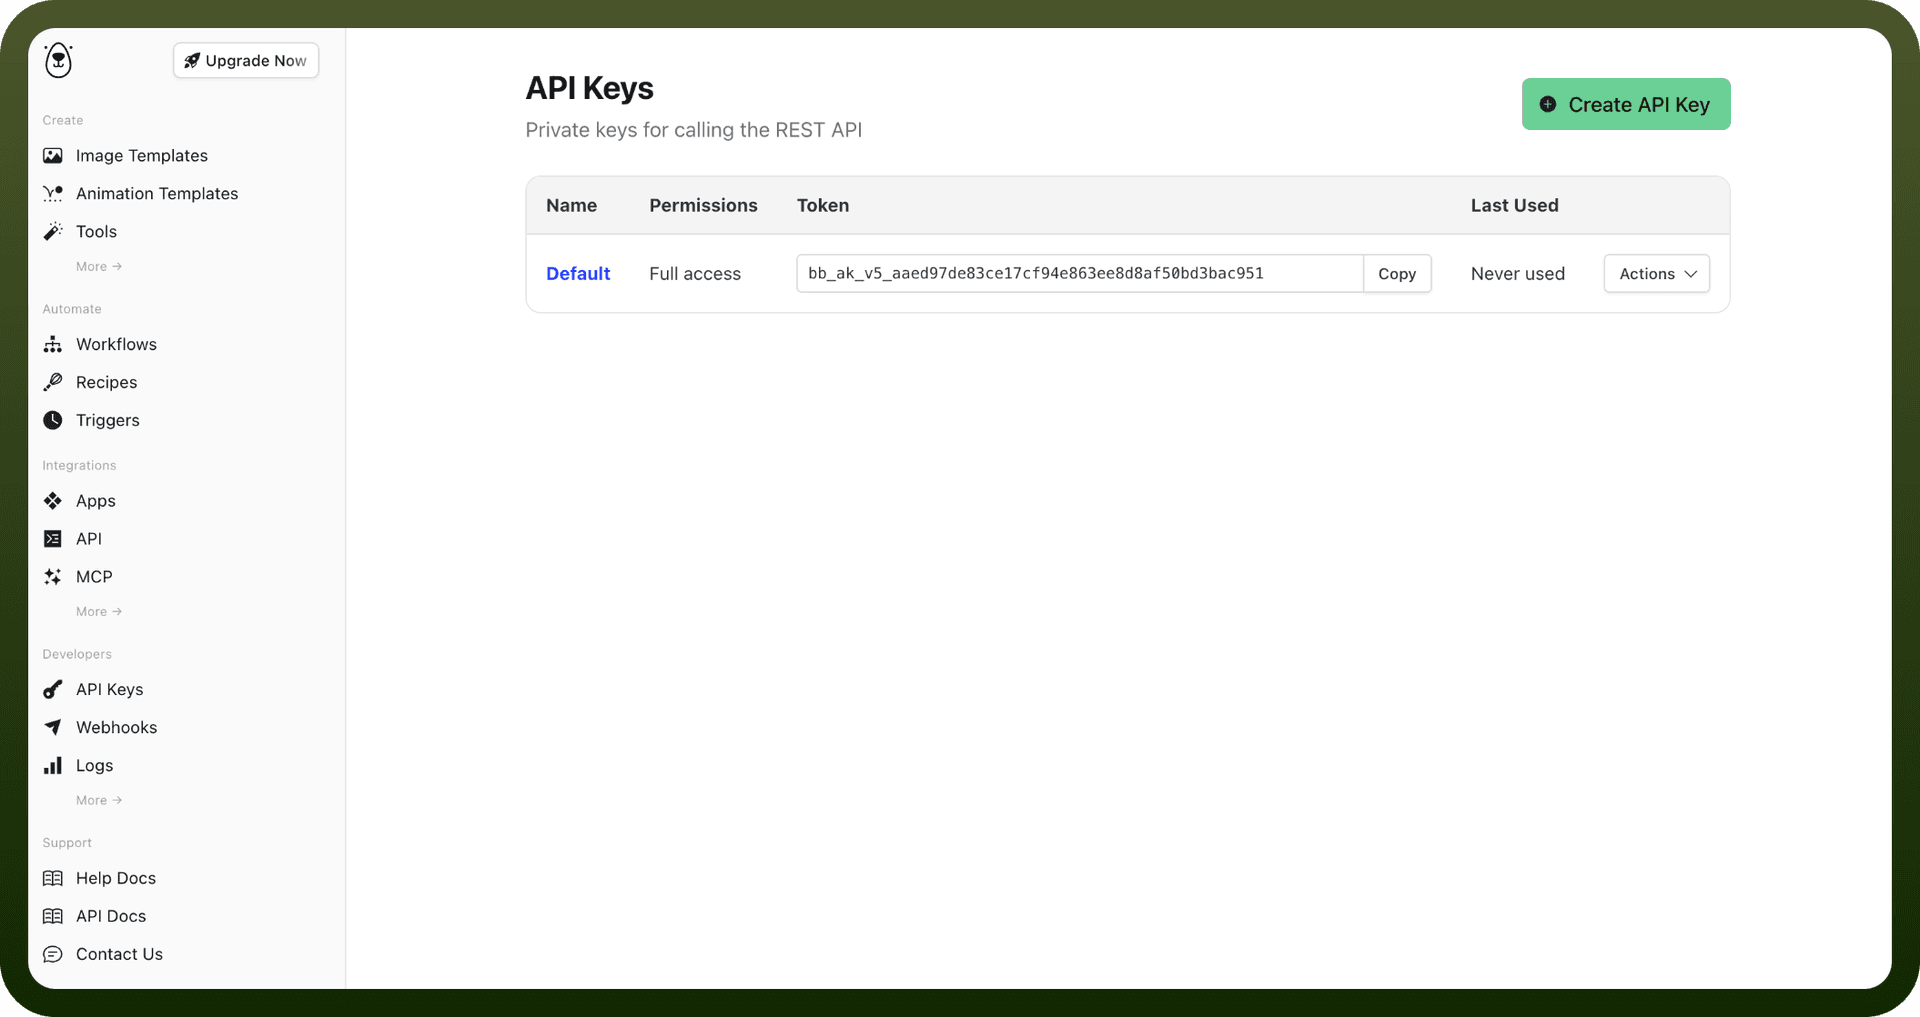
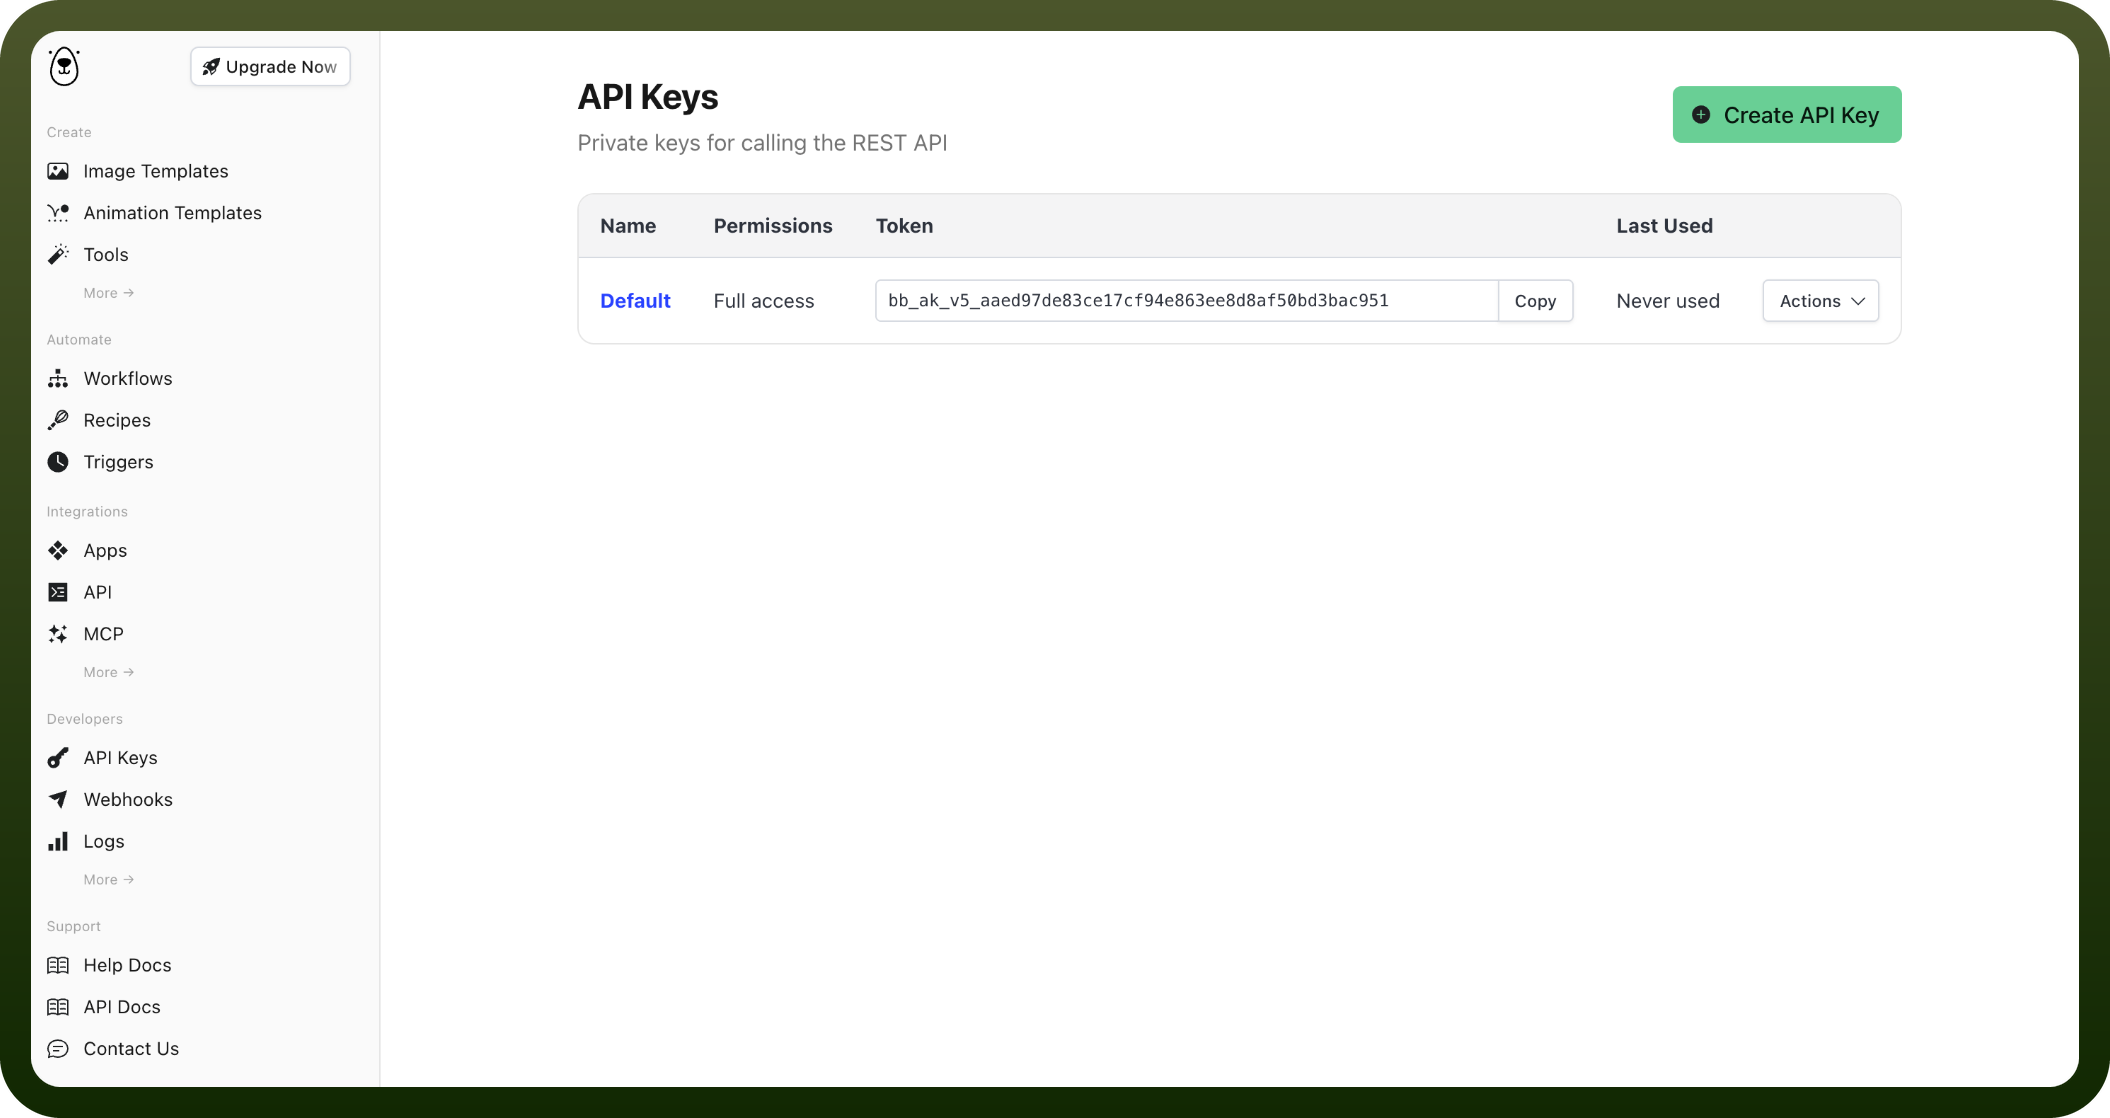
Go to Settings, then click API Key.
Create a new Project API Key on this page (or use the one already listed).
Copy the API key and store it securely for further authentication purposes.
Actions
Action Name | Description |
|---|---|
Approve video | Approve a video to proceed with rendering in BearBanner |
Create animated gif | Creates an animated gif in BearBanner |
Create collection | Generates multiple images based on a template set in BearBanner |
Create image | Generates a new image in BearBanner |
Create movie | Joins multiple clips/images into a movie with transitions in BearBanner |
Create screenshot | Takes a screenshot of website |
Create video | Creates a video in BearBanner |
Edit video | Updates a video auto-transcription in BearBanner |
Find animated GIF | Finds an animated GIF in BearBanner |
Find image | Finds an image in BearBanner |
Find video | Find a video or check status of video in BearBanner |
Join PDF files | Join multiple PDF files into a single PDF in BearBanner |