


Amazon DynamoDB is a fully managed NoSQL database service that delivers fast and predictable performance at any scale. It is designed for applications requiring low-latency access to large amounts of data with automatic scaling and high availability.
Integrating Amazon DynamoDB offers seamless scalability, low-latency performance, and fully managed database operations for high-availability applications.
Authentication
Ensure you have the following information ready for a seamless integration process:
Connection name: a name that identifies this connection in UnifyApps, such as "MyAppAmazonDynamoDBIntegration".
Region (required): the AWS region of your resources, such as us-east-1. If your AWS console URL starts with https://us-east-1.console.aws.amazon.com, enter us-east-1.
Authentication type: Access Key, IAM Role or Instance Role.
Table name (optional): provide the table name if your access is limited to a single table.
The fields you fill in depend on the authentication type:
Access Key: enter the Access key ID and Secret access key of an IAM user (both required).
IAM Role: enter the ARN of an IAM role in the IAM Role field (required), and in External Id the external ID set on the role's trust relationship.
Instance Role: no keys are entered; the connection uses the IAM role of the environment that UnifyApps runs in. Use it only when UnifyApps runs inside your own AWS account.
Access Key Based
Sign in to the AWS Management Console and search for "
Users" in the search bar present at the top of the console's home page.Click on "
Create user" at the top right corner.Enter a user name for the new user in the AWS Management Console (https://console.aws.amazon.com/).
Click Next. To return to the IAM (Identity and Access Management) dashboard later, search for "
IAM" in the search bar.Select permissions (AmazonDynamoDBFullAccess) policies by selecting "
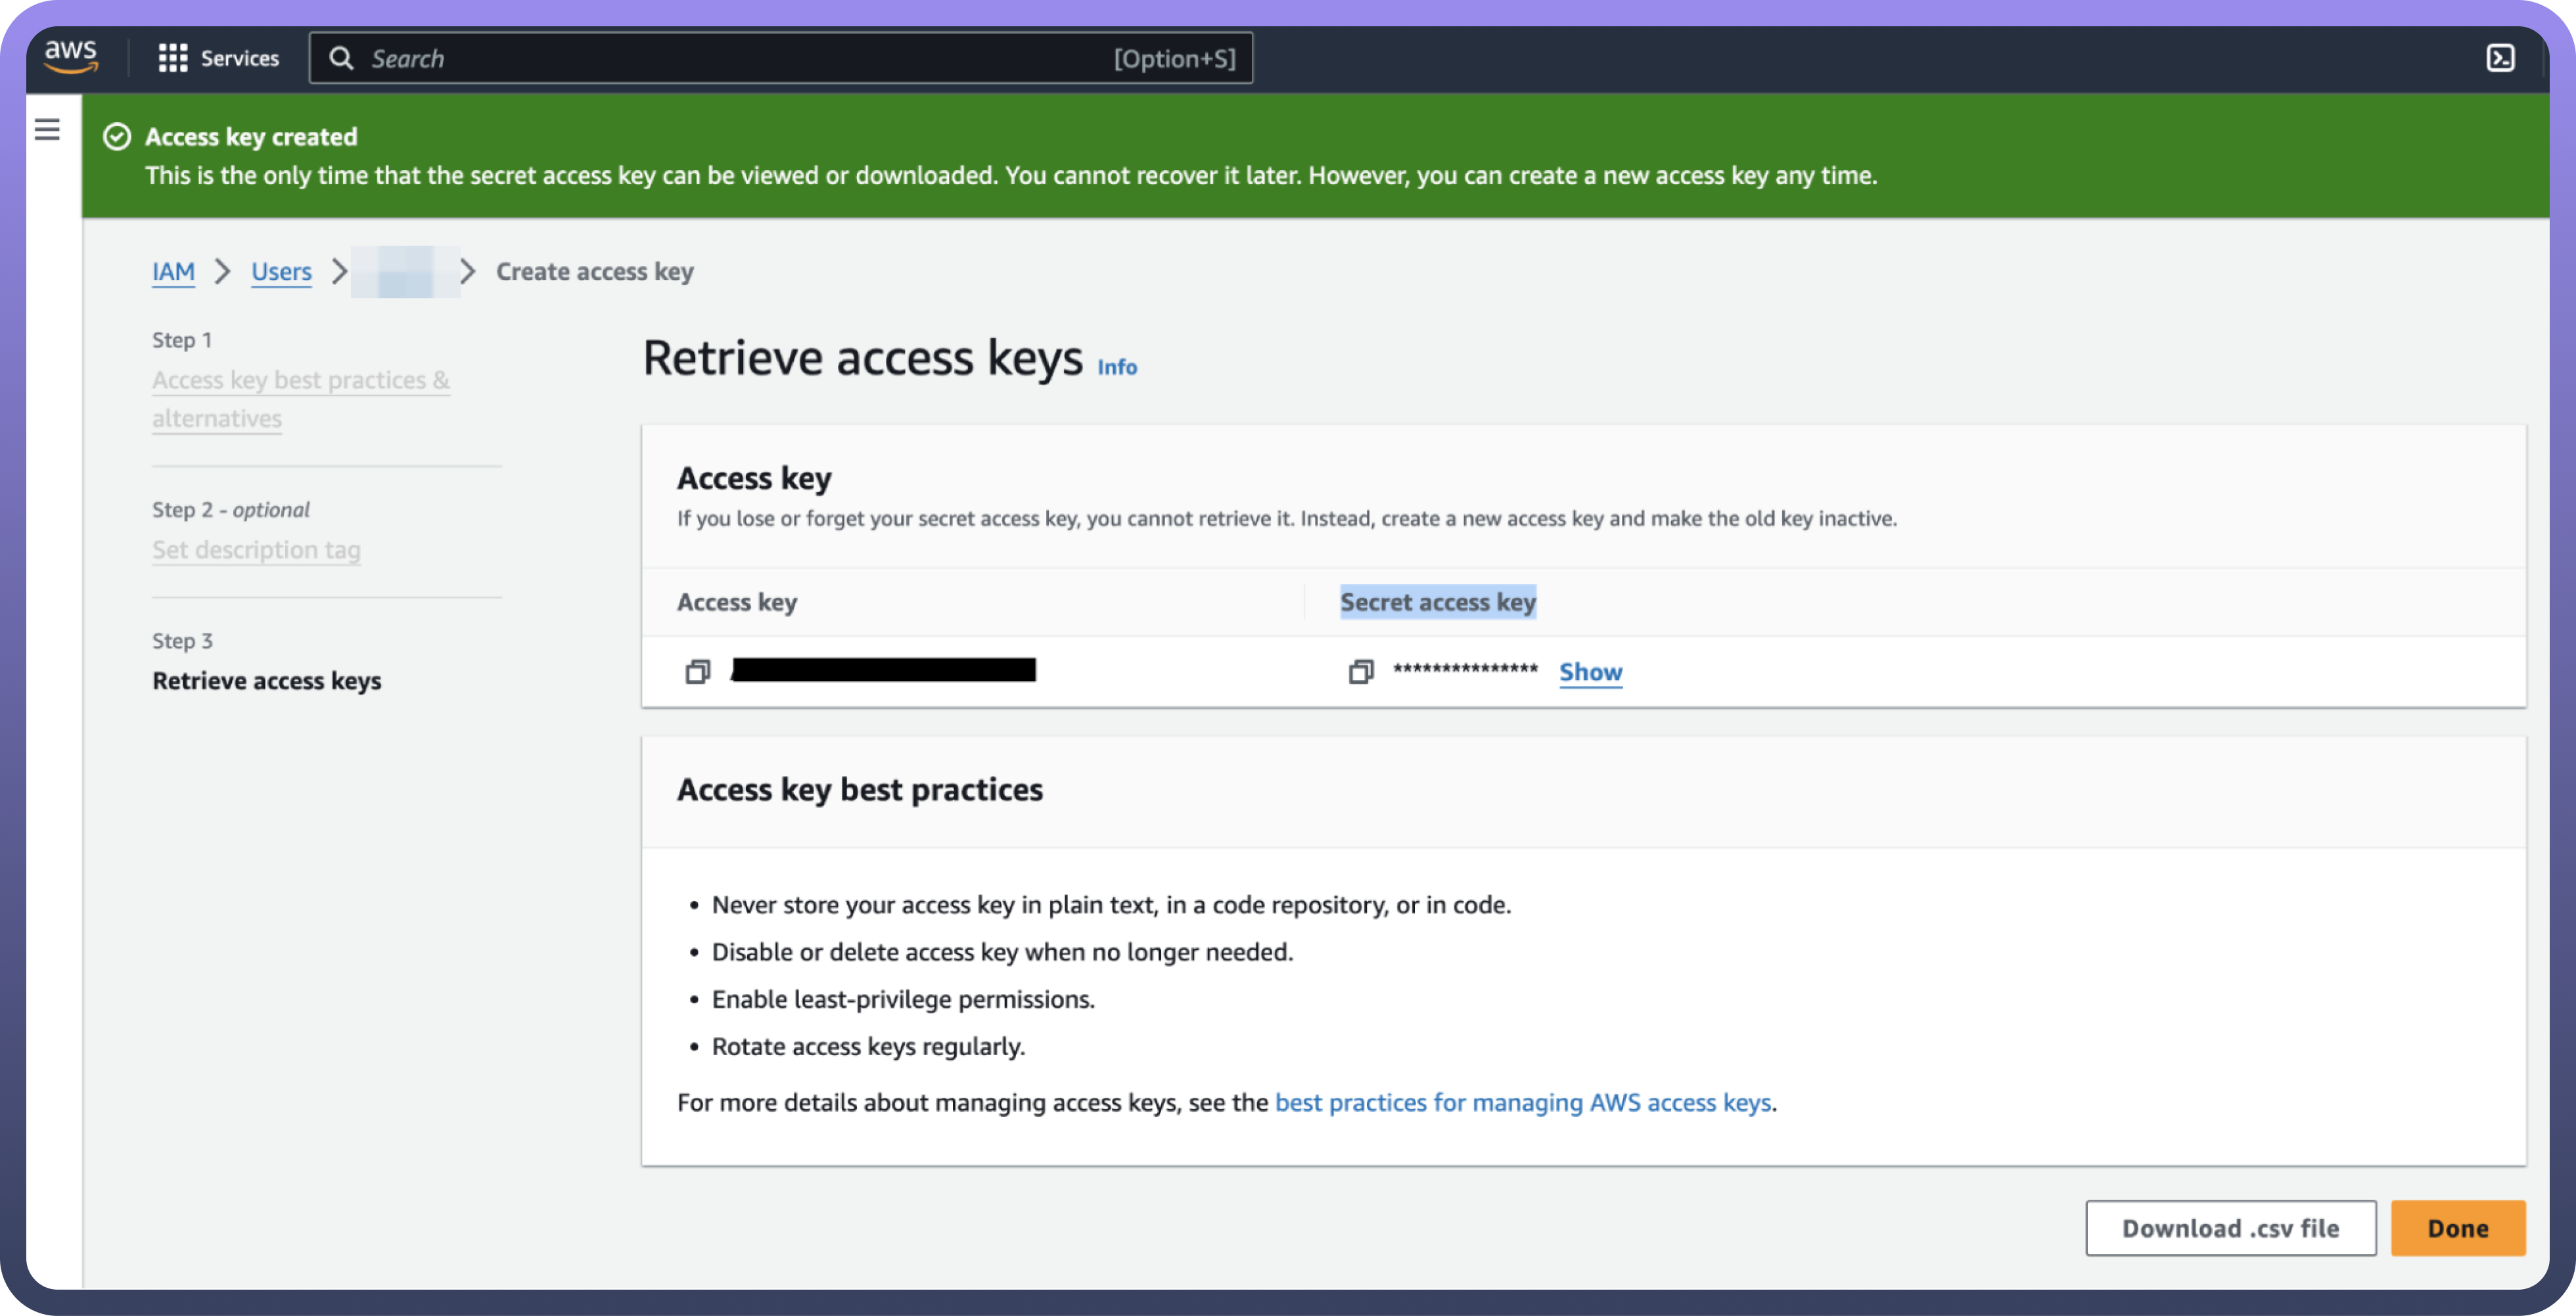
Attach policies directly" and click on the create user button.Once the user is created, click on the username of the user created and under the summary section click on create access key.
Select "
Command Line Interface" as the use case and provide the description tag to the key and click on "create access key".Treat the access key and secret access key with high confidentiality, as it allows access to your Amazon DynamoDB account.

IAM Role Based
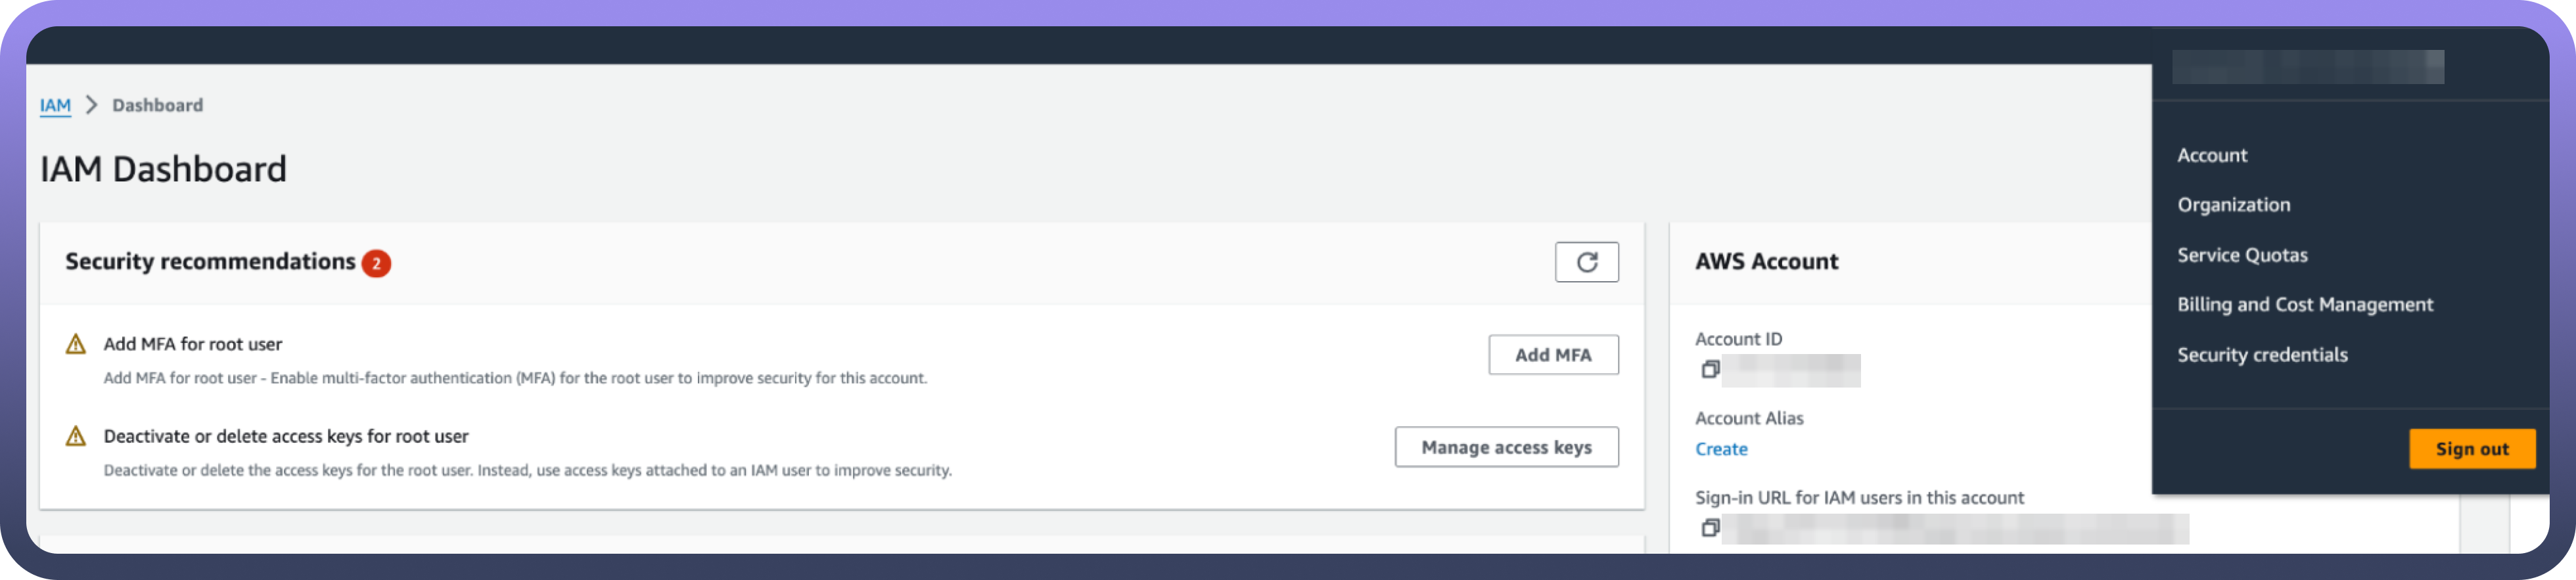
Sign in to AWS Management Console (https://console.aws.amazon.com/) and select security credentials.
Navigate to the IAM dashboard and click "
Roles" > "Create role". (https://docs.aws.amazon.com/IAM/latest/UserGuide/id_roles.html)Under "
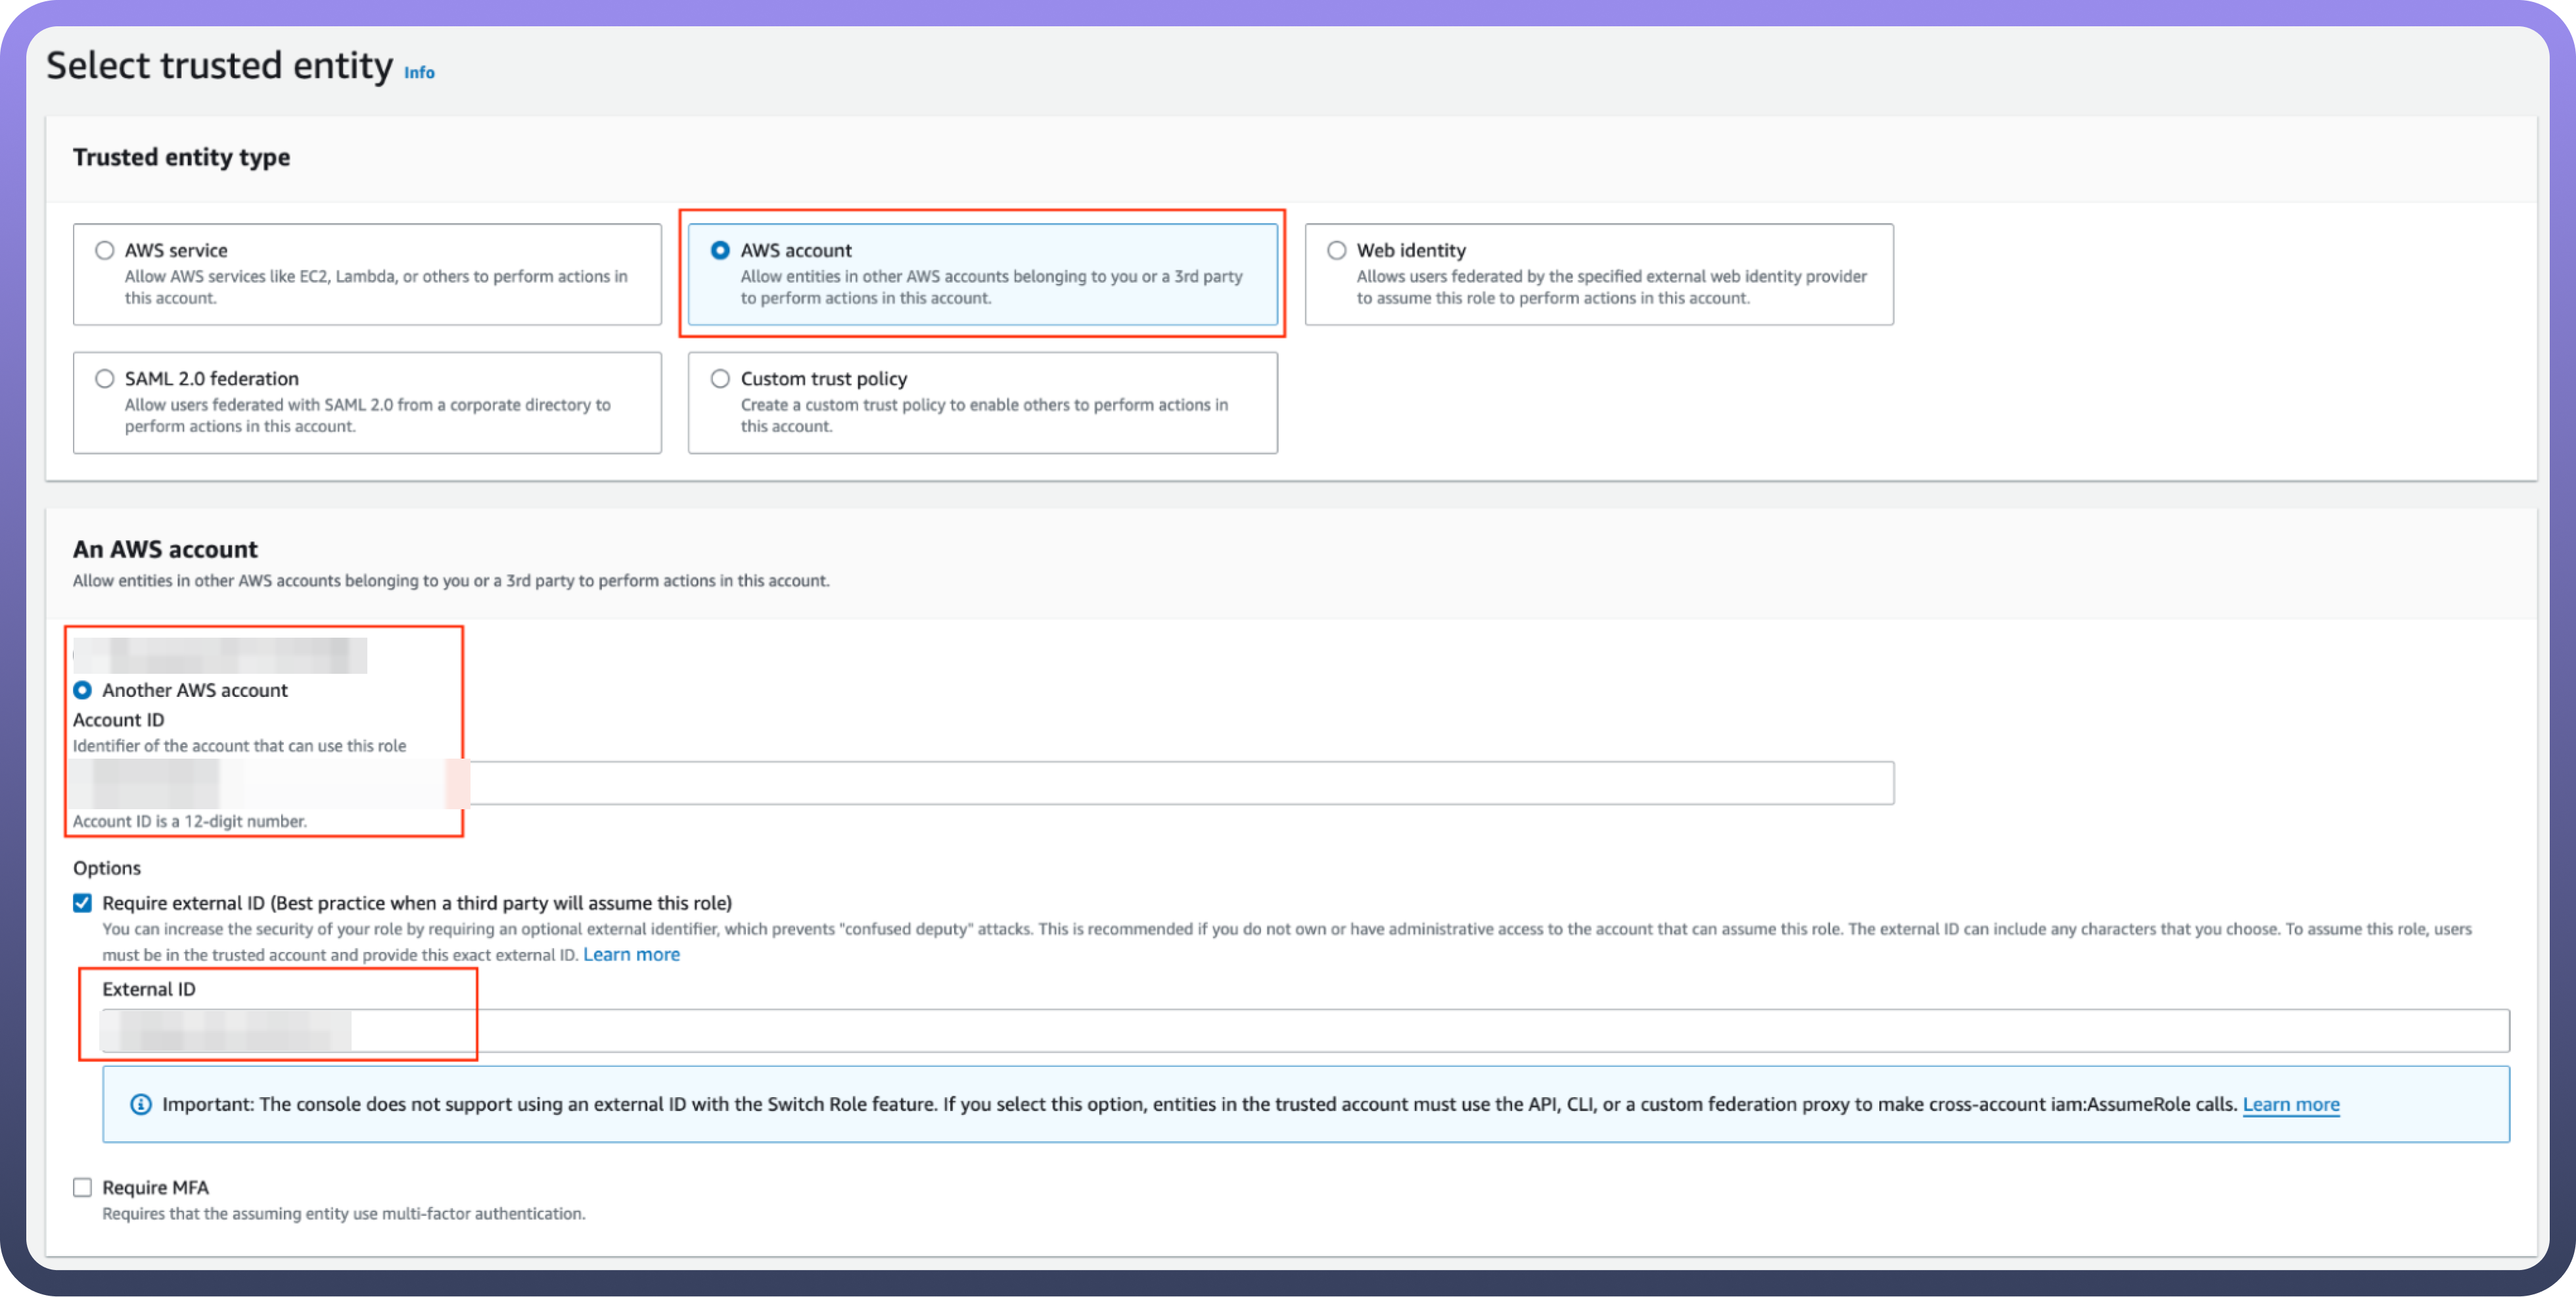
Trusted entity type," choose the AWS account option.Select "
Another AWS account" and input the UnifyApps AWS account ID (contact support to obtain this).Check the "
Require external ID" box and enter the External ID provided by UnifyApps.
Assign the necessary permissions for UnifyApps to operate automated workflows within your account.
Give the IAM role a name and description.
Click the "
Select trusted entities" Edit button to modify trusted entity policies if needed. (Optional)Click the "
Add permissions" Edit button to adjust permissions. (Optional)If using object tags, select an appropriate tag for the IAM role. (Optional)
Click on Create Role to finalize the process.
Create an IAM Permissions Policy
Go to the AWS Console and open the IAM console (https://console.aws.amazon.com/iam).
Navigate to Access management and select Policies.
Choose Create Policy.
Locate and choose the AWS service that UnifyApps will access.
Select the required permissions under the Actions field.
Define the resources that the role will have access to.
Continue clicking Next until you reach the Review policy page.
Provide a Name for the policy.
Click Create policy once done.
Retrieve IAM Role ARN
Open the AWS Console and go to My Security Credentials > Roles.
Search for the IAM role you need for the connection.

Select the role to view its details.
Copy the Role ARN for use in the UnifyApps connection setup.
Actions
Actions | Description |
|---|---|
| Add an item to a table in Amazon DynamoDB. |
| Create a table in Amazon DynamoDB. |
| Delete an item in a table in Amazon DynamoDB. |
| Delete a table in Amazon DynamoDB. |
| Describe the table in Amazon DynamoDB. |
| Get an item from a table in Amazon DynamoDB. |
| Lists tables in Amazon DynamoDB. |
| Query a table in Amazon DynamoDB. |
| Scan a table in Amazon DynamoDB. |
| Update an item in a table in Amazon DynamoDB. |