


Use the Canva connector to create visual content and marketing assets.
Integrating your application with Canva lets you use these operations in an automation. It exposes 9 actions, listed below. Add the connector from the Connections area, authenticate, then select its operations in the automation builder. Capabilities: actions, triggers.
Authentication
Before you begin, make sure you have the following information:
Connection Name: Choose a meaningful name for your connection. This name helps you identify the connection within your application or integration settings.
Authentication Type: Canva supports OAuth authentication.
Obtaining Your OAuth Client Credentials
Log in to the Canva Developer Portal and open Your integrations.
Click Create an integration, choose a Public or Private integration, and accept the Canva Developer Terms.
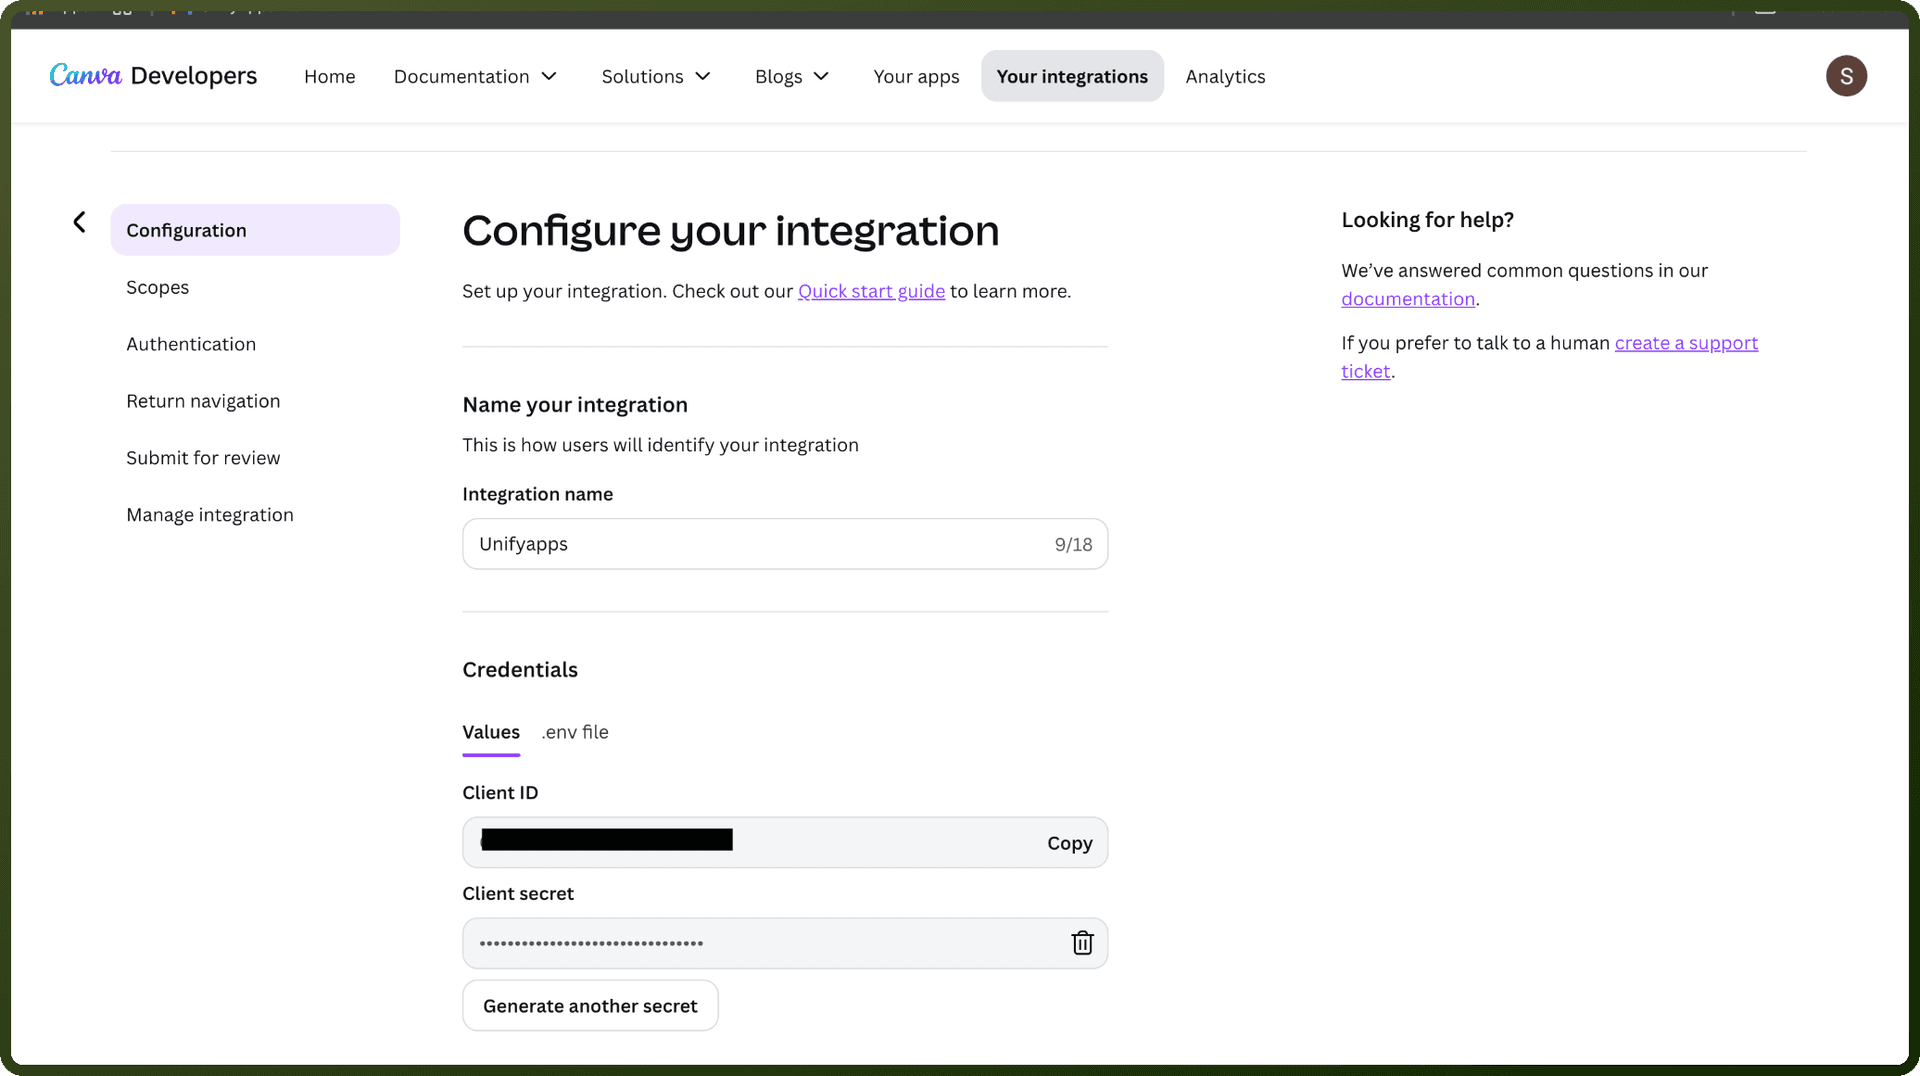
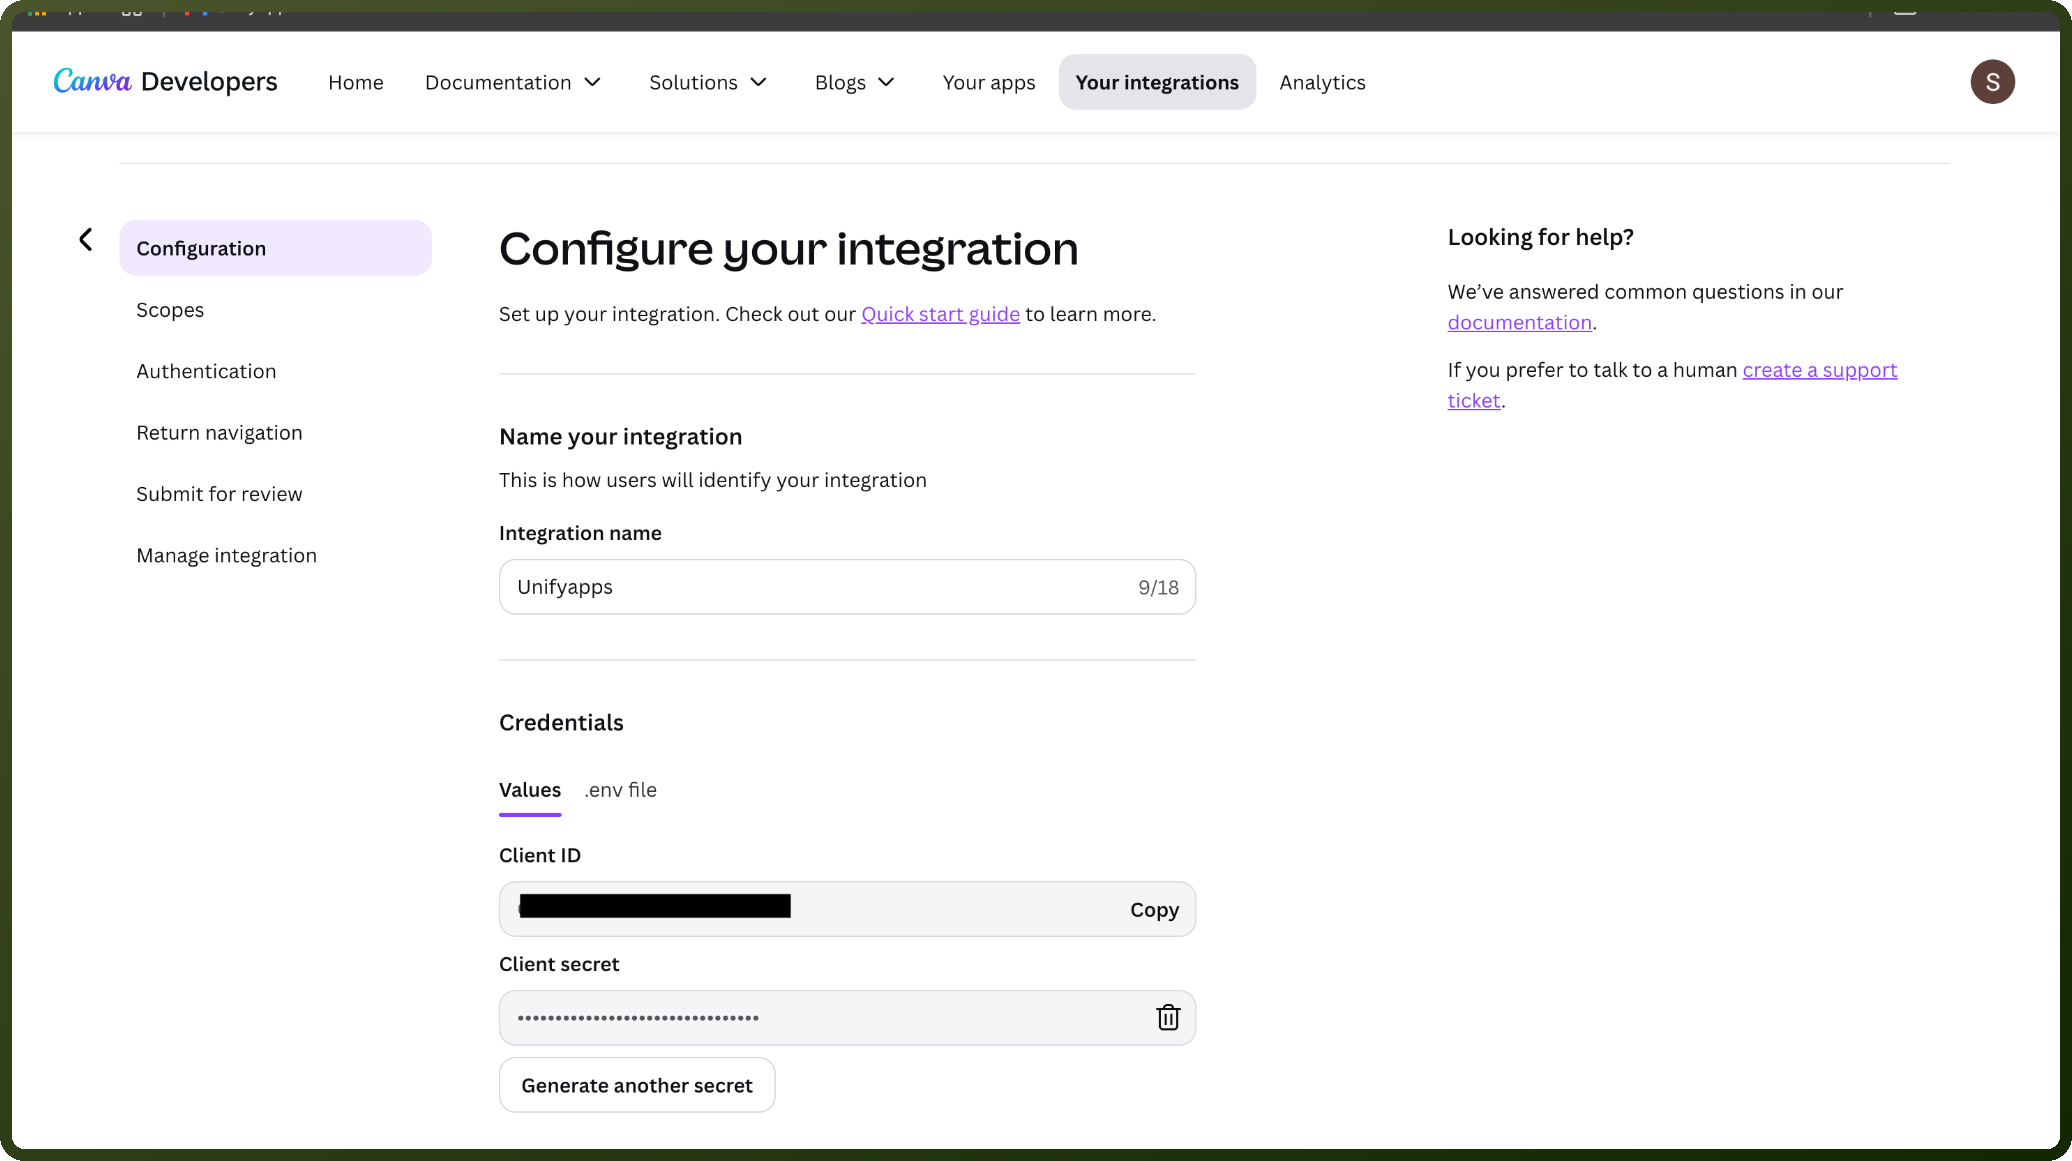
On the Configure your integration page, enter a name for your integration.
Under Credentials, copy the Client ID, then click Generate secret and copy the Client secret. Save both in a secure location — the client secret can't be viewed again after this step.
Open Scopes in the left menu and select the read and write permissions your integration needs.
Open Authentication in the left menu, add at least one Authorized redirect URL, and save your changes.
Actions
Action Name | Description |
|---|---|
Create record | Creates a record e.g. folder in Canva |
Delete record | Deletes a specific record, e.g. folder |
Export design | Export a design in Canva |
Get record | Retrieves a specific record, e.g. folder via its ID in Canva |
Import design | Import a design in Canva |
Search record | Retrieves a list of records e.g., folder items,that matches your search criteria in Canva |
Update folder items | Moves folder item from one folder to other folder in Canva |
Update record | Updates a record e.g., folder in Canva |
Upload asset | Uploads an asset in Canva |